Samantha Lee
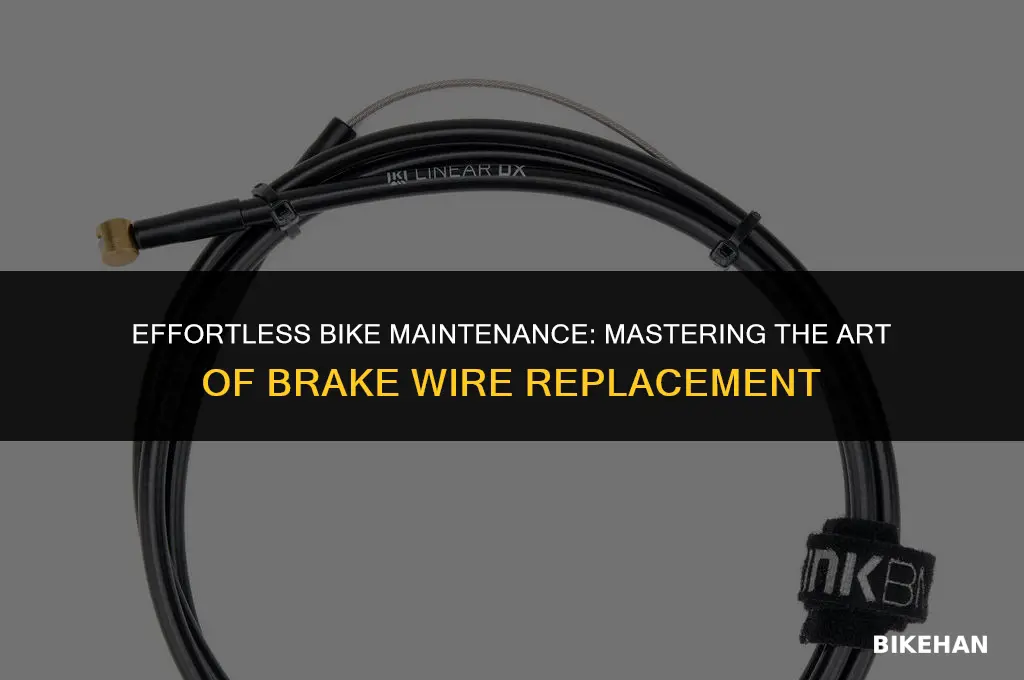
Replacing bike brake wires is an essential maintenance task to ensure your bicycle's braking system functions optimally. Over time, brake wires can become frayed, rusted, or stretched, compromising the efficiency and safety of your brakes. This guide will walk you through the process of replacing brake wires on your bike, covering the necessary tools, steps, and safety precautions. By following these instructions, you can restore your bicycle's braking performance and enjoy a safer riding experience.
| Characteristics | Values |
|---|---|
| Task Name | Replace bike brake wire |
| Required Tools | Wire cutters, pliers, screwdrivers, cable housing, lubricant |
| Estimated Time | 30 minutes to 1 hour |
| Difficulty Level | Intermediate |
| Safety Precautions | Wear gloves, ensure bike is stable, avoid touching brake pads |
| Steps Involved | 1. Remove old brake wire, 2. Clean cable housing, 3. Lubricate new wire, 4. Thread new wire through housing, 5. Secure wire at both ends, 6. Test brake function |
| Common Issues | Wire fraying, improper threading, brake pad contamination |
| Cost of Materials | $10 to $20 |
| Frequency of Maintenance | Every 6 months to 1 year |
| Environmental Impact | Minimal, proper disposal of old wire required |
| Required Knowledge | Basic understanding of bike brake systems, ability to follow instructions |
Explore related products


What You'll Learn
- Gather Materials: Collect necessary tools and replacement brake wire for your bike
- Remove Old Wire: Carefully detach the old brake wire from the brake lever and caliper
- Measure New Wire: Measure and cut the new brake wire to the appropriate length
- Install New Wire: Route the new wire through the bike frame and connect it to the brake lever and caliper
- Test Brakes: Check the brake function by squeezing the lever and ensuring the wheels stop smoothly

Gather Materials: Collect necessary tools and replacement brake wire for your bike
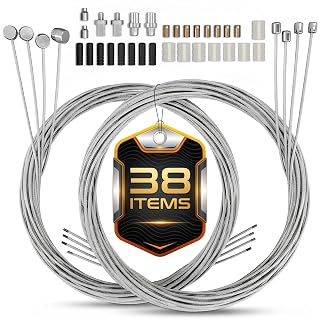
Before you begin the process of replacing your bike's brake wire, it's essential to gather all the necessary materials. This ensures that you have everything you need at hand, reducing the likelihood of interruptions and making the task more efficient. Start by collecting the appropriate tools, which typically include a set of Allen wrenches, a cable cutter, and a pair of pliers. These tools are crucial for removing the old brake wire and installing the new one securely.
Next, you'll need to obtain the correct replacement brake wire. It's important to choose a wire that is compatible with your bike's braking system. Check your bike's specifications or consult with a professional if you're unsure about the type of wire you need. Additionally, consider the length of the wire required; it's better to have a little extra than to come up short.
When selecting the replacement wire, pay attention to its quality. A high-quality brake wire will provide better performance and durability, ensuring that your brakes function reliably for an extended period. Look for wires made from materials like stainless steel, which offer good strength and resistance to corrosion.
Once you have all the materials, lay them out in a clean, organized workspace. This will help you keep track of everything and make the installation process smoother. Before proceeding, inspect the new brake wire for any signs of damage or defects. If you notice any issues, return the wire and obtain a replacement to ensure the safety and effectiveness of your brakes.
In summary, gathering the necessary tools and replacement brake wire is a critical first step in the process of replacing your bike's brake wire. By selecting the right materials and preparing your workspace, you can set yourself up for a successful and hassle-free installation.
Effortlessly Remove Your Bike's Disc Brakes: A Step-by-Step Guide
You may want to see also
Explore related products


Remove Old Wire: Carefully detach the old brake wire from the brake lever and caliper
Begin by locating the brake lever and caliper on your bicycle. The brake lever is typically found on the handlebars, while the caliper is mounted near the wheel. Once you've identified these components, you can start the process of removing the old brake wire.
Using a suitable tool, such as needle-nose pliers or a cable cutter, carefully detach the old brake wire from the brake lever. Be sure to hold the wire firmly to prevent it from slipping out of your grasp. Next, move to the caliper and repeat the process, taking care not to damage the wire or the caliper in the process.
As you remove the old wire, take note of its routing and any specific adjustments that may have been made. This information will be useful when installing the new wire. Additionally, inspect the old wire for any signs of wear or damage, such as fraying or rust, which may indicate the need for more extensive repairs.
Once the old wire has been completely removed, clean the area around the brake lever and caliper to ensure a smooth installation of the new wire. This can be done using a soft cloth or a specialized cleaning solution.
Remember to always follow the manufacturer's instructions for your specific bicycle model when replacing brake wires. Failure to do so could result in improper installation and potentially dangerous consequences.
Revive Your Ride: Effective Methods to Remove Rust from Bike Brakes
You may want to see also
Explore related products


Measure New Wire: Measure and cut the new brake wire to the appropriate length
Begin by carefully measuring the length of the existing brake wire on your bike. This will serve as a guide for cutting the new wire to the correct size. Use a flexible measuring tape or a ruler to ensure accuracy. Make sure to measure from the point where the wire is attached to the brake lever to the point where it connects to the brake caliper.
Once you have the measurement, add an extra 2-3 inches to account for any potential adjustments or replacements that may be needed in the future. This will ensure that you have enough wire to work with if any issues arise.
Using a sharp pair of wire cutters, carefully cut the new brake wire to the desired length. Make sure to cut the wire cleanly and straight to avoid any fraying or damage that could affect the performance of the brakes.
After cutting the wire, use a wire stripper to remove a small portion of the insulation from each end. This will expose the metal wire, allowing you to attach it securely to the brake lever and caliper.
When attaching the new wire, make sure to use the appropriate ferrules or end caps to prevent the wire from fraying and to ensure a secure connection. Tighten the connections firmly, but be careful not to overtighten, as this could damage the wire or the components.
Finally, test the brakes to ensure that they are functioning properly. Squeeze the brake lever and make sure that the caliper is engaging the rim or disc as expected. If necessary, make any adjustments to the brake system to ensure optimal performance.
Efficiently Clean Your Bike Disc Brakes: A Step-by-Step Guide
You may want to see also
Explore related products


Install New Wire: Route the new wire through the bike frame and connect it to the brake lever and caliper
Begin by preparing the new brake wire. Cut it to the appropriate length, leaving enough extra to make adjustments during installation. Strip the ends of the wire to expose the inner strands, and crimp a barrel adjuster onto one end. This adjuster will allow you to fine-tune the brake tension later.
Next, locate the cable routing guides on your bike frame. These are typically small plastic or metal pieces attached to the frame, designed to keep the brake wire in place and prevent it from rubbing against other components. Thread the new wire through these guides, starting from the brake lever and working your way towards the caliper. Be careful not to kink or twist the wire as you route it, as this can affect brake performance.
Once the wire is routed through the frame, attach it to the brake lever. This is usually done by loosening a small bolt or screw on the lever, inserting the wire, and then tightening it back down. Make sure the wire is securely fastened and doesn't slip out when you pull on it.
Now, move to the caliper. Loosen the brake caliper bolt and pull the old wire out. Insert the new wire into the caliper, making sure it's properly seated in the housing. Tighten the caliper bolt back down, but don't overtighten it, as this can damage the wire or the caliper.
After the new wire is installed, it's important to adjust the brake tension. Use the barrel adjuster you crimped onto the wire earlier to make fine adjustments. Turn the adjuster clockwise to increase tension and counterclockwise to decrease it. Test the brakes by squeezing the lever and making sure the caliper engages the rim properly.
Finally, trim any excess wire and cap the ends to prevent fraying. Your bike's brakes should now be functioning smoothly and safely. Remember to always test your brakes before riding, and make adjustments as needed to ensure optimal performance.
Revamping Your Ride: A Guide to Replacing Old Bike Brake Levers
You may want to see also
Explore related products


Test Brakes: Check the brake function by squeezing the lever and ensuring the wheels stop smoothly
After replacing the brake wire on your bike, it's crucial to test the brakes to ensure they're functioning correctly. Start by squeezing the brake lever gently and observe if the wheels stop smoothly. If the brakes feel spongy or the wheels don't stop immediately, you may need to adjust the brake tension or bleed the brakes to remove any air bubbles.
To perform a more thorough test, find a flat, open area where you can safely ride your bike. Gradually increase your speed and apply the brakes firmly, noting how quickly you come to a stop. Repeat this process several times, paying attention to any changes in brake performance. If you notice any issues, such as squealing or grinding noises, it may be necessary to inspect the brake pads or rotors for wear and replace them if needed.
Remember to always wear a helmet and other protective gear when testing your bike's brakes. It's also a good idea to have a friend or family member assist you by holding the bike steady while you apply the brakes, especially if you're new to bike maintenance. By taking the time to properly test your brakes, you can ensure your safety and the safety of others while riding.
Mastering Bike Maintenance: A Step-by-Step Guide to Disk Brake Repair
You may want to see also