Eric Johnson
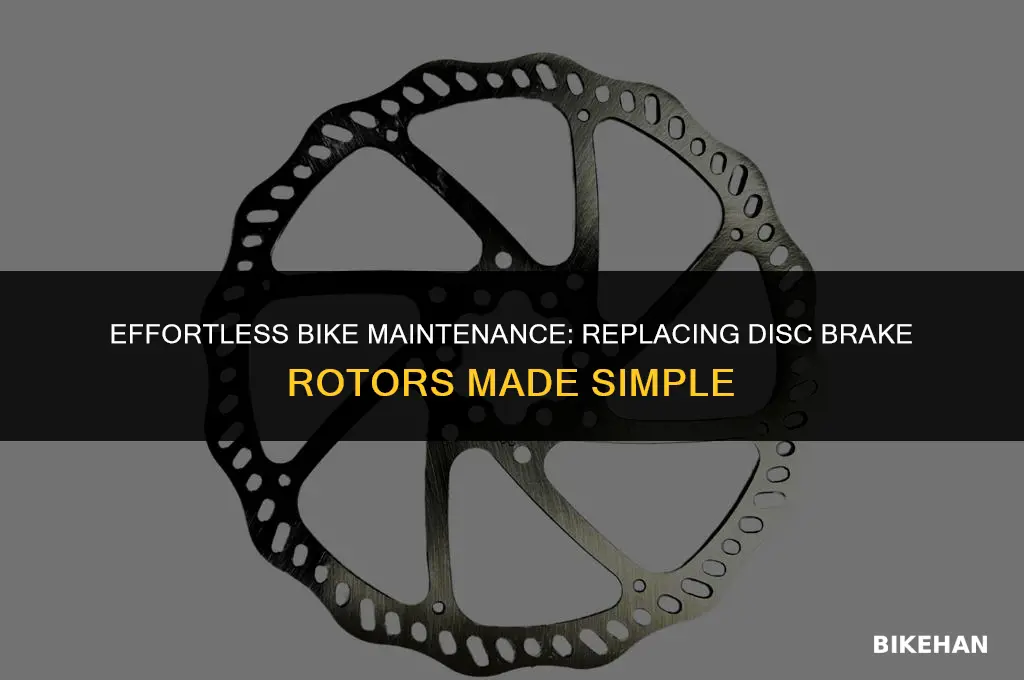
Replacing bike disc brake rotors is a crucial maintenance task that ensures optimal braking performance and safety. Over time, rotors can wear down, become warped, or accumulate excessive debris, leading to reduced stopping power and potential hazards. In this guide, we'll walk you through the step-by-step process of replacing your bike's disc brake rotors, covering everything from the necessary tools and preparation to the actual removal and installation. By following these instructions, you'll be able to restore your bike's braking system to its peak efficiency, ensuring a smoother and safer riding experience.
Explore related products



What You'll Learn
- Gather necessary tools: Assemble all required tools like disc brake caliper tool, hex keys, and gloves
- Remove the wheel: Detach the bike wheel by loosening the thru-axle or quick-release skewer
- Detach the caliper: Carefully disconnect the brake caliper from the frame or fork
- Replace the rotor: Remove the old rotor, align the new one, and secure it with bolts
- Reassemble and test: Reattach the caliper, wheel, and test the brakes for proper function

Gather necessary tools: Assemble all required tools like disc brake caliper tool, hex keys, and gloves
Before diving into the intricate process of replacing bike disc brake rotors, it's crucial to ensure you have all the necessary tools at your disposal. This not only saves time but also prevents potential mishaps that could occur if you're caught mid-process without the right equipment. A disc brake caliper tool is essential for safely removing and installing the caliper, while hex keys are indispensable for adjusting various components of the brake system. Don't forget to wear gloves to protect your hands from sharp edges and brake fluid.
When assembling your toolkit, consider the specific requirements of your bike's brake system. Some bikes may require additional tools, such as a torque wrench for precise bolt tightening or a bleed kit for flushing out old brake fluid. It's also a good idea to have a rag and some lubricant on hand for cleaning and maintaining moving parts. By gathering all these tools beforehand, you'll be well-prepared to tackle the task at hand with confidence and efficiency.
One common mistake cyclists make when replacing disc brake rotors is failing to properly clean and inspect the brake caliper and pads. This oversight can lead to suboptimal braking performance or even damage to the new rotor. To avoid this, use a clean rag to wipe away any dirt or debris from the caliper and pads, and inspect them for wear or damage. If necessary, replace the pads or clean the caliper piston to ensure smooth operation.
Another important consideration when replacing disc brake rotors is the proper alignment and installation of the rotor. Misaligned rotors can cause uneven wear, reduced braking power, and even damage to the wheel. To ensure proper alignment, use a rotor truing tool or a straight edge to check that the rotor is perfectly flat and centered on the hub. When installing the rotor, be sure to follow the manufacturer's instructions for torque specifications and bolt patterns to avoid over-tightening or damaging the components.
Finally, after installing the new rotor, it's essential to test the brakes thoroughly to ensure they're functioning correctly. Start by gently squeezing the brake lever to check for proper pad engagement and then perform a series of more aggressive braking tests to simulate real-world riding conditions. If you notice any issues, such as squealing, rubbing, or reduced braking power, re-inspect the installation and make any necessary adjustments. With the right tools and attention to detail, replacing bike disc brake rotors can be a straightforward and rewarding maintenance task that keeps your bike running smoothly and safely.
Revamping Your Ride: A Guide to Replacing Old Bike Brake Levers
You may want to see also
Explore related products


$6.98


Remove the wheel: Detach the bike wheel by loosening the thru-axle or quick-release skewer
To remove the wheel for disc brake rotor replacement, begin by ensuring the bike is securely positioned on a stand or against a stable surface. This prevents any accidental movement that could lead to injury or damage. Next, locate the thru-axle or quick-release skewer, which is typically found at the center of the wheel hub. For a thru-axle, you'll need an Allen wrench or similar tool to loosen the bolt. Turn the bolt counterclockwise until it's loose enough to remove the wheel. If your bike uses a quick-release skewer, grasp the lever and flip it to the open position, then pull the wheel straight out.
When detaching the wheel, be cautious not to damage the brake caliper or rotor. It's advisable to disconnect the brake pads from the caliper before removing the wheel to avoid any accidental contact. Once the wheel is off, inspect the rotor for any signs of wear or damage. If the rotor is warped, excessively worn, or has any cracks, it's time to replace it.
Before installing the new rotor, ensure the surface is clean and free of any debris or old brake pad residue. This will help ensure optimal braking performance and prevent any issues down the line. When reattaching the wheel, make sure the rotor is properly aligned with the brake caliper and that the thru-axle or quick-release skewer is tightened securely.
After reinstalling the wheel, test the brakes to ensure they're functioning correctly. Squeeze the brake lever and make sure the pads engage the rotor smoothly and without any unusual noises. If you encounter any issues, double-check the installation and make any necessary adjustments.
Remember, safety should always be your top priority when working on your bike. If you're unsure about any part of the process, it's best to consult a professional mechanic to avoid any potential risks or damage to your bike.
Mastering the Art of Removing a Rear Bike Wheel with Coaster Brakes
You may want to see also
Explore related products


Detach the caliper: Carefully disconnect the brake caliper from the frame or fork
Begin by ensuring the bike is securely positioned on a stand or suspended in a way that allows easy access to the wheels. This step is crucial for safety and efficiency. Next, locate the brake caliper, which is typically mounted near the rotor on the frame or fork. Identify the bolts or screws holding the caliper in place—these are usually hex bolts that require an Allen wrench for removal.
Carefully loosen and remove these bolts, taking note of their size and placement for reassembly later. It's important to support the caliper as you remove the bolts to prevent it from falling and potentially damaging the brake line or other components. Once the bolts are removed, gently pull the caliper away from the frame or fork, being cautious not to strain or kink the brake line.
If the caliper is attached to the fork, you may need to remove the wheel first to provide enough clearance. In this case, ensure the bike is stable and the wheel is properly supported before proceeding. After detaching the caliper, inspect it for any signs of wear or damage, such as cracks or leaks, which may indicate the need for replacement or repair.
Remember to keep track of all removed parts and their respective locations to facilitate reassembly. It's also a good practice to clean the area around the caliper mount to remove any dirt or debris that could interfere with the installation of the new rotor. By following these steps, you can safely and effectively detach the brake caliper, preparing the way for the replacement of the disc brake rotor.
Effortless Wheel Removal: Disc Brake Bike Guide
You may want to see also
Explore related products


Replace the rotor: Remove the old rotor, align the new one, and secure it with bolts
Begin by ensuring your bike is securely positioned on a stand or against a stable surface to prevent it from moving during the rotor replacement process. Remove the wheel from the bike frame by loosening the quick-release lever or unscrewing the thru-axle, depending on your bike's wheel attachment system. Once the wheel is off, lay it on a flat surface with the disc brake rotor facing upwards.
To remove the old rotor, locate the bolts securing it to the wheel hub. These are typically hex bolts that require an Allen wrench or hex key to loosen. Carefully unscrew the bolts, making sure to keep them in a safe place as you'll need them to secure the new rotor. Gently lift the old rotor off the hub, taking care not to damage the wheel bearings or any other components.
Before installing the new rotor, inspect it for any signs of damage or warping. Ensure that the rotor is compatible with your bike's wheel size and brake system. Align the new rotor with the wheel hub, making sure that the bolt holes line up correctly. If the new rotor doesn't align properly, you may need to use a rotor truing tool to adjust its position.
Once the new rotor is properly aligned, secure it to the wheel hub using the bolts you removed earlier. Tighten the bolts in a star pattern to ensure even pressure distribution and avoid warping the rotor. Use a torque wrench to tighten the bolts to the manufacturer's recommended specifications, which can typically be found in your bike's user manual or online.
After securing the new rotor, reattach the wheel to the bike frame, making sure to tighten the quick-release lever or thru-axle securely. Test the brakes to ensure they're functioning properly and make any necessary adjustments. Remember to dispose of the old rotor responsibly, as it may contain hazardous materials such as asbestos or other harmful substances.
Fixing Your Schwinn Stationary Bike's Brake Pads: A Simple Guide
You may want to see also
Explore related products


Reassemble and test: Reattach the caliper, wheel, and test the brakes for proper function
With the rotor replacement complete, it's time to reassemble the brake system and ensure everything functions correctly. Begin by carefully reattaching the brake caliper to the frame or fork, making sure to align the mounting holes and secure it with the appropriate bolts. Tighten the bolts evenly to avoid damaging the caliper or causing uneven brake wear.
Next, reattach the wheel to the bike, ensuring that the rotor is properly aligned with the caliper. Secure the wheel with the quick-release lever or thru-axle, depending on your bike's system. Give the wheel a spin to ensure it's true and doesn't wobble, which could affect brake performance.
Before testing the brakes, inspect the brake pads for wear and replace them if necessary. Worn brake pads can reduce braking efficiency and increase the risk of accidents. Once the pads are in good condition, test the brakes by squeezing the brake lever and applying pressure to the rotor. The brake should engage smoothly and provide adequate stopping power.
If the brakes feel spongy or unresponsive, you may need to bleed the brake lines to remove any air bubbles. This process involves opening the brake lever reservoir, attaching a bleed kit, and slowly releasing the brake fluid while pumping the brake lever. Be sure to follow the manufacturer's instructions for your specific brake system.
After reassembling and testing the brakes, take the bike for a test ride to ensure everything feels right. Pay attention to any unusual noises, vibrations, or changes in braking performance. If you notice any issues, return to your workspace and reinspect the brake system for any loose components or misalignments.
Remember, proper brake function is crucial for your safety and the safety of others on the road. If you're unsure about any part of the reassembly or testing process, don't hesitate to consult a professional mechanic or refer to your bike's user manual for additional guidance.
Effortless Bike Maintenance: Mastering the Brake Lever Replacement
You may want to see also