Eric Johnson
Filling the coolant on a dirt bike is an essential maintenance task that ensures the engine operates at optimal temperatures, preventing overheating and potential damage. To begin, you'll need to gather the necessary supplies, including the appropriate type of coolant recommended by your bike's manufacturer, a funnel, and a container to catch any spills. Start by locating the coolant reservoir, typically found near the front of the bike, and carefully remove the cap. Use the funnel to pour the coolant into the reservoir, being cautious not to overfill. Check the coolant level against the markings on the reservoir, and top off as needed. Once the coolant is at the correct level, replace the cap securely and start the engine to allow it to circulate. After a few minutes, recheck the coolant level and add more if necessary. Properly maintaining your dirt bike's coolant system is crucial for ensuring its longevity and performance.
Explore related products


What You'll Learn
- Check Coolant Level: Ensure the coolant is at the recommended level before adding more
- Choose the Right Coolant: Use a high-quality coolant suitable for dirt bikes
- Prepare the Coolant Mixture: Mix the coolant with water according to the manufacturer's instructions
- Fill the Coolant Reservoir: Carefully pour the coolant mixture into the reservoir until it reaches the full mark
- Monitor and Maintain: Regularly check the coolant level and condition, and replace it as needed

Check Coolant Level: Ensure the coolant is at the recommended level before adding more
Before adding more coolant to your dirt bike, it's crucial to check the current coolant level. This step is often overlooked but is essential to prevent overfilling, which can lead to coolant leaks and potential engine damage. To check the coolant level, start by locating the coolant reservoir, typically found near the front of the bike, behind the front fender. Ensure the bike is on a level surface and the engine is cool to the touch to get an accurate reading.
Remove the reservoir cap and visually inspect the coolant level. It should be within the marked range on the reservoir, usually indicated by "MIN" and "MAX" lines. If the coolant is below the minimum mark, you'll need to add more. However, if it's above the maximum mark, you should carefully drain some coolant to bring it down to the recommended level. Overfilling can cause the coolant to expand and overflow when the engine heats up, leading to a mess and potential damage.
When checking the coolant level, also inspect the coolant's color and consistency. Fresh coolant is typically bright green or orange, depending on the type. If the coolant appears dirty, discolored, or has any debris floating in it, it may be time to replace it entirely. Additionally, check for any signs of leaks around the reservoir or hoses, as this could indicate a problem that needs to be addressed before adding more coolant.
In summary, checking the coolant level is a simple yet critical step in maintaining your dirt bike's engine. By ensuring the coolant is at the recommended level and in good condition, you can prevent potential issues and keep your bike running smoothly. Remember to always consult your bike's owner's manual for specific instructions and recommendations regarding coolant maintenance.
Safely Emptying Gas from Your Dirt Bike: A Step-by-Step Guide
You may want to see also
Explore related products



Choose the Right Coolant: Use a high-quality coolant suitable for dirt bikes
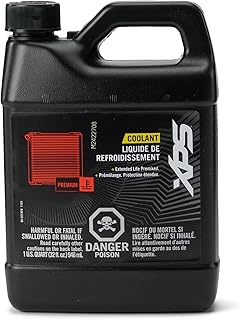
Selecting the appropriate coolant for your dirt bike is crucial for maintaining optimal engine performance and preventing overheating. High-quality coolants are specifically formulated to withstand the extreme temperatures and conditions encountered during off-road riding. When choosing a coolant, look for one that is designed for dirt bikes and has a high boiling point, typically above 260°F (127°C), to ensure it can effectively dissipate heat.
It's also important to consider the coolant's compatibility with your bike's engine materials. Most dirt bike engines are made of aluminum, so you'll want a coolant that is safe for use with aluminum components. Additionally, some coolants contain additives that help prevent corrosion and improve heat transfer, which can extend the life of your engine and improve its efficiency.
When it comes to filling your dirt bike's coolant system, it's essential to follow the manufacturer's recommendations for the correct coolant-to-water ratio. This ratio can vary depending on the specific coolant you're using and the climate in which you'll be riding. In general, a 50/50 mix of coolant and distilled water is a good starting point, but you may need to adjust this ratio based on your bike's specifications and the ambient temperature.
Before filling the coolant system, make sure to thoroughly clean the filler cap and surrounding area to prevent any debris or contaminants from entering the system. Once you've filled the system with the appropriate coolant mixture, start the engine and allow it to run for a few minutes to ensure the coolant circulates properly and reaches the correct temperature. Check the coolant level again after the engine has cooled down and top off as necessary.
Regularly checking and maintaining your dirt bike's coolant system is key to preventing overheating and ensuring your bike runs smoothly. By choosing the right coolant and following proper filling and maintenance procedures, you can help keep your dirt bike's engine running at its best, even in the most demanding off-road conditions.
Dirt Bike Maintenance: The Complete Guide to Draining Your Carburetor
You may want to see also
Explore related products

$30.95


Prepare the Coolant Mixture: Mix the coolant with water according to the manufacturer's instructions
To prepare the coolant mixture for your dirt bike, it's crucial to follow the manufacturer's instructions precisely. This typically involves mixing a specific ratio of coolant to water. The exact proportions can vary depending on the coolant brand and the climate in which you'll be riding, so always check the label for detailed guidance.
Start by measuring out the required amount of coolant concentrate. This is usually done using a measuring cup or a dedicated coolant mixing container. Be sure to wear gloves and protective eyewear, as coolant can be harmful if it comes into contact with skin or eyes.
Next, add the appropriate amount of distilled water to the coolant concentrate. It's important to use distilled water rather than tap water, as tap water can contain minerals and impurities that may affect the coolant's performance and potentially damage your bike's engine.
Once you've added the water, stir the mixture thoroughly to ensure the coolant and water are fully combined. Some coolants may require additional mixing or shaking, so again, refer to the manufacturer's instructions for specific guidance.
Before adding the coolant mixture to your dirt bike, make sure the engine is cool to the touch. This will help prevent any potential damage to the engine or injury to yourself. Also, be sure to check for any leaks in the cooling system, as adding coolant to a leaky system can lead to further complications.
Finally, carefully pour the coolant mixture into the bike's coolant reservoir, making sure not to overfill. The reservoir should have markings indicating the proper fill level. Once you've reached the correct level, replace the reservoir cap and start the engine to allow the coolant to circulate through the system.
Mastering the Mix: Fueling Your Two-Stroke Dirt Bike for Optimal Performance
You may want to see also
Explore related products


Fill the Coolant Reservoir: Carefully pour the coolant mixture into the reservoir until it reaches the full mark
Before pouring the coolant mixture into the reservoir, ensure that the engine has cooled down sufficiently to avoid any risk of burns or damage to the coolant system. Typically, this process should be done when the engine is at room temperature. Once the engine is cool, locate the coolant reservoir, which is usually marked with labels or symbols indicating its purpose.
Carefully pour the coolant mixture into the reservoir, making sure to avoid spills or overflows. It's crucial to pour slowly and steadily to prevent air bubbles from forming in the system, which can lead to overheating or poor coolant circulation. If you notice any air bubbles, gently tap the reservoir or use a small tool to dislodge them.
Continue pouring until the coolant level reaches the full mark indicated on the reservoir. This mark is usually labeled as "MAX" or "FULL" and is often accompanied by a line or symbol. Be cautious not to overfill the reservoir, as this can cause coolant to spill out when the engine is running and potentially damage other components.
After filling the reservoir, securely close the cap and ensure it is tightened properly. This will prevent any leaks or spills during operation. It's also a good practice to check the coolant level periodically, especially after long rides or in extreme weather conditions, to ensure that it remains at the optimal level for efficient engine cooling.
Remember, using the correct type and mixture of coolant is essential for the proper functioning of your dirt bike's cooling system. Always refer to your bike's owner's manual for specific recommendations and guidelines on coolant selection and maintenance.
Mastering the Art of Road Riding on a Dirt Bike
You may want to see also
Explore related products


Monitor and Maintain: Regularly check the coolant level and condition, and replace it as needed
Regular maintenance of your dirt bike's coolant system is crucial for optimal performance and longevity. Neglecting this aspect can lead to overheating, engine damage, and costly repairs. To ensure your dirt bike remains in top condition, it's essential to monitor the coolant level and quality, and replace it as necessary.
Start by checking the coolant level at least once a month, or more frequently if you ride in extreme conditions. Locate the coolant reservoir, typically found near the radiator, and inspect the level. The coolant should be at the full mark, and if it's low, you'll need to add more. Be sure to use the correct type of coolant recommended by your dirt bike's manufacturer, as using the wrong type can cause damage.
In addition to checking the level, inspect the coolant's condition. Over time, coolant can become contaminated with dirt, debris, and rust, which can clog the radiator and reduce its efficiency. If the coolant appears dirty or discolored, it's time to replace it. To do this, drain the old coolant from the system, clean the radiator and reservoir, and refill with fresh coolant.
Another important aspect of coolant maintenance is to check for leaks. Inspect the radiator, hoses, and connections for any signs of damage or wear. If you find any leaks, repair or replace the damaged components immediately to prevent further damage.
Finally, consider the age of your dirt bike's coolant system. Even if the coolant level and condition appear fine, it's recommended to replace the coolant every two to three years, or more frequently if you ride in harsh conditions. This will help ensure that your dirt bike's engine remains protected and runs smoothly.
By following these guidelines, you can keep your dirt bike's coolant system in excellent condition, prevent costly repairs, and enjoy a safer and more enjoyable riding experience.
Dirt Bike Helmet Sizing Guide: Find Your Perfect Fit
You may want to see also
Frequently asked questions
It's recommended to use a high-quality, ethylene glycol-based coolant that is specifically designed for motorcycles. Look for coolants that offer protection against corrosion and have a high boiling point to ensure optimal performance.
Coolant should typically be changed every 6 months or after every 100 hours of riding, whichever comes first. Regular changes help maintain the coolant's effectiveness and prevent engine damage.
The correct coolant level can be found in your dirt bike's owner's manual. Generally, the coolant should reach the full mark on the reservoir when the engine is cold. Overfilling can lead to coolant overflow and potential engine damage.
Bleeding the cooling system is essential to remove air pockets that can cause overheating. Start by loosening the radiator cap, then use a bleed screw if available to release trapped air. Check the coolant level frequently and top off as needed.
Signs of a coolant leak include a sudden drop in coolant level, coolant puddles under the bike, steam or smoke coming from the engine, and overheating. If you notice any of these signs, inspect the cooling system for leaks and address them promptly to prevent engine damage.