Ryan Cole

Replacing bike hydraulic brake pads is a crucial maintenance task to ensure optimal braking performance and safety. Over time, brake pads wear down due to friction and heat generated during braking, which can lead to decreased stopping power and increased risk of accidents. In this guide, we'll walk you through the step-by-step process of replacing hydraulic brake pads on your bike, covering everything from the necessary tools and parts to the proper techniques for a seamless installation. By following these instructions, you'll be able to restore your bike's braking system to like-new condition, ensuring a safer and more enjoyable riding experience.
Explore related products


What You'll Learn
- Gather necessary tools: Assemble all required tools and materials for the brake pad replacement process
- Remove old brake pads: Carefully detach the worn-out brake pads from the caliper
- Inspect brake components: Check the condition of the rotors, calipers, and other components for wear or damage
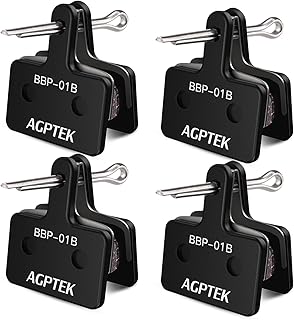
- Install new brake pads: Insert the new brake pads into the caliper, ensuring proper alignment and fit
- Test brake performance: After installation, test the brakes to ensure they are functioning correctly and safely

Gather necessary tools: Assemble all required tools and materials for the brake pad replacement process
Before diving into the intricate process of replacing bike hydraulic brake pads, it's crucial to ensure you have all the necessary tools and materials at hand. This not only saves time but also prevents potential mishaps during the procedure. Start by laying out a clean workspace, preferably a sturdy table or workbench, where you can organize your tools and parts efficiently.
The essential tools for this task typically include a set of hex keys, a Torx key set, a flathead screwdriver, needle-nose pliers, and a small container of high-quality brake grease. Additionally, you'll need a pair of safety gloves to protect your hands from sharp edges and brake fluid, as well as safety glasses to shield your eyes from any debris.
When it comes to materials, you'll obviously need the replacement brake pads specific to your bike's model. It's also a good idea to have some brake fluid on hand, as you may need to bleed the brakes after installing the new pads. Don't forget to grab some clean rags or paper towels for wiping away any excess grease or fluid.
One often overlooked but vital component is a small amount of patience and focus. Brake pad replacement can be a delicate process, and rushing through it can lead to mistakes that compromise your bike's safety. Take your time, follow the steps carefully, and don't hesitate to consult your bike's manual or online resources if you encounter any difficulties.
By gathering all these tools and materials beforehand, you'll be well-prepared to tackle the brake pad replacement process with confidence and precision. Remember, safety should always be your top priority when working on your bike's braking system.
Effortlessly Remove Your Bike's Disc Brakes: A Step-by-Step Guide
You may want to see also
Explore related products


Remove old brake pads: Carefully detach the worn-out brake pads from the caliper
Begin by ensuring your bike is securely positioned on a flat surface, preferably using a bike stand to keep it stable. This will prevent any accidental falls or movements while you're working on the brakes. Next, locate the caliper, which is the component that houses the brake pads and is typically found near the wheel's rim. It's crucial to identify the correct caliper, as bikes often have separate calipers for the front and rear brakes.
Once you've identified the caliper, carefully inspect the brake pads for wear. Worn-out pads will appear thinner than usual and may have uneven surfaces. If the pads are indeed worn, it's time to remove them. Start by locating the retaining clip or bolt that holds the pads in place. This is usually a small component that can be easily overlooked, so take your time to find it.
Using a suitable tool, such as a hex key or screwdriver, carefully remove the retaining clip or bolt. Be gentle to avoid damaging the caliper or the pads. Once the clip or bolt is removed, the pads should be loose enough to be detached. Gently pull the pads out of the caliper, taking care not to damage the caliper's pistons or seals.
After removing the old pads, inspect the caliper for any signs of damage or wear. If the caliper appears to be in good condition, you can proceed to install the new pads. However, if you notice any damage, it's best to replace the caliper as well to ensure optimal braking performance and safety.
Remember to dispose of the old brake pads properly, as they may contain hazardous materials. It's also a good idea to clean the caliper and surrounding area before installing the new pads to remove any dirt or debris that may have accumulated. This will help ensure a smooth installation process and optimal performance of your new brake pads.
Effortless Wheel Removal: A Guide for Bikes with Rim Brakes
You may want to see also
Explore related products



Inspect brake components: Check the condition of the rotors, calipers, and other components for wear or damage
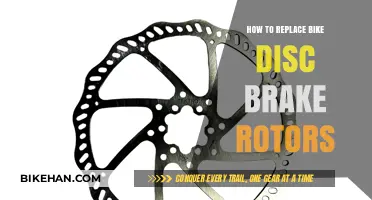
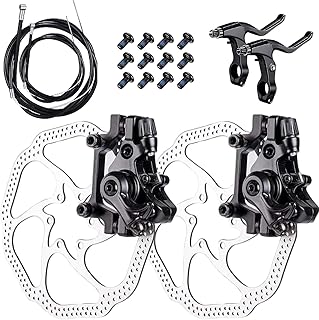
Before replacing brake pads, it's crucial to inspect the entire brake system for any signs of wear or damage. Start by examining the rotors, which are the circular metal discs attached to the wheel hubs. Look for any grooves, cracks, or discoloration that could indicate excessive wear or heat damage. If the rotors appear worn, they may need to be replaced or resurfaced to ensure optimal braking performance.
Next, inspect the calipers, which are the metal components that house the brake pads and apply pressure to the rotors. Check for any signs of corrosion, cracks, or leaks. The caliper pistons should move freely and not be stuck or seized. If you notice any issues with the calipers, they may need to be replaced or serviced by a professional.
Don't forget to check the brake lines and hoses for any signs of wear, fraying, or leaks. These components are critical for transferring hydraulic fluid from the brake lever to the calipers, and any damage could lead to a loss of braking power. Inspect the brake lever itself for proper function and adjustability.
During your inspection, be sure to check the brake pads for wear. If they are less than 1mm thick, it's time to replace them. Also, look for any signs of uneven wear, which could indicate a problem with the brake system's alignment or function.
Finally, test the brake system by applying the brakes and checking for any unusual noises, vibrations, or sponginess. If you notice any issues, it's important to address them before replacing the brake pads to ensure the best possible performance and safety.
Mastering Bike Hydraulic Brake Repair: A Step-by-Step Guide
You may want to see also
Explore related products



Install new brake pads: Insert the new brake pads into the caliper, ensuring proper alignment and fit
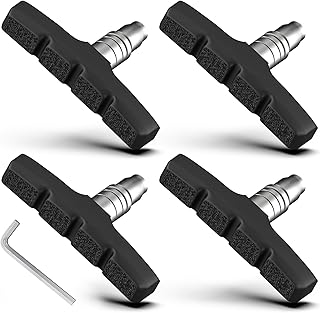
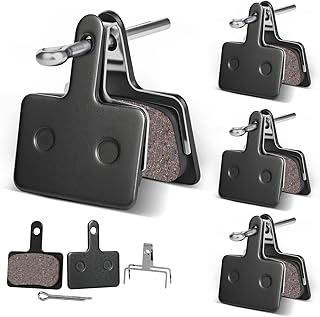
Begin by carefully inserting the new brake pads into the caliper, ensuring that they are properly aligned with the rotor. It is crucial to make sure that the pads are not crooked or misaligned, as this can lead to uneven wear and reduced braking performance. Use a flathead screwdriver or a specialized brake pad tool to gently pry the pads into place, taking care not to damage the delicate components.
Once the pads are inserted, check that they are securely held in place by the caliper's retaining clips or pins. These clips are designed to keep the pads from falling out during use, so it is important to make sure they are properly engaged. If your bike has a hydraulic brake system, you may need to bleed the brakes after installing new pads to ensure that there is no air in the lines. This process involves opening the bleed valve on the caliper and allowing the brake fluid to flow out until it is clear of any bubbles.
After installing the new brake pads, it is a good idea to test the brakes to make sure they are functioning properly. Go for a short ride and apply the brakes gently to ensure that they are engaging smoothly and providing adequate stopping power. If you notice any issues, such as squealing or reduced braking performance, you may need to adjust the pads or bleed the brakes again.
Remember to always follow the manufacturer's instructions for your specific bike and brake system when replacing brake pads. This will help ensure that you are using the correct parts and procedures for your bike, which can vary depending on the make and model. Additionally, if you are not comfortable with this process, it is always a good idea to consult with a professional mechanic to ensure that the job is done correctly and safely.
Effortless Front Brake Removal on Public Bikes: A Step-by-Step Guide
You may want to see also
Explore related products


Test brake performance: After installation, test the brakes to ensure they are functioning correctly and safely
After replacing your bike's hydraulic brake pads, it's crucial to test the brakes to ensure they're functioning correctly and safely. This involves more than just a quick squeeze of the brake lever; it requires a systematic approach to check for proper installation and performance. Start by visually inspecting the brake pads to confirm they're securely in place and aligned with the brake rotors. Next, perform a dry test by applying the brakes without any water or lubricant on the rotors. This will help you assess the initial bite and feel of the new pads.
Once you've completed the dry test, it's time to move on to a wet test. This is important because hydraulic brakes can perform differently when wet, and it's essential to ensure they're still effective in these conditions. To do this, either ride the bike through a puddle or use a spray bottle to wet the rotors. Then, apply the brakes and pay attention to the stopping distance and feel. The brakes should still engage smoothly and provide adequate stopping power, even when wet.
During both the dry and wet tests, pay close attention to any unusual noises or vibrations. A properly functioning brake system should operate quietly and smoothly. If you notice any squealing, grinding, or pulsating, it may indicate an issue with the brake pads, rotors, or calipers. In such cases, it's best to consult a professional mechanic to diagnose and address the problem.
Another important aspect of testing brake performance is to check for proper brake modulation. This refers to the ability of the brakes to provide a smooth, progressive increase in stopping power as you apply more pressure to the brake lever. To test modulation, start by applying a light pressure on the brake lever and gradually increase it. The brakes should respond accordingly, providing a consistent and predictable increase in stopping power.
Finally, after completing all the tests, take the bike for a ride to simulate real-world conditions. This will give you a better sense of how the brakes perform during actual use. Pay attention to how the brakes feel when you're stopping from different speeds and on various terrains. If you're satisfied with the performance, you can confidently conclude that the new brake pads are properly installed and functioning safely.
Fixing Your Ride: A Step-by-Step Guide to Repairing Bike Brake Cables
You may want to see also
Frequently asked questions
To replace bike hydraulic brake pads, you will need a few essential tools. These typically include a set of hex keys, a Torx key (if your brake caliper uses Torx bolts), a pair of pliers, a flathead screwdriver, and a rag or paper towels for cleaning. Additionally, you'll need the new brake pads specific to your bike's brake system.
You can tell your bike's hydraulic brake pads need replacing when you notice a decrease in braking performance, such as longer stopping distances or a spongy feeling in the brake lever. Regularly inspecting the brake pads for wear is also a good practice. Most brake pads have a wear indicator line; when the pad material wears down to this line, it's time to replace them.
The first step in replacing bike hydraulic brake pads is to ensure your bike is safely secured and won't move while you're working on it. This can be done by placing it on a bike stand or flipping it upside down and resting it on its handlebars and saddle. Next, you'll want to locate the brake caliper and remove the wheel to access the brake pads.
To remove the old brake pads from the caliper, start by locating the retaining clip or bolt that holds the pads in place. Use your hex key or Torx key to loosen and remove this clip or bolt. Once it's removed, gently pry the old brake pads out of the caliper using your flathead screwdriver or pliers. Be careful not to damage the caliper or the new brake pads during this process.
After installing the new brake pads, it's important to bleed the brake system to remove any air that may have entered during the replacement process. This ensures optimal braking performance. To bleed the brakes, you'll need a bleed kit or a syringe filled with brake fluid. Follow the manufacturer's instructions for bleeding the specific brake system on your bike. Once the brakes are bled, test them to ensure they're functioning properly before riding.