Eric Johnson
Replacing a bike brake lever is a crucial maintenance task that ensures your bicycle's braking system functions optimally. Over time, brake levers can wear out or become damaged, leading to reduced braking performance and potential safety hazards. In this guide, we'll walk you through the step-by-step process of replacing a bike brake lever, covering the necessary tools, preparation, and installation techniques. Whether you're a seasoned cyclist or a beginner, this tutorial will equip you with the knowledge and confidence to tackle this essential bike repair.
Explore related products


What You'll Learn
- Gather necessary tools: Assemble tools like Allen wrenches, pliers, and lubricants for brake lever replacement
- Remove old brake lever: Carefully detach the old lever, noting its position and any adjustments made
- Prepare new brake lever: Ensure the new lever is compatible with your bike and lubricate moving parts
- Install new brake lever: Securely attach the new lever, ensuring proper alignment and tightness
- Test brake functionality: Check that the new brake lever functions smoothly and makes proper contact with the brake pads

Gather necessary tools: Assemble tools like Allen wrenches, pliers, and lubricants for brake lever replacement
Before diving into the intricate process of replacing a bike brake lever, it's crucial to ensure you have the right tools at your disposal. This isn't just about having a screwdriver and calling it a day; brake lever replacement requires a specific set of tools to be done correctly and safely. Allen wrenches, for instance, are essential for adjusting and securing various components of the brake system. Pliers come in handy for gripping and manipulating small parts, while lubricants are necessary to keep everything running smoothly and prevent wear and tear.
When assembling your toolkit, consider the specific type of brake lever you'll be working with. Different models may require different sizes of Allen wrenches or types of lubricants. It's also a good idea to have a rag or some cleaning solution on hand to remove any dirt or grime that may have accumulated on the brake components. This will ensure a clean working environment and help prevent any contamination that could affect the performance of your brakes.
One common mistake people make when replacing a brake lever is forgetting to properly lubricate the pivot points. This can lead to a stiff or unresponsive brake lever, which can be both frustrating and dangerous. To avoid this, make sure to apply a small amount of lubricant to each pivot point and work it in thoroughly. You may also want to consider using a lubricant that's specifically designed for bicycle brakes, as these are formulated to withstand the unique demands of cycling.
Another important consideration is the proper adjustment of the brake cable. This is where the Allen wrenches come into play. You'll need to carefully adjust the tension of the cable to ensure that the brake lever engages and disengages smoothly. Too much tension can cause the lever to feel stiff, while too little can result in a spongy or unresponsive feel. It's a delicate balance, but with the right tools and a bit of patience, you can achieve the perfect adjustment.
Finally, when you're putting everything back together, make sure to double-check all your connections and adjustments. It's easy to overlook a small detail, but even the slightest misalignment can affect the performance of your brakes. Take your time, and don't hesitate to consult a professional if you're unsure about any aspect of the process. With the right tools and a bit of know-how, you can replace your bike brake lever like a pro, ensuring safe and reliable braking for all your cycling adventures.
Effortless Brake Cushion Removal: A Step-by-Step Guide for Bike Owners
You may want to see also
Explore related products




Remove old brake lever: Carefully detach the old lever, noting its position and any adjustments made
Begin by ensuring your bike is securely positioned, either by placing it on a bike stand or flipping it upside down so the wheels are in the air. This will provide stability and make it easier to access the brake lever. Next, locate the brake lever you intend to remove. It's typically found on the handlebars, and you'll need to identify the specific type of brake lever your bike has, as this will influence the removal process.
For a traditional brake lever, start by loosening the clamp that secures it to the handlebar. This is usually done with a hex key or Allen wrench. Once the clamp is loose, carefully slide the brake lever off the handlebar, making sure to keep track of its position and orientation. It's important to note any adjustments that have been made to the lever's position or tension, as you'll need to replicate these when installing the new lever.
If your bike has integrated brake and gear shifters, the process may be more complex. You'll need to disconnect the gear shifter cable before removing the brake lever. This typically involves loosening a barrel adjuster or a clamp, then carefully pulling the cable out of the shifter. Once the gear shifter cable is disconnected, you can proceed with removing the brake lever as described above.
After removing the old brake lever, inspect it for any signs of wear or damage. If the lever is worn out or has any issues, it's a good idea to replace it with a new one. If the lever is in good condition, you can proceed with cleaning and lubricating it before reinstallation. Remember to take note of the lever's position and any adjustments made during the removal process, as this will help ensure proper installation and function of the new brake lever.
Effortless Brake Handle Removal: A Step-by-Step Guide for Bike Enthusiasts
You may want to see also
Explore related products


Prepare new brake lever: Ensure the new lever is compatible with your bike and lubricate moving parts
Before installing a new brake lever, it's crucial to verify its compatibility with your bicycle. This involves checking the specifications of both the lever and your bike to ensure they match. Factors to consider include the type of brake system (rim or disc), the mounting style (flat or drop bar), and the cable routing (internal or external). Incompatible parts can lead to improper functioning or even safety hazards. Once compatibility is confirmed, proceed to the next step.
Lubrication is key to the smooth operation of your new brake lever. Apply a suitable lubricant to all moving parts, including the pivot points, cable clamp, and adjustment screws. This will reduce friction, prevent wear, and ensure consistent braking performance. Be cautious not to over-lubricate, as excess lubricant can attract dirt and debris, leading to a buildup of grime that can impair function.
When preparing the new lever, also inspect it for any signs of damage or defects. Check the integrity of the lever body, the smoothness of the pivot points, and the security of all fasteners. If any issues are detected, return the lever to the manufacturer or retailer for a replacement. It's better to address these problems before installation to avoid complications later on.
In addition to compatibility and lubrication, consider the ergonomics of the new brake lever. Ensure that it fits comfortably in your hand and that the reach to the lever is appropriate for your riding style and body size. Proper ergonomics can enhance control and reduce the risk of hand fatigue or strain during long rides.
Finally, familiarize yourself with the installation process by consulting the manufacturer's instructions or a reliable bicycle maintenance guide. This will help you understand the specific steps required for your particular brake lever model and ensure a successful installation. Remember to always follow safety guidelines and, if unsure, seek assistance from a professional mechanic.
Mastering Brake Removal: A Step-by-Step Guide for Hydraulic Bike Brakes
You may want to see also
Explore related products


Install new brake lever: Securely attach the new lever, ensuring proper alignment and tightness
Begin by preparing the workspace with all necessary tools and components within reach. This includes the new brake lever, appropriate fasteners, a torque wrench, and lubrication. Ensure the bicycle is securely mounted on a stand or stable surface to prevent movement during installation.
Next, carefully remove the old brake lever, taking note of the cable routing and any specific adjustments that were made to the original setup. This step is crucial for understanding how the new lever will be installed and ensuring a smooth transition.
When installing the new brake lever, start by threading the cable through the designated hole in the lever body. Ensure the cable is properly seated and not twisted, as this can affect braking performance. Secure the cable with the provided clamp, making sure it is tight but not over-tightened, which can cause damage to the cable or lever.
Align the new lever with the handlebar, ensuring it is positioned correctly for ergonomic use. This may involve adjusting the angle or height of the lever to match the rider's preference. Once the lever is properly aligned, use the torque wrench to tighten the fasteners to the manufacturer's recommended specifications.
After the new brake lever is securely attached, test the braking system to ensure proper function. This includes checking for any leaks in the hydraulic system, ensuring the brakes engage smoothly, and adjusting the cable tension if necessary. Finally, lubricate any moving parts to reduce friction and prolong the life of the new brake lever.
Efficiently Cleaning WD-40 Off Bike Brakes: A Simple Guide
You may want to see also
Explore related products


Test brake functionality: Check that the new brake lever functions smoothly and makes proper contact with the brake pads
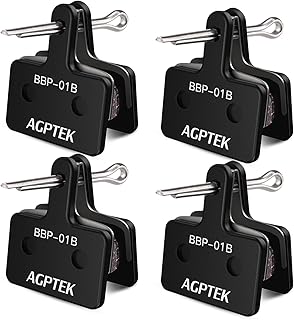
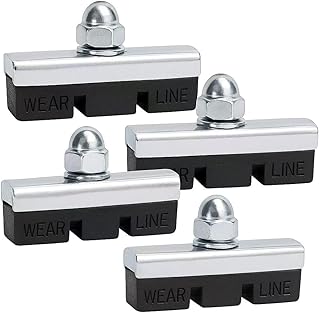
After installing a new brake lever on your bicycle, it's crucial to test its functionality to ensure your safety and the bike's performance. Begin by checking the lever's movement; it should operate smoothly without any resistance or sticking. If you encounter any issues, inspect the pivot points and ensure they are properly lubricated. Next, examine the brake pads for proper alignment and contact with the rim. Misaligned pads can lead to uneven braking and potential accidents. Adjust the pads as necessary and retest the lever.
During the test, pay close attention to the brake's response time. A well-functioning brake system should engage quickly and release smoothly. If you notice any delays or sponginess, it may indicate air in the brake lines or worn-out pads. Bleeding the brakes or replacing the pads can resolve these issues. Additionally, check for any unusual noises, such as squealing or grinding, which could signify improper pad contact or debris in the brake system.
To further ensure the brake lever's proper function, take the bike for a test ride. Start with gentle braking in a controlled environment, then gradually increase the intensity to simulate real-world riding conditions. This will help you identify any potential problems that may not have been apparent during the initial bench test. Remember to always wear appropriate safety gear, including a helmet, during your test ride.
In summary, testing the brake functionality after replacing the lever is a critical step in maintaining your bicycle's safety and performance. By following these steps and paying close attention to the brake system's response, you can identify and address any potential issues before they become a safety hazard.
Mastering Bike Brake Pad Repairs: A Comprehensive Guide
You may want to see also