Samantha Lee
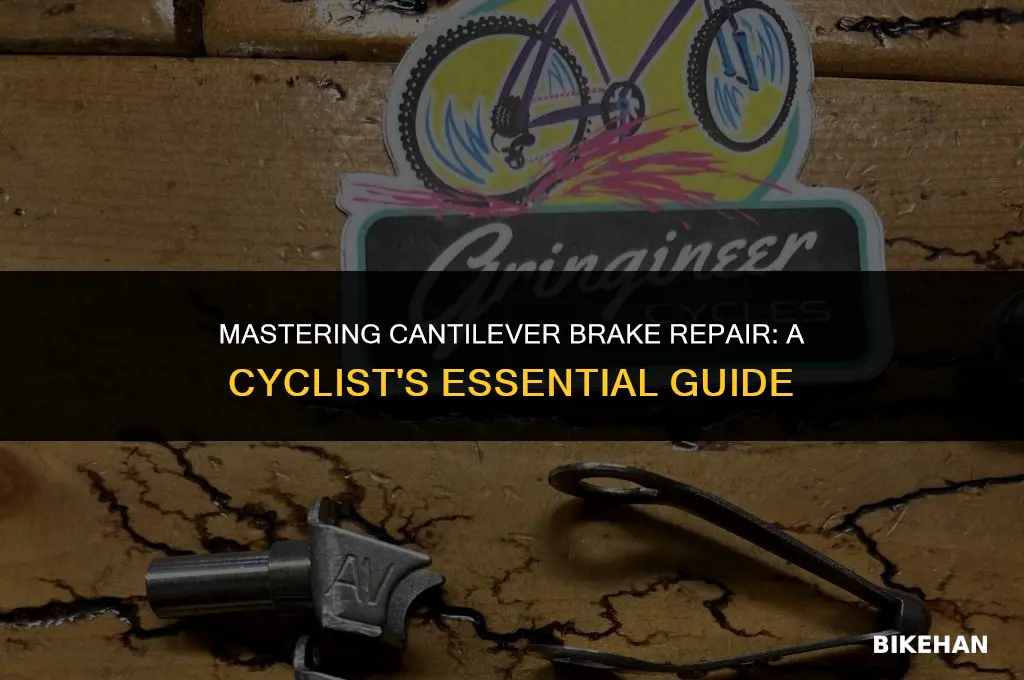
Repairing cantilever bike brakes involves several key steps. First, ensure the bike is securely positioned and the wheels are removed. Next, inspect the brake pads for wear and replace them if necessary. Adjust the brake cable tension to ensure proper brake engagement and release. Check the brake arms for any signs of damage or misalignment, and lubricate the pivot points to maintain smooth operation. Finally, reassemble the wheels and test the brakes to ensure they are functioning correctly.
Explore related products


What You'll Learn

Identifying brake issues
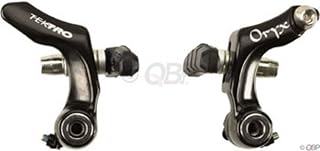
To identify brake issues on a cantilever bike brake system, start by inspecting the brake pads for wear and tear. Cantilever brakes typically have two pads that press against the rim of the wheel. If these pads are worn down to less than 1/8 inch, it's time to replace them. Additionally, check for any signs of damage or cracks on the brake pads, as this can compromise their effectiveness.
Next, examine the brake cables for any signs of fraying or damage. Cantilever brake cables run from the brake lever to the brake arms, and any damage to these cables can result in poor brake performance. If you notice any fraying or damage, replace the cable immediately.
Another common issue with cantilever brakes is misalignment. Check that the brake pads are properly aligned with the rim of the wheel. If they are not, adjust the brake arms to ensure that the pads make contact with the rim evenly. Misalignment can lead to uneven wear on the brake pads and reduced braking power.
Inspect the brake arms for any signs of bending or damage. Cantilever brake arms are subjected to a lot of stress when the brakes are applied, and any damage to these arms can affect the overall performance of the brake system. If you notice any bending or damage, replace the brake arms.
Finally, check the brake lever for proper function. The brake lever should engage the brake arms smoothly and without any hesitation. If you notice any issues with the lever, such as sticking or misalignment, adjust or replace it as necessary.
By following these steps, you can identify and address common brake issues on a cantilever bike brake system, ensuring that your bike is safe and reliable for riding.
Sunny Bike Brake Pads Removal: A Step-by-Step Guide
You may want to see also
Explore related products


Gathering necessary tools
Before diving into the intricacies of repairing cantilever bike brakes, it's crucial to ensure you have the right tools at your disposal. This section will guide you through the essential items you'll need to gather for a successful brake repair.
First and foremost, you'll require a set of Allen wrenches, also known as hex keys. These are indispensable for adjusting the brake's mounting bolts and fine-tuning the tension. Make sure to have a variety of sizes to accommodate different bolts on your bike.
Next on the list is a good quality cable cutter. Cantilever brakes rely on precise cable tension, and having the ability to cleanly cut and replace the brake cable is vital. Look for a cutter with sharp, hardened steel blades for a clean cut every time.
A set of needle-nose pliers is another must-have. These will come in handy for gripping small parts, bending cables, and reaching into tight spaces. Their long, narrow jaws provide the precision needed for delicate brake components.
Don't forget to add a tube of brake grease to your toolkit. This specialized lubricant is designed to reduce friction between the brake cable and housing, ensuring smooth operation and prolonging the life of your brake system.
Lastly, consider picking up a brake adjustment tool. While not strictly necessary, this tool can make the process of adjusting the brake tension much easier and more accurate. It's especially useful for those who are new to bike maintenance or find the manual adjustment process cumbersome.
With these tools gathered, you'll be well-prepared to tackle the repair of your cantilever bike brakes. Remember, having the right equipment can make all the difference in the success of your repair and the safety of your ride.
Revamping Your Ride: A Guide to Replacing Old Bike Brake Levers
You may want to see also
Explore related products


Removing brake pads
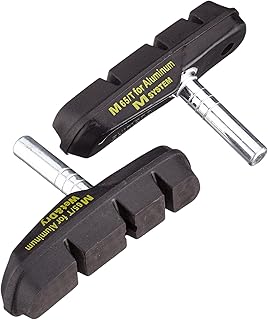
To remove brake pads on a cantilever brake system, begin by ensuring the bike is securely positioned on a stand or suspended in a way that allows easy access to the brakes. Next, locate the brake pad retention bolt, which is typically found near the top of the brake caliper where it attaches to the fork or frame. Using an appropriately sized Allen wrench or screwdriver, carefully loosen and remove this bolt. Be cautious not to strip the threads, as this could lead to difficulties in reassembly.
Once the retention bolt is removed, gently pull the brake pad away from the caliper. It's important to note that some brake pads may be attached with a clip or spring mechanism, which will need to be carefully manipulated to release the pad. After removing the pad, inspect it for wear and damage. If the pad is excessively worn or damaged, it should be replaced.
When installing new brake pads, ensure they are properly aligned with the caliper and that the retention bolt is tightened securely. It's also a good practice to apply a small amount of brake grease to the back of the pad to reduce friction and wear. Finally, test the brakes to ensure they are functioning correctly and make any necessary adjustments.
In summary, removing brake pads on a cantilever brake system involves carefully loosening the retention bolt, pulling the pad away from the caliper, and inspecting it for wear. If necessary, replace the pad and reassemble the brake system, ensuring proper alignment and function.
Effortless Brake Removal: A Step-by-Step Guide for Bike Enthusiasts
You may want to see also
Explore related products


Replacing brake cables
Begin by gathering the necessary tools and materials for the job. You'll need a set of brake cables, cable housing, cable ties, and a cable cutter. It's also helpful to have a degreaser and lubricant on hand to clean and maintain the brake components.
Next, remove the old brake cables from the bike. Start by loosening the cable clamp at the brake lever and pulling the cable out. Then, remove the cable from the brake caliper by unscrewing the caliper mounting bolt and sliding the cable out. Be careful not to damage the cable housing or the brake components during this process.
Once the old cables are removed, inspect the cable housing for any signs of wear or damage. If the housing is frayed or kinked, it's best to replace it. Cut the new cable housing to the appropriate length, leaving enough extra for adjustments.
Now, thread the new brake cable through the cable housing. Start at the brake lever and pull the cable through until it reaches the caliper. Make sure the cable is properly seated in the housing and that there are no kinks or twists.
Tighten the cable clamp at the brake lever to secure the cable in place. Then, adjust the cable tension by pulling on the cable and tightening the caliper mounting bolt. Test the brakes to ensure they are functioning properly and make any necessary adjustments.
Finally, clean and lubricate the brake components to ensure smooth operation. Apply a small amount of lubricant to the pivot points and moving parts of the brake caliper and lever. This will help to reduce friction and prolong the life of your brake system.
Mastering Bike Brake Caliper Repair: A Step-by-Step Guide
You may want to see also
Explore related products


Adjusting brake tension
To adjust the brake tension on cantilever bike brakes, you'll need to locate the tension adjustment screw, which is typically found near the brake lever. This screw controls the overall tension of the brake cable, which in turn affects how tightly the brake pads grip the rim. Start by loosening the screw slightly to reduce the tension. Then, test the brakes by squeezing the lever and observing how the pads interact with the rim. If the brakes are too loose, tighten the screw incrementally until you achieve the desired tension. Be careful not to overtighten, as this can cause the brakes to drag and reduce efficiency.
Another method for adjusting brake tension involves the use of a barrel adjuster, which is a small, cylindrical component that can be turned to fine-tune the tension of the brake cable. To use a barrel adjuster, first loosen the brake cable clamp to allow for adjustments. Then, turn the barrel adjuster clockwise to increase tension or counterclockwise to decrease tension. After making adjustments, retighten the brake cable clamp and test the brakes to ensure proper function.
When adjusting brake tension, it's important to consider the type of riding you'll be doing. For example, if you'll be riding in wet or muddy conditions, you may want to increase the tension slightly to ensure the brakes grip the rim effectively. Conversely, if you'll be riding on dry, smooth surfaces, you may be able to reduce the tension for a more efficient braking system.
One common mistake when adjusting brake tension is to focus solely on the tension adjustment screw or barrel adjuster without considering the overall brake system. It's important to remember that the brakes are a complex system, and issues with other components, such as the brake pads or cables, can also affect tension. Therefore, it's crucial to inspect the entire brake system before making adjustments to ensure that all components are in good working order.
In conclusion, adjusting brake tension on cantilever bike brakes requires a careful and methodical approach. By using the tension adjustment screw or barrel adjuster and considering the type of riding you'll be doing, you can achieve the perfect balance of braking power and efficiency. Remember to inspect the entire brake system before making adjustments, and don't hesitate to seek professional help if you're unsure about any aspect of the process.
Mastering Bike Brake Repair: A Step-by-Step Guide
You may want to see also