Megan Blake
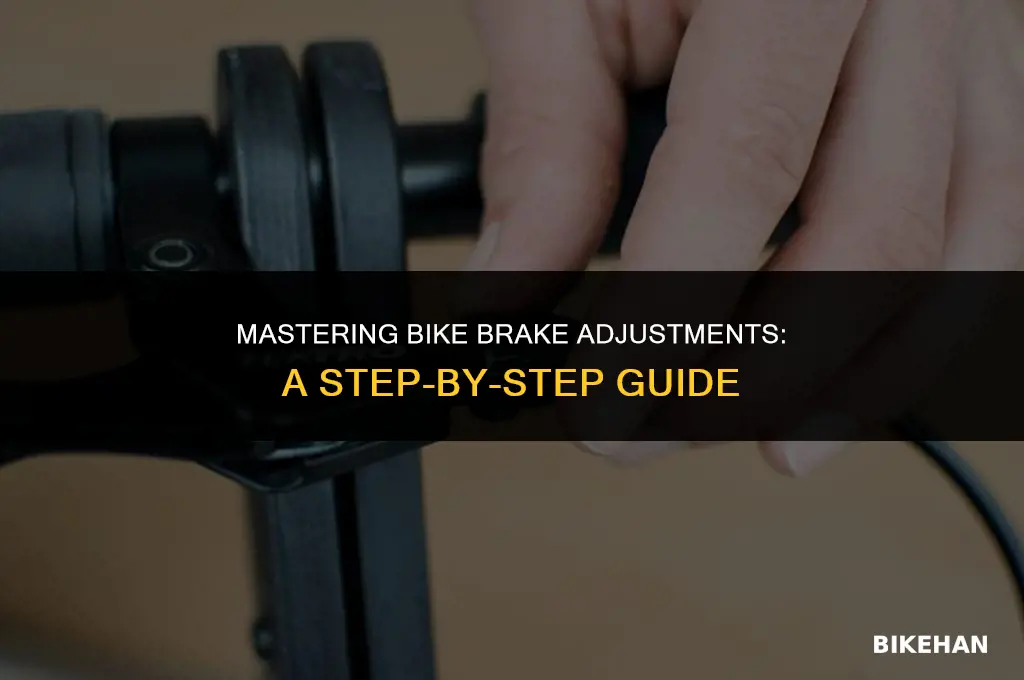
Adjusting and repairing bike brakes is a crucial maintenance task that ensures your bicycle operates safely and efficiently. Over time, brake components can wear out or become misaligned, leading to reduced stopping power and potential safety hazards. This guide will walk you through the process of inspecting, adjusting, and repairing your bike's brakes, covering both rim brakes and disc brakes. By following these steps, you'll be able to maintain optimal brake performance and enjoy a safer riding experience.
| Characteristics | Values |
|---|---|
| Task Type | Maintenance |
| Difficulty Level | Intermediate |
| Tools Required | Allen wrenches, Screwdriver, Brake cable housing, Lubricant |
| Time Estimate | 30-60 minutes |
| Safety Precautions | Wear gloves, Ensure bike is on a stable surface |
| Steps Involved | 1. Inspect brake pads and cables, 2. Adjust brake cable tension, 3. Align brake pads with rim, 4. Test brake function |
| Common Issues Addressed | Squeaky brakes, Weak braking power, Brake misalignment |
| Applicable Bike Types | Road bikes, Mountain bikes, Hybrid bikes |
| Frequency of Maintenance | Every 1000 miles or as needed |
| Cost Estimate | $0-$50 (depending on parts needed) |
| Environmental Impact | Low (minimal parts replacement) |
| Required Skills | Basic mechanical knowledge, Attention to detail |
| Alternative Methods | Bleeding brakes, Replacing brake pads |
| Helpful Resources | Online tutorials, Bike repair manuals |
| Common Mistakes to Avoid | Over-tightening cables, Misaligning brake pads |
| Post-Repair Checks | Test ride, Re-check brake function after a few days |
Explore related products


What You'll Learn
- Identify Brake Type: Determine whether your bike has rim brakes, disc brakes, or coaster brakes
- Check Brake Pads: Inspect brake pads for wear and tear; replace if necessary for optimal performance
- Adjust Brake Tension: Use the barrel adjuster to fine-tune the tension of the brake cable
- Align Brake Calipers: Ensure calipers are properly aligned with the rim or rotor for effective braking
- Test and Fine-Tune: After adjustments, test the brakes and make further tweaks as needed for safety

Identify Brake Type: Determine whether your bike has rim brakes, disc brakes, or coaster brakes
To identify the type of brake on your bike, you need to examine the components closely. Rim brakes are the most common type and are easily recognizable by the brake pads that sit above the wheel rim. Disc brakes, on the other hand, have a rotor attached to the wheel hub and a caliper mounted near the rotor. Coaster brakes are less common and are typically found on older bikes; they engage when you pedal backward and disengage when you pedal forward.
Start by locating the brake pads or rotor. If you see brake pads above the rim, you have rim brakes. If there's a rotor near the center of the wheel, you have disc brakes. If neither is visible, you may have coaster brakes, which require a different approach to adjustment.
Once you've identified the brake type, you can proceed with the appropriate adjustment method. For rim brakes, you'll need to ensure the pads are aligned correctly with the rim and that the cable tension is adjusted properly. For disc brakes, you'll need to check the rotor alignment and the caliper position, as well as the hydraulic or cable tension, depending on the system. Coaster brakes require adjusting the tension of the brake cable and ensuring the pedal mechanism is functioning correctly.
Remember to always refer to your bike's specific manual for detailed instructions on brake adjustment, as different models may have unique requirements. Safety is paramount when working on bike brakes, so ensure you have the necessary tools and knowledge before attempting any repairs or adjustments.
Revive Your Ride: Effective Methods to Remove Rust from Bike Brakes
You may want to see also
Explore related products



Check Brake Pads: Inspect brake pads for wear and tear; replace if necessary for optimal performance
Inspecting brake pads is a crucial step in maintaining your bike's braking system. Over time, brake pads can wear down due to friction and heat generated during braking. This wear can lead to reduced braking performance, longer stopping distances, and increased risk of accidents. Regularly checking your brake pads for signs of wear and replacing them when necessary is essential for ensuring your bike's brakes function optimally.
To inspect your brake pads, start by removing the wheel from the bike. This will give you better access to the brake pads and allow you to examine them more closely. Next, locate the brake pads on the brake caliper. They are typically rectangular in shape and made of a composite material. Look for any signs of wear, such as uneven surfaces, cracks, or significant thinning of the pad material.
If you notice any of these signs of wear, it's time to replace the brake pads. To do this, you'll need to remove the old pads from the brake caliper and install new ones. Make sure to follow the manufacturer's instructions for your specific brake system, as the process can vary depending on the type of brakes you have.
When replacing brake pads, it's important to choose the right type for your bike. There are different types of brake pads available, such as organic, semi-metallic, and metallic. Each type has its own advantages and disadvantages, so consider factors like your riding style, the conditions you typically ride in, and your budget when selecting new brake pads.
After replacing the brake pads, it's a good idea to test your brakes to ensure they are functioning properly. Go for a short ride and apply your brakes gently at first, gradually increasing the pressure to make sure they are responsive and effective. If you notice any issues, such as squealing or spongy brakes, you may need to adjust the brake caliper or bleed the brake lines to remove any air bubbles.
In conclusion, regularly inspecting and replacing your bike's brake pads is a simple yet important maintenance task that can help ensure your safety and improve your riding experience. By following these steps and staying attentive to the condition of your brake pads, you can keep your bike's brakes in top-notch condition.
Mastering the Art of BMX Bike Brake Removal: A Step-by-Step Guide
You may want to see also
Explore related products


Adjust Brake Tension: Use the barrel adjuster to fine-tune the tension of the brake cable
To adjust the brake tension on your bike, locate the barrel adjuster, which is typically found where the brake cable enters the brake caliper. This small, cylindrical component allows you to fine-tune the tension of the brake cable with precision. Begin by identifying the correct barrel adjuster for the brake you wish to adjust—front or rear.
Once you've located the appropriate barrel adjuster, use a Phillips-head screwdriver to turn it clockwise. This action will increase the tension on the brake cable, causing the brake pads to move closer to the rim. Test the brake by squeezing the lever to ensure it engages properly. If the brake feels too tight or the pads rub against the rim when the wheel is spinning, you may need to reduce the tension.
To decrease the tension, turn the barrel adjuster counterclockwise. This will loosen the brake cable, allowing the pads to move further away from the rim. Again, test the brake to ensure it functions correctly. Repeat this process of adjusting and testing until you achieve the desired brake tension.
Remember to check both brakes and ensure they are functioning correctly before riding. Properly adjusted brakes are crucial for safe and efficient cycling. If you're unsure about any part of this process, consult your bike's manual or seek assistance from a professional mechanic.
Effortless Maintenance: Swapping Out Bike Disk Brake Pads
You may want to see also
Explore related products


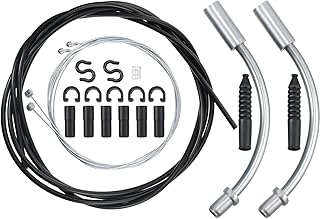

Align Brake Calipers: Ensure calipers are properly aligned with the rim or rotor for effective braking
To ensure your bike's brake calipers are properly aligned with the rim or rotor, start by checking the caliper's position relative to the wheel. The caliper should be centered over the rotor or rim, with the brake pads making even contact with the braking surface. If the caliper is misaligned, it can lead to uneven braking, reduced stopping power, and even damage to the wheel or brake components.
Begin by loosening the caliper mounting bolts just enough to allow for adjustment. Be careful not to remove them completely, as this could cause the caliper to become detached from the frame or fork. Once the bolts are loosened, gently move the caliper into the correct position, ensuring that it is parallel to the rotor or rim and that the brake pads are making proper contact.
After adjusting the caliper's position, retighten the mounting bolts in a crisscross pattern to ensure even pressure distribution. It's important to avoid over-tightening the bolts, as this can cause the caliper to warp or become damaged. Once the bolts are securely tightened, test the brakes to ensure they are functioning properly and making even contact with the rotor or rim.
In some cases, you may need to adjust the brake pads themselves to ensure proper alignment. This can be done by loosening the pad retention screws and gently moving the pads into the correct position. Be sure to check the brake pad wear indicator to ensure that the pads are not worn beyond their safe limit.
Regularly checking and adjusting your bike's brake calipers is an essential part of maintaining safe and effective braking performance. By following these steps, you can ensure that your brakes are functioning properly and provide reliable stopping power when you need it most.
Fixing Your Ride: A Step-by-Step Guide to Repairing a Bike's Back Brake Line
You may want to see also
Explore related products


Test and Fine-Tune: After adjustments, test the brakes and make further tweaks as needed for safety
After making initial adjustments to your bike brakes, it's crucial to test them thoroughly to ensure they're functioning correctly and safely. Begin by taking your bike to a flat, open area where you can ride without obstacles. Apply the brakes gently at first, noting how they respond. If the brakes feel spongy or don't engage immediately, you may need to bleed them to remove any air bubbles. This process involves opening the brake lever reservoir, attaching a bleed kit, and slowly pressing the brake lever to force out any trapped air.
Once the brakes feel firm, test them under different conditions. Ride at various speeds and apply the brakes with different levels of force. Pay attention to how the brakes perform when you're turning or riding on uneven surfaces. If you notice any squeaking or grinding noises, it could indicate that the brake pads are misaligned or worn out. In this case, you'll need to replace the pads or adjust their position.
It's also important to check the brake cables for any signs of wear or fraying. If you find any damage, replace the cables immediately to prevent brake failure. After testing, make any necessary adjustments to the brake calipers or levers to ensure they're properly aligned and functioning smoothly.
Remember, safety should always be your top priority when working on your bike brakes. If you're unsure about any part of the process, it's best to consult a professional mechanic. They can provide expert advice and ensure that your brakes are in top condition for safe riding.
Effortless Riding: A Guide to Removing Hand Brakes from Your Bike
You may want to see also