Megan Blake
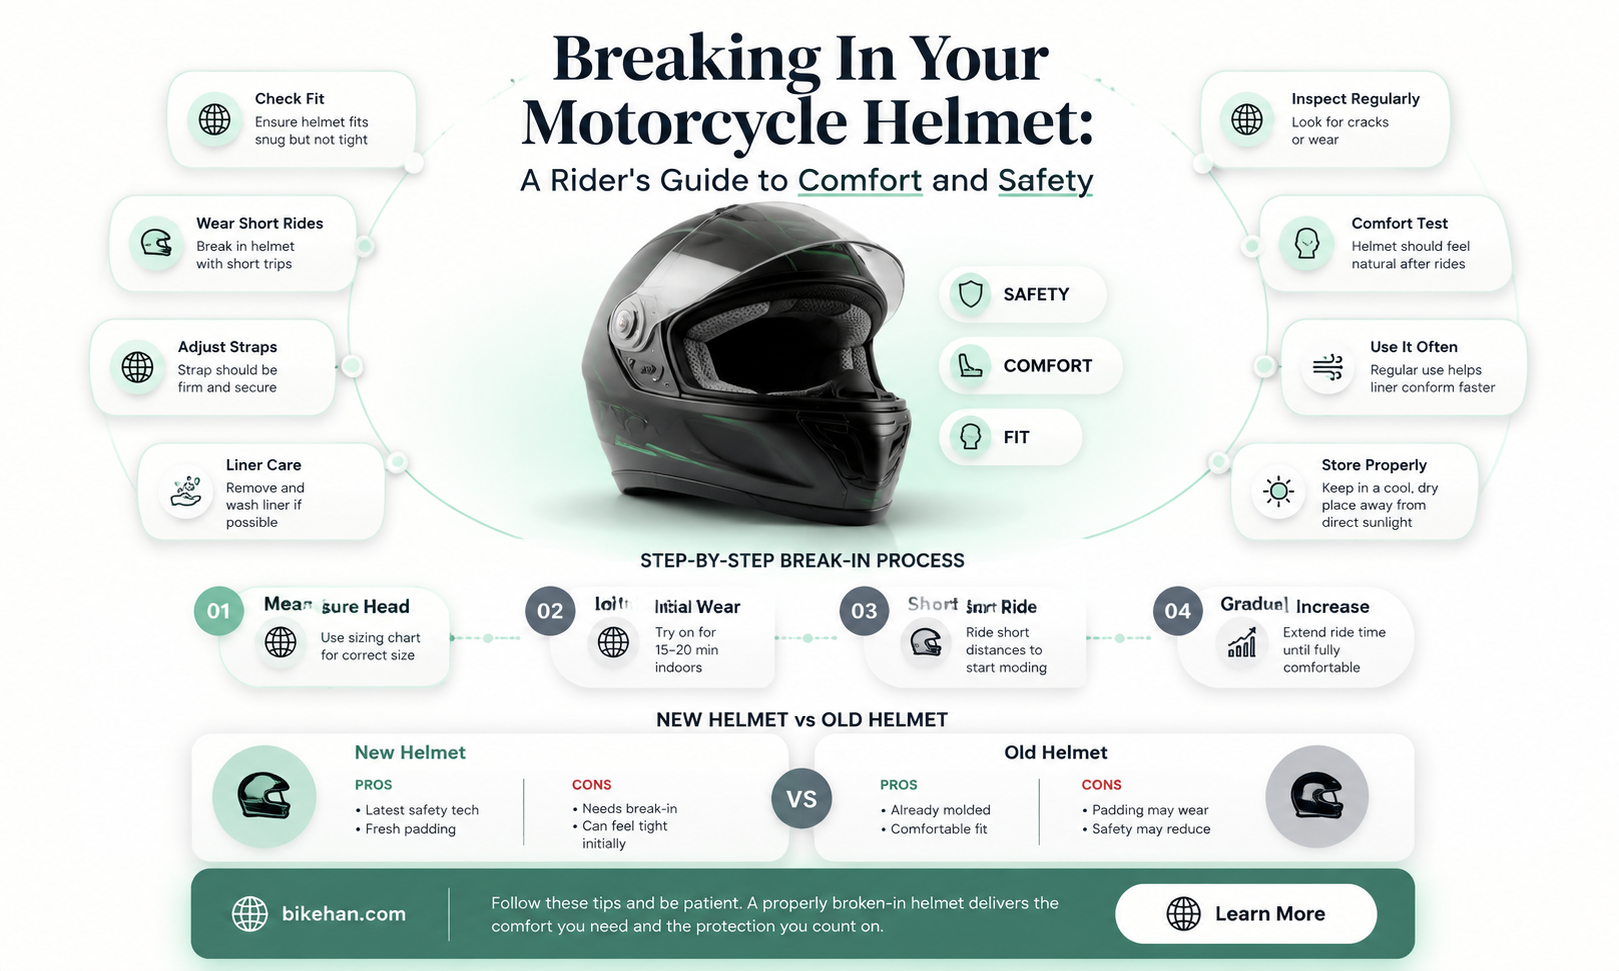
Breaking in a motorcycle helmet is an essential process to ensure both comfort and safety for the rider. A new helmet can feel stiff and uncomfortable, which may distract the rider or even cause discomfort during long rides. Properly breaking in a helmet involves a combination of techniques to soften the interior padding and adjust the fit to the rider's head shape. This process not only enhances comfort but also ensures that the helmet fits securely, providing optimal protection in the event of an accident. In this guide, we will explore effective methods to break in a motorcycle helmet, including wearing it regularly, using specialized products, and following manufacturer recommendations. By following these steps, riders can ensure their helmet is well-fitted, comfortable, and ready for safe riding.
Explore related products


What You'll Learn
- Choosing the Right Helmet: Select a helmet that fits snugly and is certified for safety
- Initial Fitting: Ensure the helmet is comfortable and secure before any adjustments
- Breaking In the Padding: Wear the helmet for short periods to mold the padding to your head
- Adjusting the Straps: Properly adjust and secure the chin straps for a safe fit
- Testing the Fit: After breaking in, test the helmet's fit and comfort during a short ride

Choosing the Right Helmet: Select a helmet that fits snugly and is certified for safety
A well-fitted helmet is crucial for both comfort and safety when riding a motorcycle. To ensure you select the right helmet, start by measuring your head circumference with a flexible tape measure. This measurement will help you determine the appropriate helmet size. When trying on helmets, make sure the chin strap is snug but not too tight, and the helmet should sit comfortably on your head without any pressure points.
Safety certification is another critical factor to consider. Look for helmets that meet the safety standards set by organizations such as the Department of Transportation (DOT) in the United States, the Economic Commission for Europe (ECE) in Europe, or the Snell Memorial Foundation. These certifications ensure that the helmet has undergone rigorous testing and meets specific safety criteria.
In addition to fit and certification, consider the helmet's construction and materials. Full-face helmets offer the most protection, covering your entire head and face, while open-face helmets provide less coverage but more ventilation. Modular helmets are a versatile option, allowing you to raise the chin bar for better airflow when needed.
When selecting a helmet, it's also important to consider your riding style and environment. For example, if you frequently ride in hot and humid conditions, a helmet with good ventilation will be more comfortable. If you ride in a noisy environment, a helmet with sound-dampening features may be beneficial.
Finally, don't forget to check the helmet's weight and balance. A lighter helmet will be more comfortable to wear for extended periods, and a well-balanced helmet will reduce neck strain. By considering all these factors, you can choose a helmet that not only fits well and is certified for safety but also meets your specific needs and preferences as a rider.
Reviving Old Motorcycle Helmets: Creative Reuse Ideas
You may want to see also
Explore related products




Initial Fitting: Ensure the helmet is comfortable and secure before any adjustments
Before making any adjustments to your new motorcycle helmet, it's crucial to ensure that it fits comfortably and securely on your head. This initial fitting process is the foundation for a safe and enjoyable riding experience. Start by placing the helmet on your head without fastening the chin strap. The helmet should sit snugly but not so tight that it causes discomfort or restricts your vision. Pay attention to any pressure points or areas where the helmet feels too loose.
Next, fasten the chin strap and adjust it so that it fits securely under your chin. The strap should be tight enough to prevent the helmet from moving around but not so tight that it causes discomfort or restricts your ability to open your mouth. Make sure the helmet is level on your head and that the visor is aligned properly with your eyes.
It's important to note that different helmet styles and brands may have slightly different fitting procedures. Always refer to the manufacturer's instructions for specific guidance on how to properly fit your helmet. Additionally, consider factors such as the thickness of your hair and whether you'll be wearing glasses or other accessories while riding.
Once you've ensured a comfortable and secure fit, you can move on to making any necessary adjustments to the helmet's ventilation, padding, or other features. Remember, a well-fitted helmet is essential for protecting your head in the event of an accident, so take the time to get it right before hitting the road.
Missouri Motorcycle Helmet Laws: What You Need to Know
You may want to see also
Explore related products


Breaking In the Padding: Wear the helmet for short periods to mold the padding to your head
Wearing a motorcycle helmet is crucial for safety, but a new helmet can feel stiff and uncomfortable. Breaking in the padding is essential to ensure a snug and comfortable fit. To do this, wear the helmet for short periods, ideally 10-15 minutes at a time, several times a day. This allows the padding to gradually mold to the shape of your head, providing a customized fit that enhances both comfort and safety.
During the break-in period, pay attention to any pressure points or areas of discomfort. Adjust the helmet's straps and padding as needed to alleviate these issues. It's also helpful to wear the helmet while performing everyday activities, such as walking or doing chores, to expedite the break-in process.
Avoid using excessive force or heat to speed up the break-in process, as this can damage the helmet's materials and compromise its safety features. Instead, focus on gradual, consistent wear. With time and patience, the helmet will become more comfortable and provide better protection while riding.
Remember, a properly broken-in helmet is more likely to stay securely in place during a ride, reducing the risk of it coming off in the event of an accident. By taking the time to break in the padding, you're not only enhancing your comfort but also improving your overall safety on the road.
Illinois Motorcycle Helmet Law: What You Need to Know
You may want to see also
Explore related products


Adjusting the Straps: Properly adjust and secure the chin straps for a safe fit
Begin by ensuring the helmet is on your head correctly, with the front edge sitting just above your eyebrows. The chin straps should be snug but not tight, allowing for one finger to fit comfortably between the strap and your chin. If the straps are too loose, they won't provide adequate protection in the event of an accident. Conversely, if they're too tight, they can cause discomfort and even restrict blood flow.
To adjust the straps, start by locating the adjustment mechanism, which is typically found on the sides of the helmet near the chin. This mechanism may involve a sliding buckle or a ratcheting system. Carefully manipulate the adjustment mechanism to tighten or loosen the straps as needed. It's important to adjust both straps equally to ensure even pressure distribution.
Once the straps are adjusted to your liking, secure them by fastening the buckle or locking the ratcheting system in place. Make sure the buckle is fully engaged and that there's no slack in the straps. If your helmet has a quick-release buckle, ensure that it's properly locked to prevent accidental opening.
After securing the straps, perform a final check to ensure the helmet is properly fitted. Shake your head gently from side to side and front to back. The helmet should remain securely in place without any significant movement. If it does move, you may need to readjust the straps or consider a different helmet size.
Remember, a properly adjusted helmet is crucial for your safety while riding. Take the time to ensure a comfortable and secure fit, and always double-check your adjustments before hitting the road.
Indiana Motorcycle Helmet Laws: What You Need to Know
You may want to see also
Explore related products



Testing the Fit: After breaking in, test the helmet's fit and comfort during a short ride
After breaking in your motorcycle helmet, the next crucial step is to test its fit and comfort during a short ride. This phase is essential to ensure that the helmet not only fits snugly but also provides the necessary comfort and safety for longer journeys. Start by putting on the helmet and fastening the chin strap securely. Make sure the strap is tight enough to prevent the helmet from coming off in case of an accident but not so tight that it causes discomfort or restricts blood flow to your face.
Next, check the positioning of the helmet on your head. It should sit level and cover your forehead without tilting too far forward or backward. The cheek pads should fit flush against your cheeks without pressing too hard, and there should be no gaps between the helmet and your head that could allow wind or debris to enter. If you feel any pressure points or discomfort, adjust the helmet's position or consider using additional padding or inserts to improve the fit.
While wearing the helmet, move your head from side to side and up and down to simulate the motions you would make while riding. This will help you identify any areas where the helmet might be too tight or too loose. Additionally, pay attention to the helmet's weight distribution. A well-fitted helmet should not cause strain on your neck or shoulders, even during extended periods of wear.
Finally, take the helmet for a short test ride to assess its comfort and performance in real-world conditions. Ride at a moderate speed and pay attention to how the helmet feels in terms of wind resistance, noise levels, and overall stability. If you experience any issues such as excessive wind noise, visor fogging, or discomfort, make adjustments to the helmet's fit or consider trying a different model that better suits your needs.
Remember, a properly fitted helmet is crucial for your safety and comfort while riding. By taking the time to test the fit and make necessary adjustments, you can ensure that your helmet provides the best possible protection and performance on the road.
Top Spots to Sell Your Motorcycle Helmets: A Comprehensive Guide
You may want to see also
Frequently asked questions
Breaking in a motorcycle helmet typically takes about 20 to 30 hours of riding. This process allows the helmet to conform to the shape of your head, ensuring a comfortable and secure fit.
To speed up the break-in process, you can wear the helmet around the house or while doing chores. Additionally, using a helmet break-in tool or applying heat with a hairdryer can help soften the foam and accelerate the molding process.
Breaking in a motorcycle helmet is crucial for safety and comfort. A well-fitted helmet provides better protection in case of an accident, as it ensures a snug fit that can absorb impact effectively. Moreover, a broken-in helmet reduces wind noise and prevents discomfort during long rides.