Samantha Lee
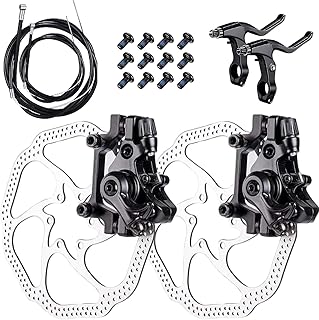
Repairing bike hand brakes can be a straightforward task with the right tools and knowledge. First, ensure your bike is safely positioned and the wheels are removed. Next, inspect the brake pads for wear and replace them if necessary. Check the brake cables for any fraying or damage and replace them as needed. Adjust the brake calipers to ensure they are properly aligned with the rims. Finally, test the brakes to ensure they are functioning smoothly and make any necessary adjustments.
Explore related products


What You'll Learn
- Identify the Problem: Determine if the issue is with the brake pads, cables, or levers
- Gather Tools: Assemble necessary tools like Allen wrenches, pliers, and brake cable housing
- Remove Brake Pads: Carefully detach the brake pads from the caliper to inspect or replace them
- Adjust Brake Cable: Ensure the cable is properly tensioned and lubricated for smooth operation
- Test and Fine-Tune: After repairs, test the brakes and make adjustments as needed for optimal performance

Identify the Problem: Determine if the issue is with the brake pads, cables, or levers
To identify the problem with your bike's hand brakes, start by inspecting the brake pads. Look for signs of wear, such as thinning or unevenness. If the pads appear worn out, they may need to be replaced. Next, check the brake cables for any fraying or damage. If the cables are intact, move on to the brake levers. Ensure that the levers are not loose and that they engage the brake mechanism properly.
If the brake pads are the issue, you'll need to replace them. Begin by removing the old pads and cleaning the brake caliper. Then, install the new pads and test the brakes to ensure they're functioning correctly. If the problem persists, it may be necessary to bleed the brakes to remove any air from the system.
If the brake cables are damaged, you'll need to replace them. Start by removing the old cables and routing the new ones through the frame. Then, attach the new cables to the brake levers and calipers, and adjust the tension as needed. Test the brakes to ensure they're working properly.
If the brake levers are the issue, you may need to adjust or replace them. Begin by checking the lever adjustment screws and tightening or loosening them as needed. If the levers are still not functioning properly, you may need to replace them. Remove the old levers and install the new ones, then test the brakes to ensure they're working correctly.
Remember to always test the brakes after making any adjustments or replacements to ensure they're functioning safely and effectively.
Mastering the Art of BMX Bike Brake Removal: A Step-by-Step Guide
You may want to see also
Explore related products


Gather Tools: Assemble necessary tools like Allen wrenches, pliers, and brake cable housing
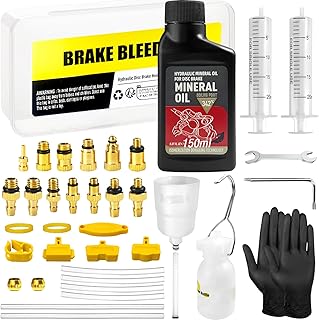
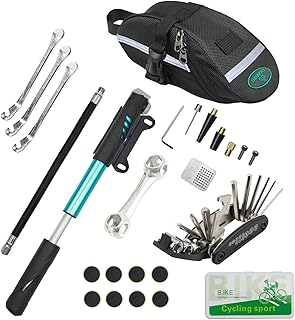
Before you begin the intricate process of repairing your bike's hand brakes, it's crucial to gather all the necessary tools. This ensures that you have everything you need at hand, preventing interruptions and potential complications during the repair. Essential tools include Allen wrenches of various sizes for adjusting bolts, pliers for gripping and manipulating small parts, and brake cable housing to protect and guide the brake cables. Additionally, having a set of screwdrivers, a torque wrench, and some lubricant can be beneficial for a thorough and efficient repair.
When assembling your toolkit, consider the specific type of hand brakes your bike is equipped with, as different systems may require unique tools. For instance, hydraulic brakes might necessitate specialized tools for bleeding the system, while mechanical brakes may require additional cable housing and ferrules. It's also wise to have a rag and some cleaning solution on hand to remove any dirt or grime that could interfere with the repair process.
Once you've gathered all the necessary tools, lay them out in an organized manner to streamline your workflow. This not only saves time but also reduces the risk of misplacing or forgetting a crucial tool midway through the repair. If you're unsure about any of the tools or their uses, consult your bike's manual or seek guidance from a professional mechanic to ensure you have everything you need for a successful repair.
Remember, safety should always be a priority when working on your bike. Wear appropriate protective gear, such as gloves and safety glasses, and ensure your bike is securely positioned before beginning any repair work. With the right tools and a clear understanding of the process, you'll be well on your way to restoring your bike's hand brakes to optimal condition.
Effortlessly Remove Casing on Front Bike Brake Wires: A Guide
You may want to see also
Explore related products


Remove Brake Pads: Carefully detach the brake pads from the caliper to inspect or replace them
Begin by ensuring your bike is securely positioned on a flat surface, with the wheels removed to provide unobstructed access to the brake system. This step is crucial for safety and ease of work. Next, locate the brake caliper, which is typically mounted near the center of the wheel hub. It's essential to identify the correct caliper for the hand brakes you're working on, as some bikes may have multiple calipers.
Once you've identified the correct caliper, carefully remove the bolts that secure it to the bike frame. These bolts are usually located on the sides of the caliper and may require a specific size of Allen wrench or screwdriver. After loosening the bolts, gently pull the caliper away from the frame, taking care not to damage any of the components.
With the caliper removed, you'll need to detach the brake pads. This process can vary depending on the type of caliper you're working with, but generally, you'll need to remove a retaining clip or screw that holds the pads in place. Be cautious when removing the pads, as they may be under tension or have sharp edges.
Inspect the brake pads for wear and tear. If they're worn down to less than 1/8 inch, it's time to replace them. Even if they're not worn out, it's a good idea to clean them with a soft cloth and brake cleaner to remove any dirt or debris that may have accumulated.
When reinstalling the brake pads, ensure they're properly aligned with the caliper and securely fastened. Then, reattach the caliper to the bike frame, making sure the bolts are tightened to the correct torque specification. Finally, test the brakes to ensure they're functioning properly and make any necessary adjustments.
Effortlessly Remove Your Bike's Disc Brakes: A Step-by-Step Guide
You may want to see also
Explore related products

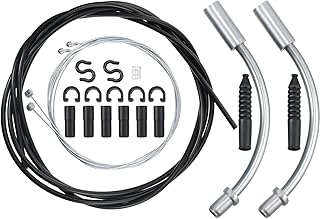


Adjust Brake Cable: Ensure the cable is properly tensioned and lubricated for smooth operation
Begin by inspecting the brake cable for any signs of wear or damage. Frayed or rusted cables should be replaced immediately to ensure safe operation. Assuming the cable is in good condition, proceed to check its tension. A properly tensioned brake cable should have a slight amount of slack when the brake lever is in the resting position. If the cable is too loose, it can lead to spongy brake performance, while an overly tight cable can cause the brakes to drag and wear out prematurely.
To adjust the tension, locate the barrel adjuster where the cable enters the brake caliper. Turn the adjuster clockwise to increase tension and counterclockwise to decrease it. Make small adjustments and test the brake lever after each turn. The goal is to achieve a balance where the brake lever feels firm but not stiff, and the brakes engage smoothly without any hesitation.
Once the tension is set correctly, it's essential to lubricate the cable to reduce friction and prolong its lifespan. Use a high-quality lubricant specifically designed for brake cables, applying a small amount to the entire length of the cable. Work the lubricant into the cable by gently flexing it back and forth. Wipe off any excess lubricant with a clean cloth to prevent dirt and debris from accumulating.
After lubricating the cable, recheck the tension and make any necessary adjustments. It's also a good idea to inspect the brake pads and caliper while you're working on the cable, as these components often wear out together. Replace any worn parts to ensure optimal braking performance and safety.
In summary, adjusting the brake cable on a bicycle is a crucial maintenance task that involves inspecting the cable for wear, adjusting its tension, and lubricating it for smooth operation. By following these steps and paying attention to the specific needs of your bike's braking system, you can ensure reliable and safe braking performance.
Effortless Brake Removal: A Step-by-Step Guide for Bike Enthusiasts
You may want to see also
Explore related products


Test and Fine-Tune: After repairs, test the brakes and make adjustments as needed for optimal performance
After completing the repairs on your bike's hand brakes, it's crucial to test and fine-tune them to ensure optimal performance and safety. Begin by taking your bike to a flat, open area where you can safely test the brakes without any obstacles. Start by gently squeezing the brake levers to check for any initial resistance or sponginess. If you feel any issues, you may need to bleed the brakes to remove any air bubbles or adjust the cable tension.
Next, perform a more thorough test by riding your bike at a moderate speed and applying the brakes firmly. Pay attention to how quickly the bike comes to a stop and whether the brakes engage smoothly or jerkily. If you notice any problems, such as uneven braking or excessive noise, you may need to adjust the brake pads or clean the brake rotors.
Fine-tuning your bike's hand brakes involves making small adjustments to achieve the best possible performance. This may include adjusting the brake lever reach to fit your hand size, changing the brake pad angle for better contact with the rotor, or tweaking the cable tension for a more responsive feel. Remember to make one adjustment at a time and test the brakes after each change to ensure you're getting the desired results.
It's also important to consider the specific conditions in which you'll be riding your bike. For example, if you plan to ride in wet or muddy conditions, you may need to use brake pads designed for better performance in those environments. Similarly, if you're a more aggressive rider, you may want to adjust the brakes for a firmer feel to give you more control during high-speed descents.
In conclusion, testing and fine-tuning your bike's hand brakes is a critical step in ensuring your safety and enjoyment while riding. By following these steps and making the necessary adjustments, you can achieve optimal brake performance and confidence on the road or trail.
Fixing Your Ride: A Step-by-Step Guide to Repairing Bike Brake Cables
You may want to see also
Frequently asked questions
You should inspect your bike's hand brakes regularly for signs of wear or damage. Look for frayed or stretched brake cables, worn brake pads, or any loose components. If you notice any of these issues or if your brakes aren't functioning properly, it's time for a repair.
To repair bike hand brakes, you'll typically need a few basic tools. These include a wrench or pliers for tightening and loosening nuts and bolts, a cable cutter for trimming brake cables, and a screwdriver for adjusting components. You may also need replacement parts like brake pads or cables.
To adjust the tension on your bike's hand brakes, start by locating the brake cable clamp on the handlebar. Loosen the clamp and pull the cable taut. Then, tighten the clamp to secure the cable in place. Test the brakes to ensure they're functioning properly and make further adjustments as needed.
When repairing bike hand brakes, it's important to avoid a few common mistakes. First, make sure you're using the correct replacement parts for your specific bike model. Second, be careful not to overtighten components, as this can damage the brakes or make them difficult to use. Finally, always test the brakes thoroughly after making any repairs to ensure they're functioning safely and effectively.