Samantha Lee
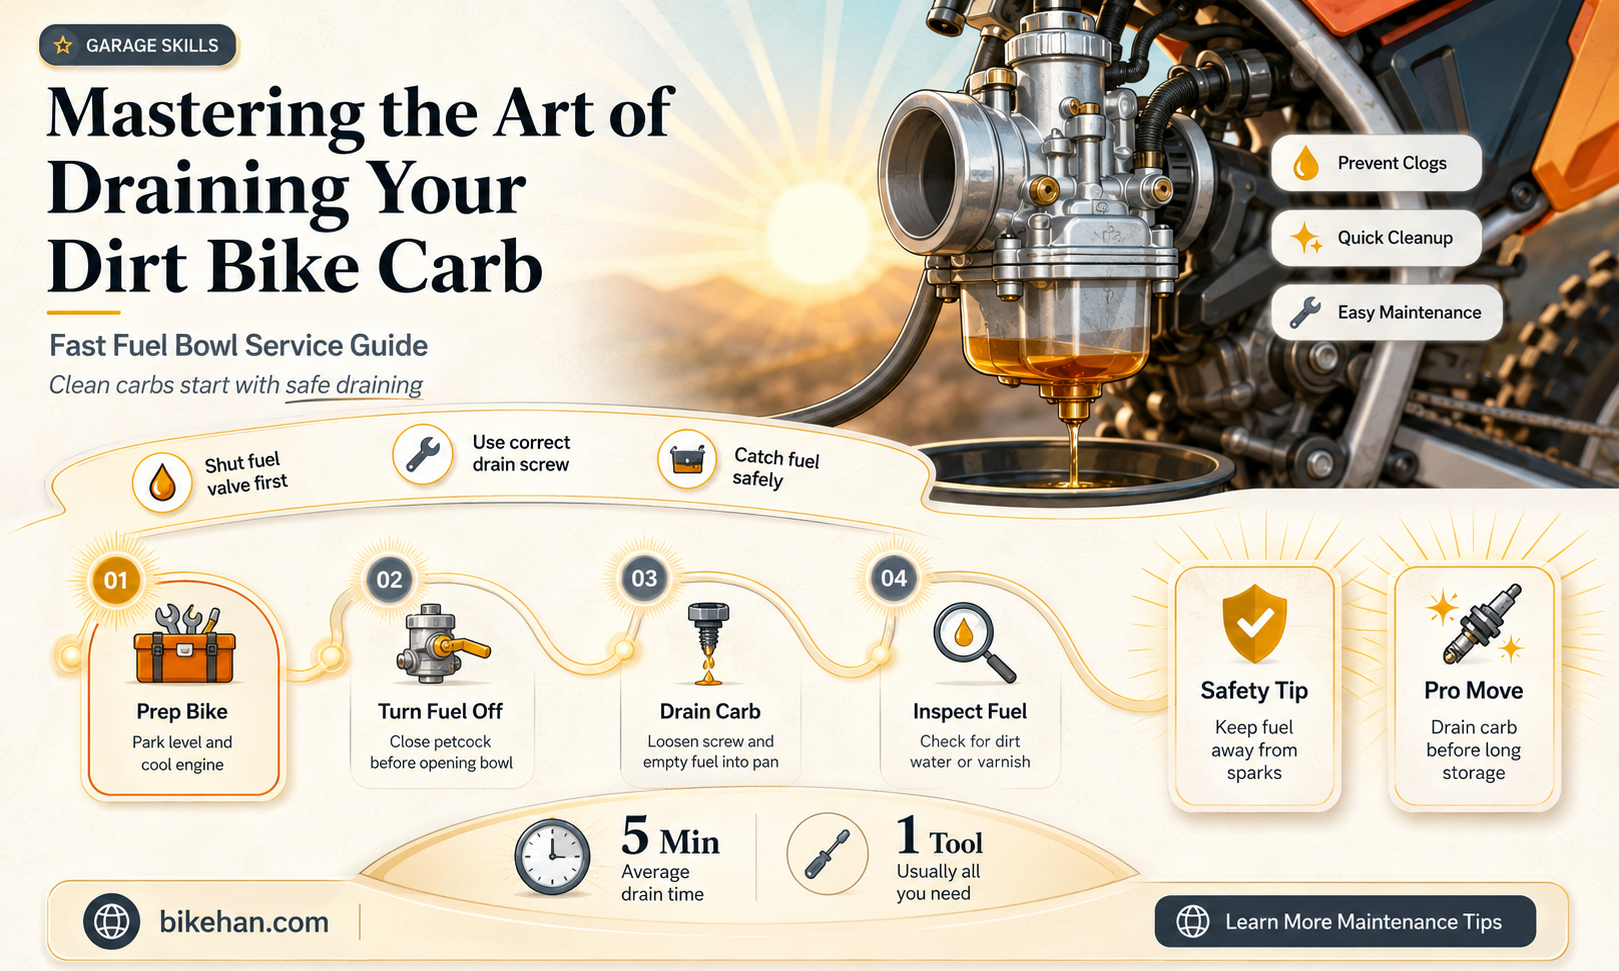
Draining the carburetor on a dirt bike is an essential maintenance task that helps ensure optimal engine performance and longevity. Over time, dirt and debris can accumulate in the carb, leading to clogs and inefficient fuel delivery. By learning how to properly drain the carb, you can prevent these issues and keep your dirt bike running smoothly. The process typically involves a few simple steps, including locating the drain screw, removing it, and allowing the old fuel and debris to drain out. It's important to perform this task carefully and follow proper safety precautions to avoid any potential hazards.
Explore related products


What You'll Learn
- Gather necessary tools: Screwdriver, pliers, wrench, drain pan, and safety gloves
- Turn off engine: Ensure the bike is cool and the engine is switched off before starting
- Locate the carb: Find the carburetor, typically near the engine's intake manifold
- Remove bowl plug: Carefully unscrew the plug to drain the fuel from the carb bowl
- Clean and inspect: After draining, clean the carb and check for any blockages or damage

Gather necessary tools: Screwdriver, pliers, wrench, drain pan, and safety gloves
Before diving into the intricacies of draining a dirt bike carburetor, it's crucial to assemble the right tools for the job. A screwdriver, pliers, wrench, drain pan, and safety gloves are the essential items you'll need. The screwdriver is used to remove screws that secure the carburetor in place, while the pliers can help in manipulating small parts and wires. The wrench is necessary for loosening and tightening bolts, ensuring a secure fit. A drain pan is vital to catch any fuel or debris that may spill during the process, preventing environmental contamination and making cleanup easier. Lastly, safety gloves protect your hands from sharp edges, chemicals, and grime, ensuring a safer working experience.
When selecting tools, consider the specific type and size of your dirt bike's carburetor. Some models may require specialized tools, so it's wise to consult your bike's manual or a professional mechanic if you're unsure. Investing in high-quality tools not only makes the job easier but also reduces the risk of damaging your bike or injuring yourself.
In addition to the basic tools, having a well-lit workspace and a stable surface to work on is essential. Good lighting helps you see small parts and potential issues more clearly, while a stable surface ensures that your bike remains steady during the process. If you're working outdoors, consider using a portable workbench or a sturdy table to provide a secure working environment.
Before you begin, it's important to disconnect the battery and turn off the fuel supply to prevent any accidental starts or fuel leaks. This safety precaution is crucial, especially when working with fuel systems. Once you've gathered your tools and prepared your workspace, you're ready to start the process of draining your dirt bike's carburetor.
Remember, safety should always be your top priority when working on your dirt bike. By taking the time to gather the necessary tools and prepare your workspace, you're setting yourself up for a successful and safe maintenance experience.
Dirt Bike Maintenance: The Complete Guide to Draining Your Gas Tank
You may want to see also
Explore related products


Turn off engine: Ensure the bike is cool and the engine is switched off before starting
Before beginning the process of draining a dirt bike carburetor, it's crucial to ensure the engine is completely cool and switched off. This safety measure prevents potential burns from hot engine components and reduces the risk of fuel spillage or other accidents. To confirm the engine is cool, you can touch the engine casing or exhaust pipe; if they're warm to the hot, wait until they've cooled down. Additionally, make sure the ignition is turned off to prevent any accidental engine starts during the draining process.
Once the engine is cool and off, you can proceed with draining the carburetor. Locate the drain screw on the bottom of the carburetor bowl and remove it using the appropriate size screwdriver. Be prepared for fuel to start flowing out, so have a container ready to catch the drained fuel. It's important to dispose of the old fuel properly, as it can be hazardous to the environment. Check your local regulations for fuel disposal guidelines.
After draining the old fuel, inspect the carburetor bowl for any debris or sediment. If you notice any buildup, clean the bowl thoroughly using a carburetor cleaner and a soft brush. This will help ensure optimal performance when you refill the carburetor with fresh fuel. Be cautious not to use too much cleaner, as it can damage the carburetor's internal components.
Before refilling the carburetor, it's a good idea to check the fuel filter and replace it if necessary. A clogged fuel filter can cause poor engine performance and may lead to further carburetor issues. Once the filter is checked or replaced, you can refill the carburetor with fresh fuel, making sure to use the correct type and octane rating recommended by your dirt bike's manufacturer.
After refilling the carburetor, reattach the drain screw and start the engine to check for any leaks or issues. If everything appears to be functioning properly, you're ready to ride. Remember to always follow proper safety procedures when working on your dirt bike, and consult your owner's manual for specific instructions related to your model.
Mastering the Art of Donuting on a Dirt Bike: A Step-by-Step Guide
You may want to see also
Explore related products


Locate the carb: Find the carburetor, typically near the engine's intake manifold
To locate the carburetor on a dirt bike, you'll need to familiarize yourself with the engine's layout. The carburetor is typically situated near the engine's intake manifold, which is the part responsible for distributing the air-fuel mixture to the cylinders. Start by removing the seat and any protective covers to expose the engine. You'll likely find the carburetor on the side of the engine, connected to the intake manifold via a series of hoses or pipes.
Once you've located the carburetor, it's essential to identify the drain plug, which is usually found at the bottom of the carburetor bowl. This plug is responsible for releasing the old fuel and any accumulated debris from the carburetor. Make sure to have a container ready to catch the drained fuel, as it can be messy and potentially hazardous.
Before proceeding with the draining process, it's crucial to ensure that the bike is on a level surface and that the engine is turned off. This will prevent any accidental spills or injuries. Additionally, it's recommended to wear gloves and safety glasses to protect yourself from any harmful chemicals or sharp edges.
To drain the carburetor, start by loosening the drain plug using a wrench or socket set. Be careful not to overtighten, as this can damage the plug or the carburetor itself. Once the plug is loose, allow the old fuel to drain completely into your container. If the fuel flow is slow or restricted, you may need to gently tap the carburetor to encourage the fuel to release.
After the carburetor has been drained, it's a good idea to inspect it for any signs of damage or wear. Check the hoses and pipes for cracks or leaks, and ensure that the throttle plate is clean and free of debris. If you notice any issues, it's best to address them before reassembling the carburetor and testing the bike.
Remember, proper maintenance of your dirt bike's carburetor is essential for optimal performance and longevity. Regular draining and cleaning can help prevent clogs, improve fuel efficiency, and ensure a smooth and responsive ride. By following these steps and taking the necessary precautions, you can safely and effectively drain your dirt bike's carburetor.
Mastering the Art of Whoops on Your Dirt Bike: A Step-by-Step Guide
You may want to see also
Explore related products


Remove bowl plug: Carefully unscrew the plug to drain the fuel from the carb bowl
To remove the bowl plug and drain the fuel from the carb bowl, you'll need to follow a precise sequence of steps. First, ensure the dirt bike is on a level surface and the engine is off. Locate the carb bowl, which is typically found beneath the carburetor. You'll see a plug on the side or bottom of the bowl; this is the bowl plug you need to remove.
Using the appropriate size wrench or socket, carefully unscrew the bowl plug in a counterclockwise direction. Be cautious not to overtighten or strip the plug, as this can cause damage to the carb bowl. Once the plug is removed, allow the fuel to drain completely from the bowl. It's essential to do this slowly and carefully to avoid spilling fuel, which can be hazardous and potentially damage the surrounding components.
As the fuel drains, inspect the carb bowl for any signs of dirt, debris, or corrosion. If you notice any buildup, it's a good idea to clean the bowl thoroughly before reinstalling the plug. This will help ensure optimal performance and prevent any issues with the fuel mixture.
After the fuel has drained and the bowl is clean, carefully screw the bowl plug back into place in a clockwise direction. Make sure the plug is tight but not over-tightened, as this can cause leaks or damage to the bowl. Once the plug is securely in place, you can start the engine and check for any leaks or issues with the fuel flow.
Remember, safety is paramount when working with fuel and engines. Always wear protective gloves and eyewear, and work in a well-ventilated area to avoid inhaling fumes. If you're unsure about any part of the process, it's best to consult a professional mechanic to ensure the job is done correctly and safely.
Dirt Bike Maintenance: The Complete Guide to Draining Your Carburetor
You may want to see also
Explore related products


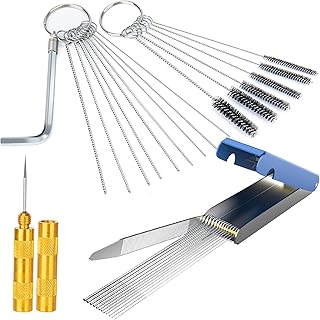
Clean and inspect: After draining, clean the carb and check for any blockages or damage
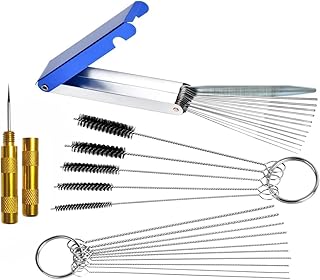
Begin by disassembling the carburetor into its main components, such as the float bowl, jet block, and throttle body. This will allow for a thorough inspection and cleaning of each part. Use a soft-bristled brush and a specialized carburetor cleaner to remove any dirt, grime, or old fuel residue. Be sure to clean the jets and passages thoroughly, as any blockages can significantly impact the bike's performance.
Inspect the float bowl for any signs of damage or wear, such as cracks or pitting. Check the float itself for proper operation and replace it if necessary. The jet block should be examined for any blockages or corrosion, and the throttle body should be checked for smooth operation and any signs of wear.
Once the components are clean and inspected, reassemble the carburetor, making sure to tighten all bolts and screws to the manufacturer's specifications. It's important to note that improper reassembly can lead to further issues, so take care to follow the correct procedure.
After reassembly, it's a good idea to test the carburetor's performance by starting the bike and checking for any signs of issues, such as hesitation or stalling. If any problems persist, further inspection and cleaning may be necessary.
Remember to always refer to the manufacturer's manual for specific instructions and guidelines related to your particular dirt bike model. By following these steps and taking the time to properly clean and inspect your carburetor, you can ensure optimal performance and extend the life of your dirt bike.
Dirt Bike Drag Racing 101: Tips and Techniques to Get You Started
You may want to see also
Frequently asked questions
To drain a dirt bike carb, you'll need a few basic tools: a wrench or socket set to remove the carb, a screwdriver to open the carb drain screw, and a container to catch the drained fuel. Additionally, having a carb cleaning kit can be helpful for thorough maintenance.
To safely remove the carburetor from your dirt bike, start by turning off the fuel supply and draining the fuel from the tank. Then, use a wrench or socket set to loosen and remove the bolts securing the carb to the engine. Carefully pull the carb away from the engine, taking note of any electrical connections or hoses that may need to be disconnected.
When draining the fuel from the carburetor, it's important to work in a well-ventilated area to avoid inhaling fumes. Wear protective gloves and eyewear to prevent skin and eye irritation. Make sure to have a container ready to catch the drained fuel, and dispose of it properly according to local regulations.
It's recommended to drain and clean your dirt bike carb regularly, especially after riding in dirty or dusty conditions. A clogged carb can lead to poor performance and decreased fuel efficiency. Depending on your riding habits, draining and cleaning the carb every few rides or at least once a month can help maintain optimal performance.