Samantha Lee
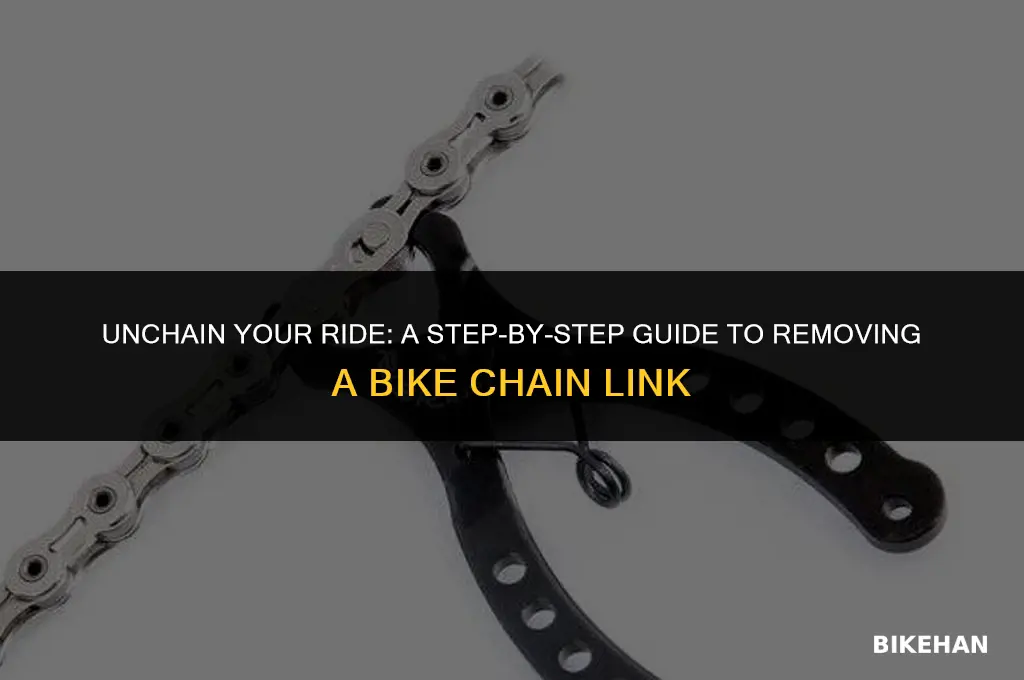
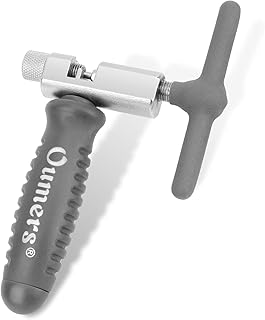
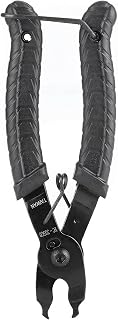
Removing a chain link from a bicycle is a common maintenance task that can be performed with the right tools and a bit of know-how. To begin, you'll need to gather a few essential items: a chain tool, which is specifically designed to push out the pins that hold the chain links together, and a replacement pin if you plan to reattach the chain after removal. Start by positioning the chain on the chain tool, ensuring that the pin you wish to remove is aligned with the tool's pushing mechanism. Then, carefully apply pressure to the handle of the chain tool to drive the pin out of the chain link. It's important to do this slowly and steadily to avoid damaging the chain or the bike's components. Once the pin is removed, you can separate the chain links and proceed with your repair or replacement. Remember to always follow proper safety procedures when working on your bike, and consult a professional if you're unsure about any part of the process.
Explore related products


What You'll Learn
- Gather necessary tools: Assemble pliers, screwdrivers, and a chain tool for efficient removal
- Position the bike: Place the bicycle on a stable surface or use a bike stand for easy access
- Locate the chain link: Identify the specific link to be removed, ensuring it's not under tension
- Use the chain tool: Insert the chain tool into the link, following the tool's instructions to push out the pin
- Remove and replace: Carefully extract the link, and if necessary, replace it with a new one using the same method

Gather necessary tools: Assemble pliers, screwdrivers, and a chain tool for efficient removal
To efficiently remove a chain link from a bike, it's crucial to have the right tools at hand. The essential items for this task include a pair of pliers, a set of screwdrivers, and a specialized chain tool. The pliers will be used to grip and manipulate the chain pins, while the screwdrivers can assist in prying out the pins if they are stubborn. The chain tool, however, is the most critical component as it is specifically designed to push out the pins without damaging the chain or the bike frame.
Before beginning the removal process, ensure that the bike is securely positioned and the chain is properly aligned. This will prevent any unnecessary strain on the chain and reduce the risk of injury. It's also advisable to wear protective gloves to safeguard your hands from sharp edges and grease.
Start by using the chain tool to push out the pin of the chain link you wish to remove. Apply steady pressure and be cautious not to force the pin out too quickly, as this could cause it to snap or damage the surrounding links. Once the pin is partially out, use the pliers to grip it and gently pull it out the rest of the way.
After removing the pin, carefully separate the chain link from the rest of the chain. Be mindful of the direction in which you are pulling to avoid catching the chain on the bike's gears or frame. With the link removed, you can now proceed to replace it with a new one or perform any necessary repairs.
Remember to always follow the manufacturer's instructions for your specific bike model and chain type. Additionally, it's a good practice to clean and lubricate the chain regularly to maintain its performance and prolong its lifespan. By gathering the necessary tools and following these steps, you can efficiently remove a chain link from your bike and ensure a smooth and safe riding experience.
Single Speed Bike Maintenance: A Guide to Chain Replacement
You may want to see also
Explore related products


Position the bike: Place the bicycle on a stable surface or use a bike stand for easy access
To effectively remove a chain link from a bike, it's crucial to first position the bike correctly. This ensures stability and easy access to the chain, making the task safer and more manageable. Start by placing the bicycle on a flat, stable surface such as a concrete floor or a sturdy table. This prevents the bike from tipping over and causing potential damage or injury. If you have access to a bike stand, use it to elevate the bike to a comfortable working height. Bike stands are designed to hold the bike securely, allowing you to work on the chain without worrying about the bike falling or moving unexpectedly.
When positioning the bike, make sure the chain is visible and accessible. If the bike has a derailleur, ensure that the derailleur is in the correct position to allow for easy removal of the chain. This might involve shifting the gears to align the chain properly. Once the bike is positioned, gather your tools—you'll need a chain tool or a pair of pliers, and possibly a lubricant if the chain is rusty or stiff.
Before you begin the process of removing the chain link, it's important to inspect the chain for any signs of wear or damage. Look for rust, kinks, or stretched links, as these can affect the performance of the bike and may require additional maintenance. If you notice any issues, make a note to address them once you've removed the chain link.
To remove the chain link, use the chain tool or pliers to push out the pin that holds the link in place. Be careful not to push too hard, as this can cause the pin to snap or the link to break. If the pin is stuck, you may need to apply some lubricant to loosen it. Once the pin is removed, carefully separate the chain link from the rest of the chain.
After removing the chain link, inspect it closely to determine if it needs to be replaced or if it can be reinstalled. If the link is damaged or worn, it's best to replace it with a new one. If it appears to be in good condition, you can reinsert the pin and reattach the link to the chain. Make sure the pin is securely in place and that the chain moves smoothly before reassembling the bike.
Finally, once the chain link is removed or replaced, take a moment to clean and lubricate the chain. This will help ensure smooth operation and prolong the life of the chain. With the bike properly positioned and the chain link removed, you're ready to move on to the next step in maintaining or repairing your bike.
Effortless Cycling: Mastering the Art of 7-Speed Bike Chain Replacement
You may want to see also
Explore related products


Locate the chain link: Identify the specific link to be removed, ensuring it's not under tension
To locate the chain link that needs to be removed from a bike, begin by inspecting the chain for any signs of wear, damage, or misalignment. Look for links that are bent, stretched, or have become discolored, as these are common indicators that a link may need to be replaced. Once you've identified a suspect link, it's crucial to ensure that it's not under tension. This can be done by gently pulling on the chain in the area around the link to see if there's any slack. If the chain feels taut, you may need to adjust the derailleur or loosen the chain tension before proceeding.
When you've confirmed that the link is not under tension, use a chain tool to carefully push out the pin that holds the link in place. Be sure to align the chain tool properly with the pin and apply steady pressure to avoid damaging the chain or the tool. As you push the pin out, keep an eye on the surrounding links to ensure that they don't become dislodged or damaged in the process. Once the pin is fully removed, you can separate the link from the chain.
Before removing the link, it's important to consider the type of chain you're working with. Some chains have a directional design, with one side intended to face the front of the bike and the other side the rear. Make sure you're removing the link from the correct side of the chain to avoid reinstalling it incorrectly. Additionally, be aware of any special features or coatings on the chain, as these may require specific handling or replacement procedures.
After removing the damaged link, inspect the surrounding links for any signs of wear or damage. If you find additional links that need to be replaced, repeat the process of locating, isolating, and removing them. Once you've removed all the necessary links, you can proceed with replacing them or reinstalling the chain, ensuring that it's properly aligned and tensioned.
Remember to always follow the manufacturer's guidelines for your specific bike and chain when performing maintenance or repairs. If you're unsure about any aspect of the process, it's best to consult a professional mechanic to avoid causing further damage to your bike.
Effortless Cycling: Mastering the Art of Chain Replacement
You may want to see also
Explore related products


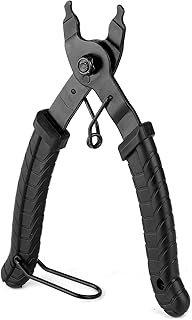

Use the chain tool: Insert the chain tool into the link, following the tool's instructions to push out the pin
To remove a chain link from a bike using a chain tool, begin by inserting the chain tool into the link you wish to remove. Ensure that the tool is properly aligned with the pin you need to push out. Follow the manufacturer's instructions for your specific chain tool, as the process may vary slightly depending on the tool's design. Typically, you will need to turn the handle of the chain tool to drive the pin out of the link. Apply steady pressure and rotate the handle until the pin is fully removed.
It's important to note that the chain tool should be inserted from the side of the link that allows the pin to be pushed out towards the opposite side. This is usually indicated by an arrow or marking on the chain tool itself. If you're unsure, consult the tool's manual or look for online resources specific to your chain tool model.
Once the pin is removed, carefully separate the two halves of the chain link. Be cautious not to damage the surrounding links or the chain itself. If you're removing multiple links, repeat the process for each link, ensuring that you keep track of the order in which you remove them. This will make reassembly easier if you need to put the chain back together.
After removing the desired number of links, inspect the chain for any damage or wear. If the chain appears to be in good condition, you can proceed with reassembly. If not, consider replacing the chain to ensure safe and efficient operation of your bike.
Remember to always work in a well-lit area and use proper safety equipment, such as gloves, to protect your hands during this process. If you're unsure about any step, it's best to consult a professional bike mechanic to avoid potential damage to your bike or injury to yourself.
Fix Your Ride: A Step-by-Step Guide to Replacing a Broken Bike Chain
You may want to see also
Explore related products


Remove and replace: Carefully extract the link, and if necessary, replace it with a new one using the same method
To remove a chain link from a bike, you'll need to carefully extract the link without damaging the surrounding chain or bike components. Start by identifying the link you want to remove and ensure the bike is securely positioned to prevent any accidental movement. Using a chain tool, which is specifically designed for this task, align the tool with the link you want to remove. The chain tool should fit snugly around the link, allowing you to apply pressure to push the link out.
Once the chain tool is in place, apply steady pressure to push the link out of the chain. It's important to do this slowly and carefully to avoid damaging the link or the chain. If the link is particularly stubborn, you may need to use a bit more force, but always be mindful of the surrounding components. After the link has been removed, inspect it for any damage or wear. If the link is damaged or excessively worn, it's best to replace it with a new one to ensure the safety and efficiency of your bike's chain.
To replace the link, follow the same process in reverse. Align the new link with the gap in the chain where the old link was removed. Using the chain tool, apply pressure to push the new link into place. Make sure the link is securely seated and that the chain moves smoothly. Once the new link is in place, test the chain by pedaling the bike to ensure it's functioning properly.
When removing and replacing a chain link, it's crucial to avoid damaging the chain or bike components. Always use the appropriate tools and take your time to ensure the task is done correctly. If you're unsure about the process or encounter any difficulties, it's best to consult a professional bike mechanic to avoid any potential safety hazards.
Mastering the Art of Riveting a Bike Chain: A Step-by-Step Guide
You may want to see also
Frequently asked questions
To remove a chain link from a bike, you'll need a chain tool, which is specifically designed for this purpose. You may also need a wrench or pliers to assist with the process.
The correct link to remove is usually the one that is causing the chain to be too long or too short. If you're shortening the chain, you'll want to remove a link near the rear derailleur. If you're lengthening the chain, you may need to remove a link near the front derailleur.
The first step is to shift the chain to the correct position so that the link you want to remove is aligned with the chain tool. This will make it easier to access and remove the link.
Place the chain tool around the link you want to remove, making sure that the tool is aligned with the pins of the link. Then, turn the handle of the tool to push the pins out of the link. You may need to use a wrench or pliers to help push the pins out.
After removing the chain link, you should clean the chain and the area around the derailleur to remove any dirt or debris. Then, you can reattach the chain to the bike, making sure that it is properly aligned and lubricated.