 Megan Blake
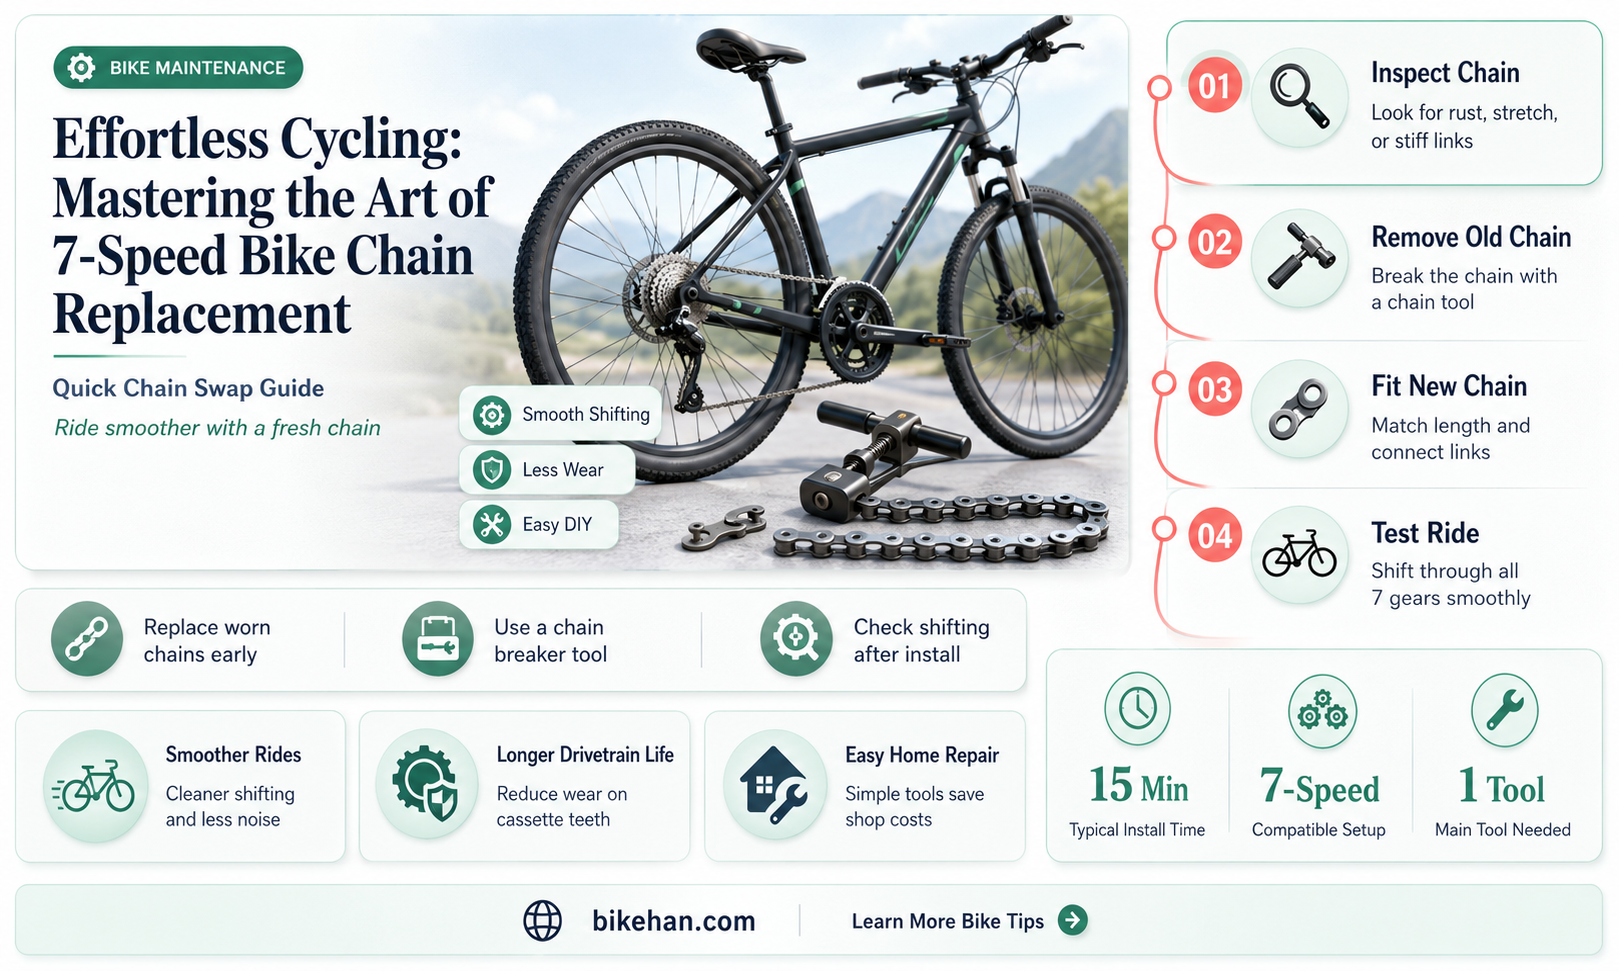
Replacing a 7-speed bike chain is a crucial maintenance task that ensures smooth and efficient gear shifting. Over time, bike chains can wear out, stretch, or accumulate dirt and grime, leading to poor performance and potential damage to the drivetrain. In this guide, we'll walk you through the step-by-step process of replacing a 7-speed bike chain, including the necessary tools and precautions to take. By following these instructions, you'll be able to restore your bike's performance and extend the life of your drivetrain components.
Explore related products



What You'll Learn
- Gather necessary tools: Chain whip, chain tool, new chain, lube, rag, gloves
- Remove old chain: Use chain whip and chain tool to loosen and remove old chain from bike
- Clean and inspect: Clean chainring and cassette, check for wear or damage
- Install new chain: Thread new chain through derailleur, around chainring and cassette, ensure proper alignment
- Lubricate and adjust: Apply chain lube, adjust derailleur for smooth shifting, wipe off excess lube

Gather necessary tools: Chain whip, chain tool, new chain, lube, rag, gloves
Before diving into the process of replacing a 7-speed bike chain, it's crucial to gather all the necessary tools. A chain whip and chain tool are essential for removing the old chain and installing the new one. The chain whip is used to push the chain onto the rear sprocket, while the chain tool helps to remove and install the chain pins.
In addition to these specialized tools, you'll need a new chain that's compatible with your 7-speed bike. It's important to choose a chain that's the correct length and has the appropriate pitch and roller diameter for your bike's drivetrain. Lubricant is another essential item, as it helps to reduce friction and wear on the chain and sprockets. A high-quality bike lube is recommended, as it's designed to withstand the elements and provide long-lasting protection.
A rag and gloves are also necessary for cleaning the old chain and protecting your hands during the replacement process. The rag can be used to wipe off excess lubricant and dirt from the chain, while the gloves will protect your hands from grease, cuts, and abrasions. When selecting gloves, choose a pair that offers good grip and dexterity, as this will make it easier to handle the tools and chain.
Once you've gathered all the necessary tools, you're ready to begin the process of replacing your 7-speed bike chain. Start by shifting the bike into the smallest gear and pedaling backwards to remove any tension from the chain. Then, use the chain tool to remove the chain pin and separate the chain from the rear sprocket. After removing the old chain, clean it thoroughly with the rag and lubricant, and then use the chain whip to install the new chain onto the rear sprocket.
With the new chain in place, use the chain tool to secure the chain pin and ensure that the chain is properly aligned with the sprockets. Finally, apply a small amount of lubricant to the chain and sprockets, and then wipe off any excess with the rag. This will help to ensure smooth and efficient operation of your bike's drivetrain.
Effortless Cycling: Mastering the Art of Replacing Your 10-Speed Bike Chain
You may want to see also
Explore related products


Remove old chain: Use chain whip and chain tool to loosen and remove old chain from bike
To remove an old chain from a 7-speed bike, you'll need a chain whip and a chain tool. The chain whip is used to loosen the chain, while the chain tool is used to push out the pins that hold the chain together. Start by positioning the chain whip around the chain, making sure that the whip's pin is aligned with one of the chain's pins. Then, turn the whip in the direction that the chain moves, which will help to loosen the chain.
Once the chain is loose, use the chain tool to push out one of the pins. To do this, place the chain tool over the pin and turn it counterclockwise until the pin is pushed out. Be careful not to push the pin all the way out, as you'll need to reuse it when installing the new chain. Repeat this process for each pin in the chain, working your way around the chain until it's completely removed from the bike.
When removing the old chain, it's important to keep track of the direction that each pin was pushed out. This will help you when installing the new chain, as you'll need to make sure that the pins are pushed back in the correct direction. Additionally, be sure to clean the chainring and cassette before installing the new chain, as this will help to ensure that the new chain shifts smoothly.
In summary, removing an old chain from a 7-speed bike requires a chain whip and a chain tool. Use the chain whip to loosen the chain, then use the chain tool to push out the pins that hold the chain together. Be careful not to push the pins all the way out, and keep track of the direction that each pin was pushed out. Finally, clean the chainring and cassette before installing the new chain.
Mastering Bike Maintenance: A Guide to Chain Repair
You may want to see also
Explore related products




Clean and inspect: Clean chainring and cassette, check for wear or damage
Before replacing a 7-speed bike chain, it's crucial to clean and inspect the chainring and cassette. This step ensures that the new chain will function smoothly and efficiently. Start by removing any dirt or grime from the chainring and cassette using a degreaser and a soft brush. Be thorough, as any residual dirt can cause the new chain to wear out prematurely.
Once the components are clean, inspect them for signs of wear or damage. Look for any bent or broken teeth on the chainring and cassette, as these can interfere with the chain's ability to shift gears properly. Also, check for any signs of rust or corrosion, which can weaken the components and lead to failure.
If you notice any wear or damage, it's best to replace the affected components before installing the new chain. This will ensure that your bike's drivetrain operates smoothly and efficiently. When replacing components, be sure to use the correct tools and follow the manufacturer's instructions carefully.
In addition to cleaning and inspecting the chainring and cassette, it's also a good idea to check the derailleurs and shifters. Make sure they are properly adjusted and functioning smoothly. This will help ensure that the new chain shifts gears seamlessly and provides a comfortable riding experience.
Finally, before installing the new chain, apply a small amount of lubricant to the chainring and cassette. This will help reduce friction and wear, and keep your bike's drivetrain running smoothly for miles to come.
Mastering the Art of Repinning Your Bike Chain: A Step-by-Step Guide
You may want to see also
Explore related products


Install new chain: Thread new chain through derailleur, around chainring and cassette, ensure proper alignment
Begin by carefully threading the new chain through the derailleur, ensuring that it aligns correctly with the jockey wheels. This step is crucial for the proper functioning of your bike's gear system. Once the chain is through the derailleur, guide it around the chainring, making sure it sits snugly in the teeth without any slack.
Next, move on to threading the chain around the cassette. This process requires precision, as the chain must be perfectly aligned with each cog to ensure smooth gear shifting. Take your time to inspect the alignment after each cog to avoid any misalignment that could lead to mechanical issues.
During this process, it's essential to keep the chain taut but not overly tight. A chain that is too loose can slip off the gears, while one that is too tight can cause excessive wear and tear on your bike's components. If you're unsure about the correct tension, consult your bike's manual or seek advice from a professional mechanic.
Once the chain is properly aligned around the cassette, connect the two ends of the chain using a chain connector or a quick link, depending on your bike's setup. Make sure the connection is secure and that the chain moves freely without any binding.
Finally, test the chain by pedaling the bike and shifting through the gears. Listen for any unusual noises or feel for any resistance, and make adjustments as necessary. With proper installation and maintenance, your new chain should provide smooth and reliable performance for many miles to come.
Explore related products


Lubricate and adjust: Apply chain lube, adjust derailleur for smooth shifting, wipe off excess lube
After removing the old chain and installing the new one, it's crucial to lubricate and adjust the chain for optimal performance. Begin by applying a small amount of chain lube to each roller of the chain while slowly rotating the pedals backward. This ensures that the lube penetrates the rollers and pins, reducing friction and wear. Be cautious not to over-lubricate, as excess lube can attract dirt and grime, leading to a buildup of debris that can damage the chain and other components.
Next, it's time to adjust the derailleur for smooth shifting. Start by checking the derailleur's limit screws, which control the range of movement for the derailleur. Ensure that the screws are properly adjusted so that the chain shifts smoothly between gears without slipping or making noise. If the shifting is not smooth, you may need to fine-tune the derailleur's tension or alignment.
Once the derailleur is properly adjusted, wipe off any excess lube from the chain using a clean rag. This step is essential to prevent the accumulation of dirt and grime, which can lead to premature wear and tear on the chain and other components. After wiping off the excess lube, allow the chain to dry completely before riding the bike.
In addition to lubricating and adjusting the chain, it's important to regularly inspect the chain for signs of wear and tear. A worn chain can cause damage to the sprockets and other components, leading to costly repairs. By following these steps and maintaining your bike chain properly, you can ensure smooth shifting and prolong the life of your bike's drivetrain.
Frequently asked questions
It's generally recommended to replace your bike chain every 500 to 750 miles, depending on the conditions in which you ride and how well you maintain your chain.
To replace a 7-speed bike chain, you'll typically need a chain tool, a new chain, a rag, lubricant, and possibly a quick link if your new chain doesn't come with one.
You can check for chain wear by measuring the distance between two pins on the chain. If this distance is more than 1/16 of an inch, it's time to replace the chain. Another sign of wear is if the chain skips or slips while riding.
After installing a new chain, it's best to lubricate it while slowly pedaling backwards. Apply a small amount of lubricant to the chain, allowing it to penetrate the rollers. Then, wipe off any excess lubricant with a clean rag to prevent dirt buildup.




