 Matthew Brooks
Retensioning a bike chain is a crucial maintenance task that ensures smooth and efficient operation of your bicycle. Over time, bike chains can stretch and lose tension, leading to poor shifting, increased wear, and potential safety hazards. In this guide, we'll walk you through the step-by-step process of retensioning your bike chain, covering the necessary tools, safety precautions, and techniques to get the job done right. Whether you're a seasoned cyclist or a beginner, mastering this skill will help you keep your bike in top condition and prolong its lifespan.
Explore related products


What You'll Learn
- Inspecting the Chain: Check for wear, rust, or damage. Replace if necessary. Lubricate regularly
- Lubricating the Chain: Apply lubricant evenly. Wipe off excess. Lubricate every 100 miles
- Adjusting Chain Tension: Use derailleur adjustment screws. Ensure proper alignment. Check tension regularly
- Cleaning the Chain: Use a chain cleaning device. Degrease and re-lubricate. Clean every 500 miles
- Replacing the Chain: Remove old chain. Install new chain. Adjust tension. Break in new chain

Inspecting the Chain: Check for wear, rust, or damage. Replace if necessary. Lubricate regularly
Before attempting to retension a bike chain, it's crucial to thoroughly inspect it for any signs of wear, rust, or damage. This step is often overlooked but is essential for ensuring the longevity and performance of your bike's drivetrain. Start by visually examining the chain for any obvious signs of damage, such as broken or bent links. Then, use a chain wear indicator tool to measure the chain's stretch. If the chain has stretched beyond the recommended limit, it's time to replace it.
Rust is another common issue that can affect a bike chain's performance. To check for rust, closely inspect each link for any signs of corrosion. If you notice any rust, it's best to replace the chain to prevent further damage to your bike's drivetrain. In addition to wear and rust, it's also important to check for any debris or dirt that may have accumulated on the chain. Clean the chain thoroughly using a degreaser and a brush, then dry it completely before proceeding with the retensioning process.
Lubrication is key to maintaining a healthy bike chain. After cleaning and inspecting the chain, apply a small amount of lubricant to each link, ensuring that it penetrates the rollers and pins. Be careful not to over-lubricate, as this can attract dirt and debris, leading to a buildup of grime that can damage the chain and drivetrain. Regular lubrication will help reduce friction, wear, and noise, ensuring a smooth and efficient ride.
When it comes to retensioning the bike chain, it's important to follow the manufacturer's guidelines for your specific bike model. Generally, you'll need to remove the chain from the bike, measure its length, and then adjust the tension accordingly. Use a chain tensioner tool to ensure that the chain is properly tensioned, and double-check that it's not too tight or too loose. Once the chain is properly tensioned, reattach it to the bike and test it by pedaling slowly and shifting through the gears.
Remember, regular maintenance is key to keeping your bike's drivetrain in good condition. By inspecting and lubricating your chain regularly, you can prevent premature wear and damage, ensuring a safe and enjoyable ride.
Mastering Chain Repositioning: A Cyclist's Guide to Smooth Shifting
You may want to see also
Explore related products


Lubricating the Chain: Apply lubricant evenly. Wipe off excess. Lubricate every 100 miles
To ensure optimal performance and longevity of your bike chain, regular lubrication is crucial. The process involves applying lubricant evenly across the chain's surface, wiping off any excess, and repeating this maintenance every 100 miles. This practice not only reduces friction but also prevents wear and tear, ultimately enhancing your cycling experience.
Begin by selecting a suitable lubricant designed specifically for bike chains. Avoid using household oils or greases, as they can attract dirt and grime, leading to a buildup that can harm the chain. Once you have the right lubricant, position your bike on a stand or flip it upside down to access the chain easily.
Apply the lubricant sparingly to each roller of the chain while slowly rotating the pedals backward. Ensure that the lubricant penetrates the rollers and pins, as this is where the majority of friction occurs. After application, allow the lubricant to set for a few minutes before wiping off any excess with a clean rag. Excess lubricant can attract dirt and lead to a buildup of grime, which can negatively impact the chain's performance.
It's essential to establish a regular maintenance schedule, lubricating the chain every 100 miles or more frequently if you ride in wet or dirty conditions. Keeping the chain clean and well-lubricated not only improves efficiency but also extends the life of the chain, saving you money on replacements in the long run.
In summary, proper chain lubrication is a simple yet effective way to maintain your bike's performance. By following these steps and adhering to a regular maintenance schedule, you can ensure that your chain remains in top condition, providing a smooth and enjoyable ride.
Resizing Your Bike Chain with a Master Link: A Step-by-Step Guide
You may want to see also
Explore related products


Adjusting Chain Tension: Use derailleur adjustment screws. Ensure proper alignment. Check tension regularly
To adjust the chain tension on your bicycle, you'll need to familiarize yourself with the derailleur adjustment screws. These screws are typically located on the derailleur itself and are used to fine-tune the position of the derailleur, which in turn affects the tension of the chain. Start by identifying the screws on your derailleur; they're usually marked with arrows or symbols indicating their function.
Once you've located the adjustment screws, you'll need to ensure that the derailleur is properly aligned with the gears. This is crucial for maintaining optimal chain tension and preventing premature wear on your chain and gears. To check the alignment, shift the chain through the gears and observe the derailleur's movement. If the derailleur is misaligned, you may need to adjust the limit screws or the B-tension screw to correct the alignment.
Now that the derailleur is properly aligned, you can begin adjusting the chain tension using the derailleur adjustment screws. Turn the screws incrementally, checking the tension of the chain after each adjustment. The ideal tension will depend on your specific bicycle and riding style, but a good rule of thumb is to aim for a tension that allows the chain to move smoothly through the gears without being too loose or too tight.
Regularly checking the chain tension is essential for maintaining a well-functioning bicycle. Over time, the chain can stretch or wear, causing the tension to decrease. This can lead to slipping or jumping between gears, which can be both frustrating and dangerous. By checking the tension regularly and making adjustments as needed, you can ensure that your bicycle performs optimally and safely.
In addition to adjusting the chain tension, it's also important to keep your chain clean and lubricated. A dirty or dry chain can cause excessive wear on both the chain and the gears, leading to decreased performance and potentially costly repairs. Regularly cleaning and lubricating your chain can help extend its lifespan and maintain optimal performance.
Remember, proper chain tension is crucial for a smooth and safe riding experience. By following these steps and regularly checking the tension, you can ensure that your bicycle is always in top condition.
Effortless Cycling: Mastering the Art of Replacing Your 10-Speed Bike Chain
You may want to see also
Explore related products




Cleaning the Chain: Use a chain cleaning device. Degrease and re-lubricate. Clean every 500 miles
Regular cleaning of your bike chain is crucial for maintaining its performance and longevity. A chain cleaning device can make this task much easier and more effective. These devices typically consist of a container that holds a cleaning solution and brushes that scrub the chain as it passes through. To use one, simply place the chain on the device and pedal backwards while the brushes do the work.
After cleaning, it's important to degrease the chain to remove any remaining lubricant and grime. This can be done using a degreaser specifically designed for bike chains. Apply the degreaser to a clean rag and wipe down the chain, rotating the pedals backwards to ensure even coverage. Once the chain is clean and degreased, it's time to re-lubricate.
When re-lubricating your chain, it's important to use the right type of lubricant for your riding conditions. For dry conditions, a wax-based lubricant is recommended, while for wet conditions, an oil-based lubricant is better. Apply the lubricant sparingly to the chain, rotating the pedals backwards to ensure even coverage. Be sure to wipe off any excess lubricant with a clean rag, as this can attract dirt and grime.
It's recommended to clean your bike chain every 500 miles to keep it in good condition. However, if you ride in particularly dirty or wet conditions, you may need to clean it more frequently. Regular cleaning and maintenance of your bike chain can help prevent premature wear and tear, improve shifting performance, and ensure a smoother, more efficient ride.
Effortless Cycling: Mastering the Art of Chain Replacement
You may want to see also
Explore related products


Replacing the Chain: Remove old chain. Install new chain. Adjust tension. Break in new chain
To replace a bike chain, begin by removing the old one. This process typically involves using a chain tool to push out the pins that hold the chain links together. Start by positioning the chain tool on one of the pins and turning the handle to drive the pin out. Be careful not to push the pin all the way out, as you may need to reuse it. Once you've removed enough pins to free the chain, carefully take it off the bike.
Next, install the new chain. Thread it through the derailleur and around the cassette, making sure it's properly aligned with the gears. If your bike has a front derailleur, thread the chain through it as well. Once the chain is in place, use the chain tool to insert the pins back into the links, securing the chain together.
After installing the new chain, it's crucial to adjust the tension. This ensures that the chain shifts smoothly and doesn't slip off the gears. To adjust the tension, locate the barrel adjuster on your bike's derailleur. Turn the adjuster to increase or decrease the tension as needed. It's important to note that over-tightening the chain can lead to premature wear, while under-tightening can cause the chain to slip.
Finally, break in the new chain. This process helps to ensure that the chain and gears work together smoothly. To break in the chain, ride your bike for a short distance, ideally on a flat surface. Avoid putting too much force on the pedals, as this can cause the chain to stretch prematurely. After breaking in the chain, check the tension again and make any necessary adjustments.
Remember, replacing a bike chain is a task that requires precision and care. By following these steps and paying attention to detail, you can ensure that your bike's chain is properly installed and tensioned, leading to a smoother and more efficient ride.
Mastering the Art of Resetting Your Bike Chain Lock: A Step-by-Step Guide
You may want to see also
Frequently asked questions
It's recommended to check and retension your bike chain every 100-200 miles or after any significant changes in riding conditions, such as after riding in wet or muddy terrain.
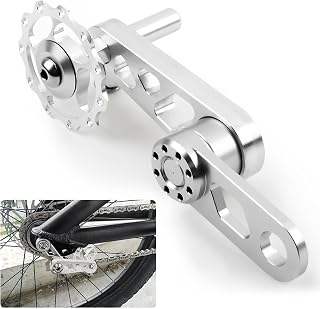
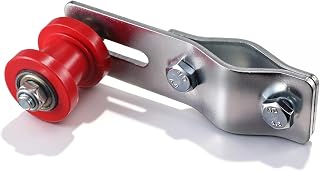
You'll need a chain tensioner tool, which is specific to your bike's chain size, and possibly a wrench or socket set to adjust the tensioner bolt.
Yes, you can retension your bike chain without removing it by using a chain tensioner tool that allows you to adjust the tension while the chain is still on the bike.
The proper tension for a bike chain is when it's snug but not too tight. You should be able to press the chain down slightly with your thumb, but it shouldn't sag or be loose.
If your bike chain is too loose, it can slip off the gears and cause damage to the chain or gears. If it's too tight, it can cause excessive wear on the chain and gears, and make it difficult to pedal smoothly.





