Matthew Brooks
Replacing bike brake handles is an essential maintenance task that ensures your bicycle remains safe and functional. Over time, brake handles can wear out, become damaged, or simply lose their effectiveness, necessitating a replacement. This process involves removing the old brake handles and installing new ones, which may seem daunting at first, but with the right tools and guidance, it can be accomplished relatively easily. In this article, we'll walk you through the steps to replace bike brake handles, covering the necessary tools, preparation, removal of the old handles, installation of the new ones, and final adjustments to ensure optimal performance. By following these instructions, you'll be able to restore your bike's braking system to its proper working condition, enhancing both safety and riding enjoyment.
Explore related products


What You'll Learn
- Gather Tools and Materials: Collect necessary tools like Allen wrenches, screwdrivers, and replacement brake handles
- Remove Old Brake Handle: Unscrew and detach the old brake handle from the bike's handlebar
- Install New Brake Handle: Align and secure the new brake handle onto the handlebar using appropriate screws
- Connect Brake Cables: Attach the brake cables to the new handle, ensuring proper tension and secure connections
- Test Brake Functionality: Squeeze the new brake handle to confirm smooth operation and effective braking

Gather Tools and Materials: Collect necessary tools like Allen wrenches, screwdrivers, and replacement brake handles
Before you begin the process of replacing your bike's brake handles, it's crucial to gather all the necessary tools and materials. This ensures that you have everything you need at hand, preventing interruptions and potential complications during the repair. Start by collecting the essential tools: Allen wrenches in various sizes, a set of screwdrivers (both flathead and Phillips), and a pair of pliers. You'll also need the replacement brake handles, which should be compatible with your bike's model and specifications.
In addition to the tools, prepare some materials that will aid in the process. A clean, lint-free cloth is useful for wiping away any grease or debris from the brake components. Lubricant, specifically designed for bike brakes, will help ensure smooth operation after the replacement. It's also a good idea to have some electrical tape on hand to secure any loose wires or cables.
When selecting your replacement brake handles, consider the type of braking system your bike uses. For example, if your bike has a hydraulic braking system, you'll need brake handles that are compatible with this setup. Similarly, if your bike uses a cable-actuated system, ensure the new handles are designed for this type of brake.
Once you have all the tools and materials ready, find a well-lit, comfortable workspace to perform the replacement. A sturdy table or workbench is ideal, as it provides a stable surface for your bike and tools. Before you begin, it's a good practice to familiarize yourself with the brake handle replacement process by consulting your bike's manual or watching a tutorial specific to your bike's model.
Remember, safety should always be a priority when working on your bike. Wear protective gloves to prevent injuries from sharp edges or components, and ensure your bike is securely positioned to avoid any accidents during the repair. With the right tools, materials, and preparation, you'll be well-equipped to successfully replace your bike's brake handles and ensure safe, reliable braking performance.
Effortless Brake Cable Removal: A Step-by-Step Guide for Bike Owners
You may want to see also
Explore related products


Remove Old Brake Handle: Unscrew and detach the old brake handle from the bike's handlebar
To remove the old brake handle, begin by ensuring your bike is securely positioned, either by placing it on a bike stand or leaning it against a stable surface. This will prevent any accidental falls or movements that could disrupt the process. Next, locate the brake handle you intend to replace. It's typically found on the handlebar, connected to the brake lever mechanism.
Using a Phillips-head screwdriver, carefully unscrew the bolts that secure the brake handle to the handlebar. These bolts are usually located on the underside of the handlebar, so you may need to rotate the handlebar to access them easily. Apply gentle, consistent pressure to avoid stripping the screws. Once the bolts are removed, you should be able to detach the old brake handle from the handlebar.
Take care not to damage the brake lever mechanism or the handlebar itself during this process. If the brake handle is particularly stubborn, you may need to use a bit of penetrating oil or lubricant to loosen the connection. After removing the old brake handle, inspect the area for any signs of wear or damage that may need to be addressed before installing the new handle.
Remember to keep track of the screws and any other small parts you remove during this process, as you'll need them to secure the new brake handle in place. It's also a good idea to clean the area around the brake lever mechanism to ensure a smooth installation of the new handle.
Effortless Brake Hood Removal: A Step-by-Step Guide for Bike Enthusiasts
You may want to see also
Explore related products


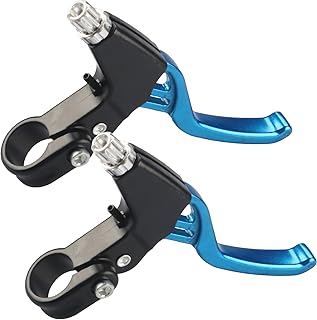

Install New Brake Handle: Align and secure the new brake handle onto the handlebar using appropriate screws
Begin by ensuring the bicycle is securely positioned on a stable surface or bike repair stand to prevent any movement during the installation process. Remove any existing brake handle and clean the area on the handlebar where the new brake handle will be installed. This ensures a clean surface for the new handle to adhere properly.
Next, identify the correct orientation for the new brake handle. Typically, brake handles are designed to be installed in a specific direction to ensure proper functioning. Refer to the manufacturer's instructions or the packaging for guidance on the correct orientation. Once you have determined the correct position, align the new brake handle onto the handlebar.
Using the appropriate screws provided with the new brake handle, secure it firmly to the handlebar. Ensure the screws are tightened evenly to avoid any imbalance or misalignment. It is crucial to use the correct torque when tightening the screws to prevent overtightening, which can damage the handlebar or the brake handle itself.
After securing the brake handle, test its functionality by squeezing the lever. The brake lever should move smoothly without any resistance or clicking noises. If you encounter any issues, recheck the alignment and tightness of the screws. Once the brake handle is functioning correctly, reassemble any additional components, such as the brake cable or housing, and test the brakes again to ensure they are working properly.
Remember to dispose of any old or damaged parts responsibly and recycle them if possible. Proper installation and maintenance of your bike's brake system are essential for safe riding. Regularly inspect your brake handles and other components for signs of wear or damage and replace them as needed to ensure optimal performance and safety.
Effortless Brake Removal: A Step-by-Step Guide for Bike Pedals
You may want to see also
Explore related products


Connect Brake Cables: Attach the brake cables to the new handle, ensuring proper tension and secure connections
Begin by identifying the correct brake cables for your bike. Typically, there are two types: front and rear. Ensure you have the appropriate cables for each. Next, thread the cable through the brake lever's housing. This may require some patience and precision, as the housing can be quite narrow. Once the cable is through, pull it taut to remove any slack.
Now, locate the barrel adjuster, which is usually found where the cable meets the brake caliper. This adjuster allows you to fine-tune the tension of the cable. Tighten the adjuster until the cable is snug, but be careful not to overtighten, as this can cause the cable to fray.
Secure the cable to the brake lever using the provided clamp. Make sure the clamp is tight enough to hold the cable in place, but not so tight that it damages the cable. Test the brake lever to ensure it moves smoothly and that the cable is properly tensioned.
If you encounter any issues during this process, such as the cable not threading through the housing or the brake lever not functioning properly, consult your bike's manual or seek assistance from a professional bike mechanic. Remember, proper installation of brake cables is crucial for your safety while riding.
Mastering Bike Hand Brake Repair: A Step-by-Step Guide
You may want to see also
Explore related products


Test Brake Functionality: Squeeze the new brake handle to confirm smooth operation and effective braking
After replacing the brake handle on your bike, it's crucial to test its functionality to ensure your safety and the proper operation of your bicycle. To do this, follow these steps:
- Position Yourself Safely: Find a flat, open area away from traffic and obstacles. Make sure the bike is on a stable surface and that you're wearing appropriate safety gear, such as a helmet.
- Check the Brake Pads: Before testing the new brake handle, inspect the brake pads to ensure they are properly aligned with the rim of the wheel and not worn out. If the pads are misaligned or excessively worn, adjust or replace them as necessary.
- Squeeze the Brake Handle: With the bike stationary, firmly squeeze the new brake handle. The handle should move smoothly without any resistance or clicking noises. If you encounter any issues, such as stiffness or unusual sounds, the handle may not be properly installed or there could be a problem with the brake cable.
- Test the Braking Effectiveness: While holding the brake handle in the squeezed position, try to pedal the bike. The wheel should not spin freely; instead, it should slow down and eventually stop. If the bike doesn't stop or the braking effect is minimal, the brake pads may not be making proper contact with the rim, or there could be an issue with the brake cable tension.
- Adjust and Re-test: If the brake handle doesn't operate smoothly or the braking effectiveness is poor, make the necessary adjustments. This may involve tightening or loosening the brake cable, adjusting the brake pad alignment, or even replacing parts if they are damaged or worn out. Re-test the brake handle after each adjustment to ensure it's functioning correctly.
- Final Check: Once you're satisfied with the brake handle's operation, take the bike for a short test ride. Apply the brakes at various speeds and in different conditions to ensure they respond effectively and consistently.
By following these steps, you can ensure that the new brake handle is installed correctly and functions properly, providing you with safe and reliable braking performance.
Mastering Rear Bike Brake Repair: A Step-by-Step Guide
You may want to see also