Matthew Brooks
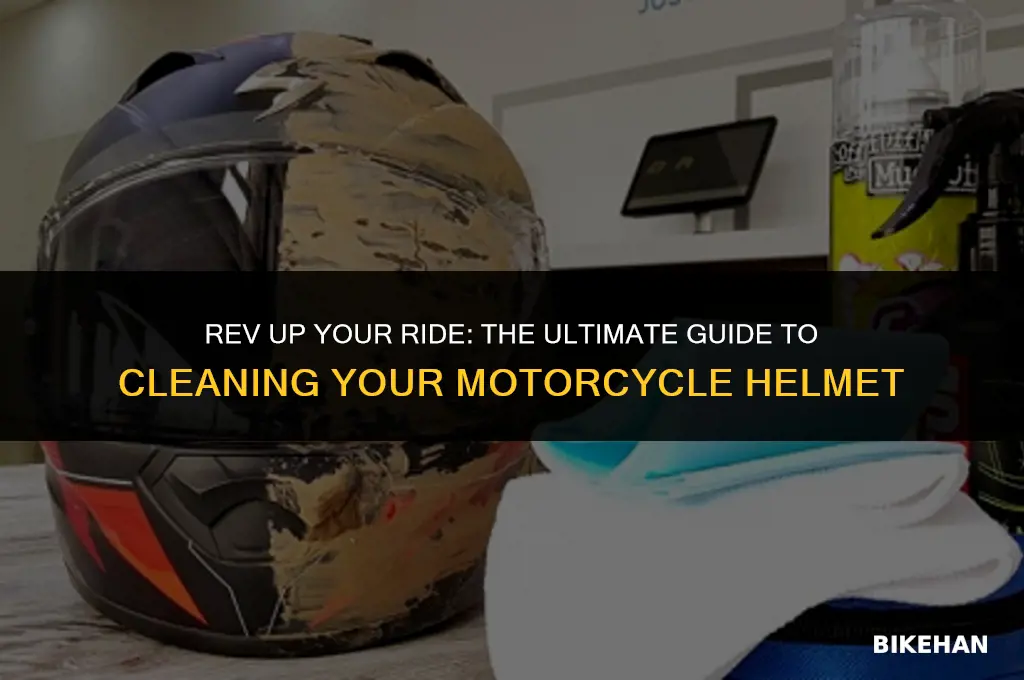
Cleaning the inside of a motorcycle helmet is essential for maintaining hygiene and ensuring a comfortable riding experience. Over time, the interior can accumulate sweat, dirt, and bacteria, which can lead to unpleasant odors and potentially compromise the helmet's safety features. To effectively clean the inside of your helmet, start by removing any removable liners or padding. These components should be washed separately using a mild detergent and warm water. For the main interior, use a soft-bristled brush to gently scrub away any debris or buildup. Avoid using harsh chemicals or abrasive materials that could damage the helmet's surface. After cleaning, allow the helmet to air dry completely before reassembling any removable parts. Regular cleaning not only keeps your helmet fresh but also helps to prolong its lifespan and maintain optimal performance.
Explore related products


What You'll Learn
- Remove the Liner: Gently detach the helmet's interior liner for thorough cleaning
- Wash the Liner: Use mild soap and water to clean the liner, avoiding harsh chemicals
- Clean the Shell: Wipe the helmet's exterior with a damp cloth to remove dirt and debris
- Dry the Liner: Air dry the liner completely before reinstalling it in the helmet
- Reassemble the Helmet: Once the liner is dry, reattach it securely inside the helmet

Remove the Liner: Gently detach the helmet's interior liner for thorough cleaning
Begin by locating the retention clips or fasteners that secure the liner to the helmet shell. These are typically found at the front, sides, or rear of the helmet's interior. Carefully release each clip or fastener, ensuring not to damage the liner or the helmet's shell. Once all clips are released, gently lift the liner out of the helmet, taking care not to stretch or tear any elastic components.
Inspect the liner for any signs of wear, damage, or excessive dirt buildup. If the liner is damaged beyond repair, it may be necessary to replace it. For liners in good condition, proceed with cleaning. Use a mild detergent and warm water to hand wash the liner, paying special attention to areas with heavy sweat or dirt accumulation. Avoid using harsh chemicals or abrasive cleaners, as these can damage the liner's material.
After washing, thoroughly rinse the liner with clean water to remove all soap residue. Gently squeeze out excess water without wringing or twisting the liner, as this can cause it to lose its shape. Allow the liner to air dry completely before reinstalling it in the helmet.
When reinstalling the liner, ensure it is properly aligned with the helmet's shell and that all clips or fasteners are securely in place. Test the liner's fit by gently pulling on it to ensure it is snugly attached to the helmet. A properly cleaned and maintained liner will not only improve the comfort and hygiene of the helmet but also extend its overall lifespan.
Is Mounting a GoPro on Your Motorcycle Helmet Legal?
You may want to see also
Explore related products


Wash the Liner: Use mild soap and water to clean the liner, avoiding harsh chemicals
Begin by removing the liner from the helmet. This is typically done by gently pulling it out, taking care not to damage any of the padding or stitching. Once the liner is removed, it's important to check for any specific care instructions that may be attached to it. These instructions will often provide guidance on the best cleaning methods for that particular type of liner.
For most liners, a mild soap and water solution will be sufficient for cleaning. Avoid using harsh chemicals or abrasive cleaners, as these can damage the liner's material and reduce its effectiveness. Instead, opt for a gentle dish soap or a specialized cleaner designed for helmet liners. Fill a basin or sink with lukewarm water and add a small amount of soap, creating a solution that is not too sudsy.
Submerge the liner in the soapy water and gently agitate it to work the soap into the fabric. Be careful not to scrub too vigorously, as this can cause the liner to become misshapen or damaged. If there are any particularly stubborn stains or odors, you can use a soft-bristled brush to gently scrub the affected areas.
After cleaning, rinse the liner thoroughly with clean water to remove all soap residue. It's important to ensure that no soap is left behind, as this can cause skin irritation when the liner is worn. Once rinsed, gently squeeze out any excess water from the liner, being careful not to wring or twist it, which can also cause damage.
Allow the liner to air dry completely before reinstalling it in the helmet. This may take several hours, depending on the thickness of the liner and the ambient temperature. It's important to ensure that the liner is completely dry before use, as a damp liner can lead to mold and mildew growth, as well as reduced comfort and safety.
Taming the Dragon: A Guide to Customizing Your Motorcycle Helmet
You may want to see also
Explore related products


Clean the Shell: Wipe the helmet's exterior with a damp cloth to remove dirt and debris
Begin by inspecting the helmet's exterior for any loose debris. Use a soft-bristled brush to gently dislodge any dirt or dust that may have accumulated. This initial step is crucial as it prevents scratching the helmet's surface during the wiping process.
Next, dampen a microfiber cloth with lukewarm water. Avoid using harsh chemicals or abrasive cleaners, as these can damage the helmet's finish. Gently wipe the entire exterior surface of the helmet, paying special attention to areas around the vents, visor, and any other crevices where dirt may have settled.
For stubborn stains or grime, you can use a mild soap solution. Apply a small amount to the affected area and use a soft brush to work it in. Be sure to rinse thoroughly with clean water to remove any soap residue.
After cleaning, allow the helmet to air dry completely. Avoid using a hairdryer or other heat sources, as these can warp the helmet's materials. Once dry, apply a helmet protectant to help repel dirt and UV rays, keeping your helmet looking its best.
Regularly cleaning the exterior of your motorcycle helmet not only improves its appearance but also helps maintain its structural integrity. Dirt and debris can cause scratches and abrasions, which may weaken the helmet over time. By following these steps, you can ensure your helmet remains in top condition, providing optimal protection for years to come.
Florida Motorcycle Helmet Laws: What You Need to Know
You may want to see also
Explore related products



Dry the Liner: Air dry the liner completely before reinstalling it in the helmet
After thoroughly cleaning the inside of your motorcycle helmet, it's crucial to ensure the liner is completely dry before reinstalling it. This step is often overlooked but is essential for maintaining the helmet's hygiene and structural integrity.
To air dry the liner effectively, remove it from the helmet and lay it flat on a clean, dry surface. Avoid using a machine dryer, as the high heat can damage the liner's materials and compromise its ability to absorb sweat and provide comfort. Instead, allow the liner to air dry naturally, which may take several hours depending on the thickness and material of the liner.
It's important to ensure that the liner is completely dry to the touch before reinstalling it in the helmet. Any residual moisture can lead to the growth of bacteria and fungi, which can cause unpleasant odors and potentially compromise the helmet's safety features. Additionally, a damp liner can become uncomfortable to wear, leading to distractions while riding.
If you're in a hurry and need to speed up the drying process, you can use a clean, dry towel to gently pat the liner dry. However, be careful not to rub too vigorously, as this can damage the liner's delicate materials. Another option is to use a fan to circulate air around the liner, which can help to speed up the drying process without applying direct heat.
Once the liner is completely dry, you can reinstall it in the helmet, ensuring that it's properly positioned and secured. This will help to maintain the helmet's comfort, hygiene, and safety features, ensuring that you're well-protected while riding.
Personalize Your Ride: The Ultimate Guide to Customizing Your Motorcycle Helmet
You may want to see also
Explore related products



Reassemble the Helmet: Once the liner is dry, reattach it securely inside the helmet
Once the liner is thoroughly dry, it's crucial to reattach it securely inside the helmet to ensure optimal protection and comfort. Begin by carefully aligning the liner with the helmet's interior, making sure that all clips, straps, and attachment points are properly positioned. Gently press the liner into place, ensuring a snug fit without any wrinkles or bunching that could compromise safety or comfort.
Next, check all attachment mechanisms to confirm they are securely fastened. This may involve snapping clips into place, threading straps through designated slots, or securing Velcro patches. It's essential to test the liner's attachment by gently pulling on it to ensure it doesn't shift or come loose. If any adjustments are necessary, make them before proceeding.
In addition to securing the liner, it's important to inspect the helmet's exterior for any damage or wear that may have occurred during the cleaning process. Check for scratches, dents, or cracks in the shell, as well as any loose or damaged components such as the visor, chin strap, or ventilation system. Address any issues before reassembling the helmet to ensure it provides the necessary protection.
Finally, once the liner is securely in place and the helmet has been inspected, it's ready for use. Remember to always wear the helmet properly, ensuring a snug fit and fastening all straps and buckles as intended. Regular maintenance, including cleaning and inspection, is essential to prolong the life of the helmet and ensure it continues to provide optimal protection.
The Lifespan of a Motorcycle Helmet: What You Need to Know
You may want to see also
Frequently asked questions
The best way to clean the inside of a motorcycle helmet is to use a mild detergent and warm water. Remove the helmet's interior padding and wash it by hand or in a washing machine on a gentle cycle. Rinse thoroughly and allow it to air dry completely before reinstalling.
No, you should avoid using harsh chemicals to clean the interior of your motorcycle helmet. These can damage the materials and compromise the helmet's safety features. Stick to mild detergents and water for cleaning.
It's recommended to clean the inside of your motorcycle helmet at least once a month, or more frequently if you ride often or in dusty conditions. Regular cleaning helps maintain hygiene and ensures the helmet's comfort and safety.
If your helmet's interior padding is removable, take it out and wash it separately using a mild detergent and warm water. This will help prevent the buildup of sweat, dirt, and bacteria, keeping your helmet fresh and comfortable.
No, it is not safe to put your motorcycle helmet in the dishwasher. The high temperatures and harsh detergents used in dishwashers can damage the helmet's materials and safety features. Always hand wash or use a gentle machine cycle for cleaning.