Samantha Lee

When it comes to protecting your bike's paint job and ensuring its longevity, applying a clear coat is an essential step. But how many coats of clear coat should you apply to achieve the best results? The ideal number of clear coat layers for a bike can vary depending on several factors, including the type of clear coat used, the environmental conditions, and the desired level of protection. In general, most experts recommend applying 2-3 coats of clear coat to provide a durable and glossy finish that can withstand the elements and resist scratches and chips. However, it's important to follow the manufacturer's instructions and allow each coat to dry completely before applying the next to ensure a smooth and even application.
Explore related products


What You'll Learn
- Preparation: Cleaning and sanding the bike frame to ensure a smooth surface for clear coat application
- Primer Application: Applying a suitable primer to enhance adhesion and provide a uniform base for the clear coat
- Clear Coat Types: Choosing the right type of clear coat, such as polyurethane or acrylic, for durability and finish
- Application Techniques: Methods of applying the clear coat, including spraying, brushing, or dipping, and their effects on the finish
- Curing and Maintenance: Proper curing times and temperatures, as well as maintenance tips to prolong the life of the clear coat

Preparation: Cleaning and sanding the bike frame to ensure a smooth surface for clear coat application
Before applying any clear coat to a bike frame, meticulous preparation is crucial to ensure a flawless finish. This involves a thorough cleaning process to remove any dirt, grease, or debris that could interfere with the clear coat's adhesion. Start by using a degreaser specifically designed for bicycle components, applying it generously to the frame and allowing it to sit for a few minutes to penetrate any grime. Then, use a soft-bristled brush or a sponge to gently scrub the entire frame, paying close attention to areas around the bottom bracket, chainstays, and seat tube where dirt tends to accumulate.
After cleaning, the frame should be rinsed with clean water and dried completely with a soft, lint-free cloth. Any moisture left on the frame can lead to rust or poor clear coat adhesion. Once the frame is dry, inspect it closely for any remaining dirt or debris, and spot clean as necessary.
The next step in preparation is sanding the frame to create a smooth surface for the clear coat. Use a fine-grit sandpaper, such as 320 or 400 grit, and lightly sand the entire frame, following the direction of the frame's tubes. This will help to remove any imperfections, scratches, or old paint that could affect the clear coat's appearance. After sanding, wipe down the frame again with a clean, damp cloth to remove any dust or debris.
Allow the frame to dry completely before applying the clear coat. It's essential to work in a well-ventilated area, preferably outdoors or in a space with good airflow, to avoid inhaling fumes from the clear coat. Wear protective gear, such as gloves and a mask, to prevent any skin or respiratory irritation.
When applying the clear coat, use a high-quality brush or spray gun to ensure an even, smooth application. Start with a light coat, allowing it to dry completely before applying additional layers. The number of coats needed will depend on the specific clear coat product and the desired level of protection and shine. Typically, two to three coats are sufficient, but always follow the manufacturer's instructions for the best results.
Between coats, lightly sand the frame again with a fine-grit sandpaper to remove any dust or debris that may have settled on the surface. This will help to ensure a smooth, glossy finish. After the final coat, allow the frame to dry completely before reassembling the bike.
By following these detailed preparation steps, you can ensure a professional-looking finish that will protect your bike frame and enhance its appearance. Remember, the key to a successful clear coat application is patience and attention to detail. Take your time, and don't rush the process.
Pedaling to Burn: Unraveling the Caloric Mystery of a Mile Bike Ride
You may want to see also
Explore related products


Primer Application: Applying a suitable primer to enhance adhesion and provide a uniform base for the clear coat
Applying a suitable primer is a crucial step in the process of coating a bike with clear coat. The primer serves as a bonding agent between the bike's surface and the clear coat, ensuring better adhesion and a more uniform finish. Without a proper primer, the clear coat may not adhere well to the bike's surface, leading to peeling, chipping, or an uneven finish.
When selecting a primer, it's important to choose one that is specifically designed for use with clear coats and is compatible with the type of surface you're working with. For example, if your bike has a metal frame, you'll want to use a metal primer. If the bike has a composite or plastic frame, a primer designed for those materials would be more appropriate.
Before applying the primer, it's essential to properly prepare the bike's surface. This includes cleaning the surface thoroughly to remove any dirt, grease, or debris. You may also need to sand the surface lightly to create a better bonding surface for the primer. Once the surface is prepared, you can apply the primer using a brush, roller, or spray gun, depending on your preference and the size of the bike.
After applying the primer, it's important to allow it to dry completely before applying the clear coat. The drying time will vary depending on the type of primer you're using, but it's typically around 30 minutes to an hour. Once the primer is dry, you can proceed with applying the clear coat, following the manufacturer's instructions for the best results.
In summary, applying a suitable primer is a critical step in the process of coating a bike with clear coat. It ensures better adhesion, a more uniform finish, and ultimately, a more durable and long-lasting clear coat application. By choosing the right primer, properly preparing the bike's surface, and allowing the primer to dry completely, you can achieve a professional-looking finish that will protect your bike for years to come.
Calories Burned: Unraveling the Mystery of a 15-Mile Bike Ride
You may want to see also
Explore related products
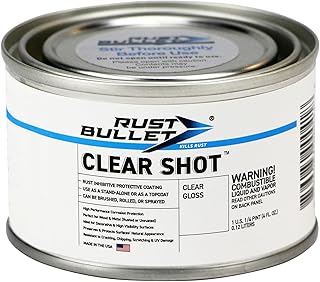


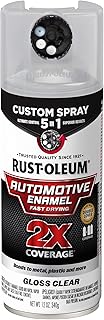
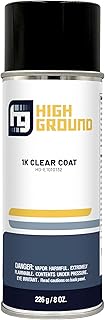
Clear Coat Types: Choosing the right type of clear coat, such as polyurethane or acrylic, for durability and finish
Polyurethane and acrylic are two of the most common types of clear coats used for various applications, including bike finishes. When choosing the right type of clear coat, it's essential to consider factors such as durability, finish quality, and application method. Polyurethane clear coats are known for their high durability and resistance to scratches and impacts, making them an excellent choice for high-traffic areas or surfaces that require extra protection. On the other hand, acrylic clear coats are more flexible and can provide a glossier finish, which can be desirable for certain aesthetic applications.
When applying clear coats to a bike, the choice between polyurethane and acrylic may depend on the specific requirements of the project. If the bike is intended for regular use and will be exposed to various weather conditions, a polyurethane clear coat may be the better option due to its superior durability. However, if the bike is primarily for display purposes or the owner desires a high-gloss finish, an acrylic clear coat could be a more suitable choice.
Another factor to consider when choosing a clear coat is the application method. Polyurethane clear coats are typically applied using a spray gun, which can provide a more even and professional finish. Acrylic clear coats, on the other hand, can be applied using a brush or roller, making them more accessible for DIY projects or smaller applications.
In terms of the number of coats required, both polyurethane and acrylic clear coats usually require multiple applications to achieve the desired level of protection and finish quality. The specific number of coats will depend on the thickness of each application and the overall desired effect. It's essential to follow the manufacturer's instructions for both the clear coat and the application method to ensure the best results.
In conclusion, choosing the right type of clear coat for a bike project involves considering factors such as durability, finish quality, and application method. By understanding the differences between polyurethane and acrylic clear coats and their respective benefits, one can make an informed decision that will result in a high-quality, long-lasting finish.
Rev Up Your Fitness: Calories Burned Biking for Navy PRT
You may want to see also
Explore related products


Application Techniques: Methods of applying the clear coat, including spraying, brushing, or dipping, and their effects on the finish
Spraying is the most common method for applying clear coat to a bike frame due to its efficiency and ability to provide an even finish. This technique involves using a spray gun or aerosol can to mist the clear coat onto the surface. The key to a successful spray application is to maintain a consistent distance from the surface, typically around 6-8 inches, and to use a steady, sweeping motion to avoid drips and runs. It's also crucial to apply the clear coat in thin, even layers, allowing each layer to dry completely before applying the next. This method can provide a high-gloss finish that is both durable and resistant to the elements.
Brushing is another option for applying clear coat, particularly for smaller areas or for touch-ups. This method involves using a clean, dry brush to apply the clear coat in smooth, even strokes. The advantage of brushing is that it allows for more precise application and can be used to fill in small imperfections or scratches. However, brushing can be more time-consuming than spraying and may not provide as even a finish. It's important to use a high-quality brush with soft bristles to avoid leaving brush marks on the surface.
Dipping is a less common method for applying clear coat, but it can be effective for coating small parts or accessories. This technique involves submerging the part in the clear coat liquid and then allowing it to drip dry. The advantage of dipping is that it can provide a very even coat and is ideal for coating parts with intricate details or hard-to-reach areas. However, dipping can be messy and requires careful preparation to ensure that the part is properly cleaned and primed before coating.
Each application method has its own unique advantages and challenges, and the choice of method will depend on the specific needs of the project. Regardless of the method chosen, it's important to follow the manufacturer's instructions for the clear coat product and to take proper safety precautions, such as wearing gloves and working in a well-ventilated area. By carefully selecting and executing the application technique, it's possible to achieve a professional-quality finish that will protect and enhance the bike frame for years to come.
Rev Up Your Metabolism: The Calorie-Burning Power of Cycling
You may want to see also
Explore related products
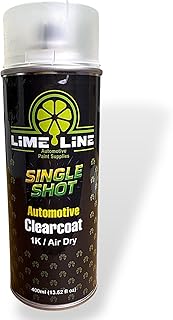
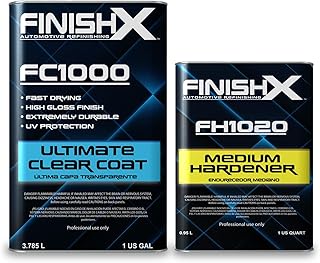

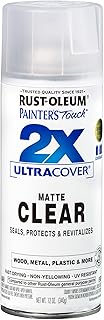


Curing and Maintenance: Proper curing times and temperatures, as well as maintenance tips to prolong the life of the clear coat
Proper curing is critical to ensure the clear coat on your bike achieves its full protective potential. The ideal curing time and temperature can vary depending on the specific product used, but generally, a clear coat should be allowed to cure for at least 24 hours at room temperature. During this time, it's essential to keep the bike in a dry, dust-free environment to prevent any contaminants from affecting the finish. For optimal results, some manufacturers recommend a two-stage curing process: an initial cure at room temperature followed by a shorter period at a higher temperature, such as 100-120°F (38-49°C), to fully harden the coating.
Once the clear coat has cured, regular maintenance is key to prolonging its life. This includes routine cleaning with a mild soap and water solution to remove dirt and debris. Avoid using abrasive cleaners or scrubbers that could scratch the surface. After cleaning, dry the bike thoroughly with a soft, clean cloth to prevent water spots. Additionally, applying a wax or sealant specifically designed for clear coats can help protect the finish from UV damage and environmental factors.
It's also important to inspect the clear coat regularly for any signs of wear or damage. If you notice any chips, cracks, or peeling, address them promptly to prevent further deterioration. In some cases, a touch-up application of clear coat may be necessary to repair minor damage. For more extensive issues, it may be best to consult a professional or consider reapplying the clear coat entirely.
By following these curing and maintenance guidelines, you can help ensure that your bike's clear coat remains effective and visually appealing for years to come. Remember to always refer to the manufacturer's instructions for the best results, as different products may have specific requirements.
Pedaling Towards Fitness: Calorie Burn Insights for Sedentary Cyclists
You may want to see also
Frequently asked questions
Typically, applying 2-3 coats of clear coat to a bike is sufficient for optimal protection. Each coat should be allowed to dry completely before applying the next.
The purpose of applying a clear coat to a bike is to protect the paint and finish from UV rays, scratches, and other environmental factors that can cause damage over time. It also enhances the bike's appearance by giving it a glossy, polished look.
Each coat of clear coat should dry for approximately 10-15 minutes before applying the next one. This ensures that the coats adhere properly and do not mix, which can affect the finish.
Yes, applying too many coats of clear coat can lead to a thick, uneven finish that may be prone to cracking or peeling. It's best to stick to the recommended 2-3 coats for optimal results.
When choosing a clear coat for your bike, look for a product specifically designed for automotive or bike use. These clear coats are formulated to provide the best protection and finish for your bike's paint and components.