Matthew Brooks
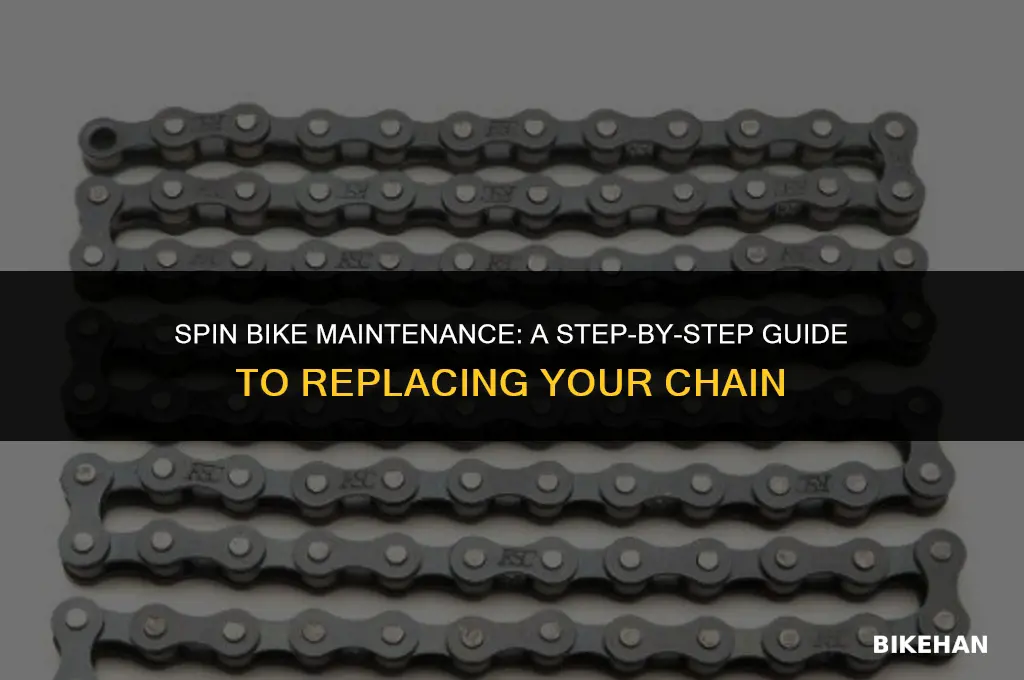
Replacing the chain on a spin bike is a crucial maintenance task that ensures smooth and efficient operation. Over time, chains can wear out, become loose, or accumulate dirt and grime, leading to decreased performance and potential damage to the bike's drivetrain. In this guide, we'll walk you through the step-by-step process of replacing the chain on your spin bike, including the necessary tools and precautions to take. By following these instructions, you'll be able to restore your spin bike to its optimal condition and enjoy a safe and effective workout experience.
Explore related products





What You'll Learn
- Gather Tools and Materials: Collect necessary tools like wrenches, pliers, and lubricants, along with a compatible replacement chain
- Remove Old Chain: Loosen and detach the old chain from the bike's chainrings and pulleys carefully
- Inspect and Clean Components: Check the chainrings, pulleys, and derailleur for wear and tear. Clean these parts thoroughly
- Install New Chain: Thread the new chain through the derailleur, around the pulleys, and onto the chainrings. Ensure proper alignment
- Lubricate and Adjust: Apply lubricant to the new chain and adjust the derailleur settings for smooth gear shifting

Gather Tools and Materials: Collect necessary tools like wrenches, pliers, and lubricants, along with a compatible replacement chain
Before embarking on the task of replacing the chain on your spin bike, it's crucial to gather all the necessary tools and materials. This preparation phase ensures that you have everything you need at your disposal, minimizing interruptions and potential complications during the process. Start by collecting a set of wrenches in various sizes, as you may need different ones to loosen and tighten bolts. Pliers will also be essential for gripping and manipulating small parts, such as chain links or pins.
In addition to these basic hand tools, make sure to have a good quality lubricant on hand. This will be used to coat the new chain, reducing friction and wear on both the chain and the bike's drivetrain components. When selecting a lubricant, opt for one specifically designed for bicycle chains, as these products are formulated to withstand the unique demands of cycling.
Perhaps the most critical component you'll need is the replacement chain itself. Ensure that you've purchased a chain that's compatible with your spin bike's specifications. This typically involves matching the chain's pitch (the distance between pins) and length to your bike's requirements. If you're unsure about the correct chain size, consult your bike's user manual or take it to a local bike shop for assistance.
Once you've gathered all the necessary tools and materials, lay them out in a clean, well-lit workspace. This will help you stay organized and make it easier to locate items as you need them. With everything in place, you're ready to begin the chain replacement process, which will involve removing the old chain, sizing and installing the new one, and finally, lubricating it for optimal performance.
Revitalize Your Ride: A Step-by-Step Guide to Replacing Your Bike Chain
You may want to see also
Explore related products


Remove Old Chain: Loosen and detach the old chain from the bike's chainrings and pulleys carefully
Begin by ensuring the bike is stationary and secure, ideally on a bike stand or with the wheels locked to prevent any movement. This is crucial for safety and to avoid any accidents while working on the chain. Next, locate the quick-release mechanism or the chain tensioner, which is typically found near the rear derailleur. This component allows you to loosen the chain sufficiently for removal.
Once the chain is loose, carefully lift it off the chainrings and pulleys. It's important to support the chain's weight as you do this to prevent it from falling and potentially causing damage or injury. Use a chain tool or a pair of pliers to assist in the removal process if necessary. Be cautious not to apply excessive force, as this could damage the chainrings or pulleys.
After detaching the old chain, inspect the chainrings and pulleys for any signs of wear or damage. If they appear worn or misaligned, it may be necessary to replace them as well. Otherwise, proceed to clean the area thoroughly to ensure a smooth installation of the new chain.
When removing the old chain, it's also a good opportunity to inspect the bike's overall condition. Check the brake pads, cables, and other components for wear and tear. This proactive approach can help identify potential issues early and ensure the bike remains in good working order.
Finally, dispose of the old chain properly. If it's still in usable condition, consider donating it to a local bike shop or recycling center. If it's damaged beyond repair, recycle it responsibly to minimize environmental impact.
Mastering Bike Maintenance: The Easy Guide to Replacing a Chain Link
You may want to see also
Explore related products


Inspect and Clean Components: Check the chainrings, pulleys, and derailleur for wear and tear. Clean these parts thoroughly
Before replacing the chain on a spin bike, it's crucial to inspect and clean the components that the chain interacts with. This includes the chainrings, pulleys, and derailleur. These parts are subject to wear and tear from regular use, and cleaning them thoroughly ensures that the new chain operates smoothly and efficiently.
To begin, remove the chain from the bike and set it aside. Then, use a soft brush or cloth to remove any dirt or debris from the chainrings, pulleys, and derailleur. For more stubborn grime, a degreaser can be applied to these parts. Allow the degreaser to sit for a few minutes before wiping it off with a clean cloth.
Next, inspect each component for signs of wear. The chainrings should be checked for any bent or damaged teeth, as these can cause the chain to slip or make noise during operation. The pulleys should be examined for any cracks or chips, and the derailleur should be inspected for any bent or misaligned parts. If any damage is found, the affected component should be replaced before proceeding with the chain replacement.
Once the components have been cleaned and inspected, they should be lubricated to ensure smooth operation. A light application of lubricant can be applied to the chainrings, pulleys, and derailleur. Be careful not to over-lubricate, as this can attract dirt and debris, leading to further wear and tear.
Finally, reattach the new chain to the bike, making sure it is properly aligned with the chainrings, pulleys, and derailleur. Test the chain by pedaling the bike and shifting through the gears to ensure smooth operation. Regular inspection and cleaning of these components will help to prolong the life of the chain and maintain the overall performance of the spin bike.
Effortless Cycling: Mastering the Art of Replacing Your 10-Speed Bike Chain
You may want to see also
Explore related products


Install New Chain: Thread the new chain through the derailleur, around the pulleys, and onto the chainrings. Ensure proper alignment
Begin by carefully threading the new chain through the derailleur, ensuring that it aligns correctly with the jockey wheels. This step is crucial for the smooth operation of your spin bike's drivetrain. Once the chain is through the derailleur, guide it around the pulleys, making sure it sits snugly against each one without any slack or tension that could cause slipping or binding.
Next, move on to threading the chain onto the chainrings. Start with the smallest chainring and work your way up to the largest, ensuring that the chain is properly seated on each ring. It's important to maintain consistent tension throughout this process to prevent the chain from derailing or causing damage to the bike's components.
As you thread the chain, periodically check for proper alignment. The chain should run straight from the derailleur to each pulley and chainring without any kinks or twists. If you notice any misalignment, adjust the chain's position and recheck. Proper alignment is key to ensuring efficient power transfer and reducing wear on your bike's components.
Once the chain is fully installed, give it a test run by pedaling the bike and shifting through the gears. Listen for any unusual noises or feel for any resistance that could indicate a problem with the chain's installation. If everything feels smooth and quiet, you're ready to start enjoying your spin bike with its new chain.
Remember, regular maintenance is essential to keep your spin bike in top condition. Replacing the chain when it's worn out not only improves performance but also helps prevent damage to other components. By following these steps and ensuring proper alignment, you can extend the life of your bike and enjoy a smoother, more efficient ride.
Single Speed Bike Maintenance: A Guide to Chain Replacement
You may want to see also
Explore related products

$12.99 $13.99


Lubricate and Adjust: Apply lubricant to the new chain and adjust the derailleur settings for smooth gear shifting
After installing the new chain on your spin bike, it's crucial to ensure it runs smoothly and efficiently. This involves two key steps: lubricating the chain and adjusting the derailleur settings. Proper lubrication reduces friction and wear, extending the life of the chain and improving performance. To lubricate the chain, apply a small amount of lubricant to each roller while slowly rotating the pedals backward. Wipe off any excess lubricant with a clean cloth to prevent dirt buildup.
Next, adjust the derailleur settings to ensure smooth gear shifting. Begin by checking the cable tension; it should be firm but not overly tight. If necessary, adjust the barrel adjuster where the cable enters the derailleur. Then, ensure the derailleur hanger is straight and the derailleur is properly aligned with the gears. Misalignment can cause the chain to skip or make noise. Finally, check the limit screws to ensure the derailleur doesn't shift too far in or out, which could cause the chain to derail.
When performing these adjustments, it's important to be patient and methodical. Small changes can have a significant impact on performance, so take your time to get it right. After lubricating and adjusting, take the bike for a test ride to ensure everything is working smoothly. If you encounter any issues, such as the chain slipping or making noise, revisit the adjustments and make further fine-tuning as needed.
Remember, regular maintenance is key to keeping your spin bike in top condition. By properly lubricating and adjusting the chain and derailleur, you can enjoy a smoother, more efficient ride and prolong the life of your equipment.
Fix Your Ride: A Step-by-Step Guide to Replacing a Broken Bike Chain
You may want to see also