Ryan Cole
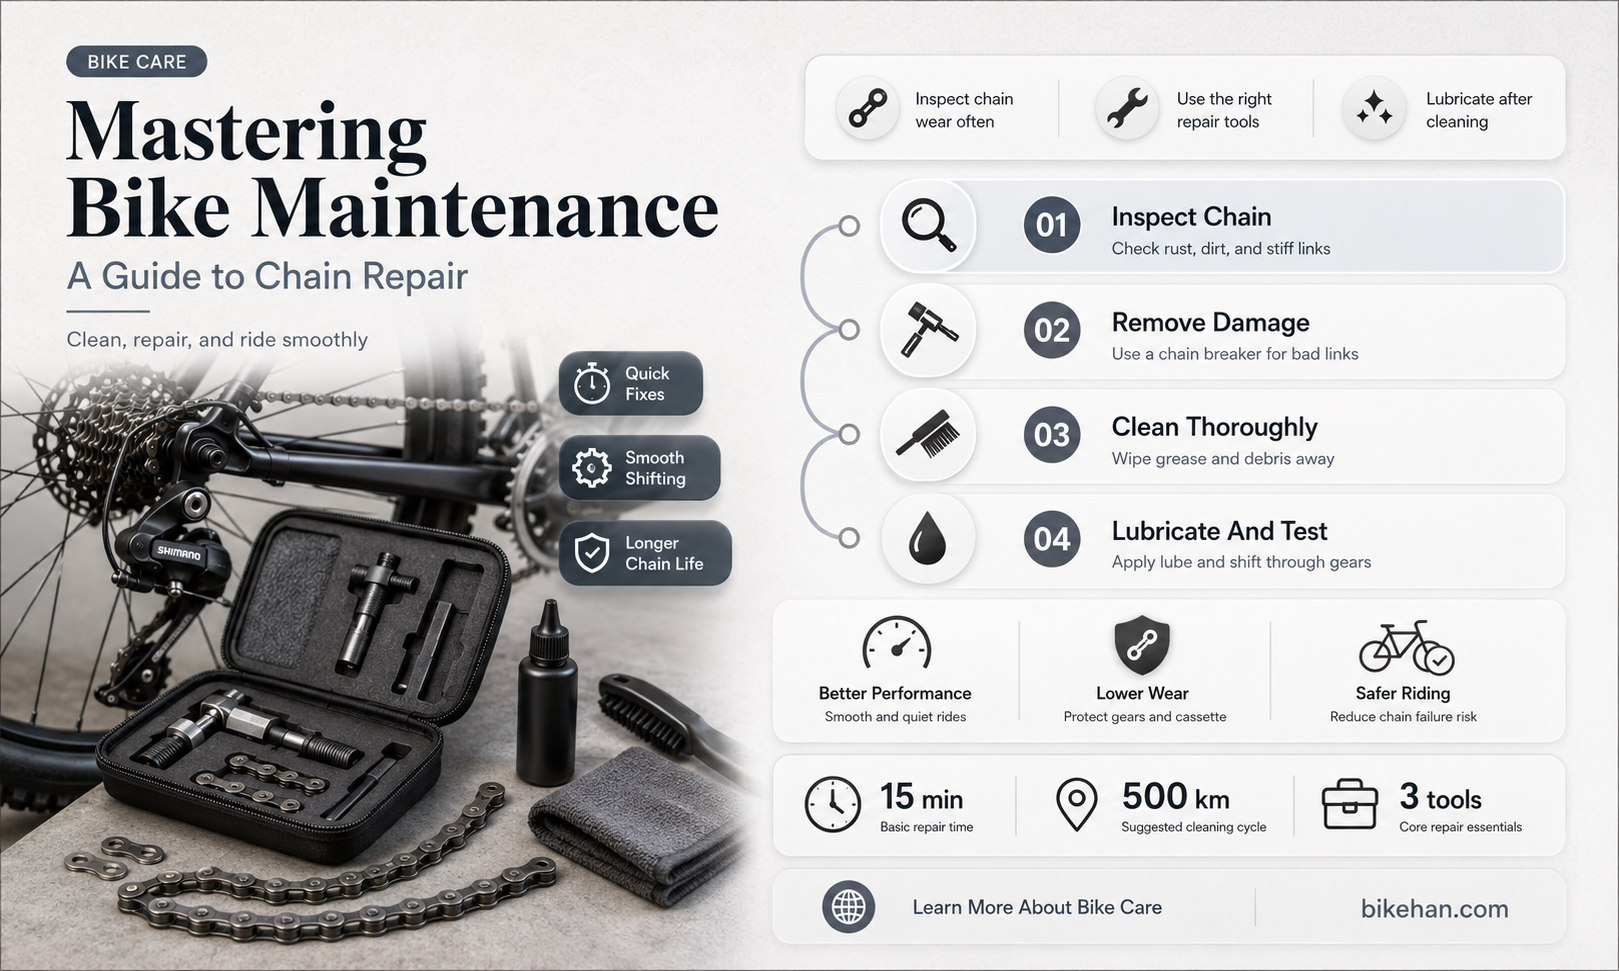
Repairing a bike chain is an essential skill for any cyclist, as a broken or damaged chain can quickly put an end to a ride. Fortunately, with the right tools and a bit of know-how, fixing a bike chain is a relatively straightforward process. In this guide, we'll walk you through the steps necessary to repair a broken bike chain, from identifying the problem to getting back on the road. Whether you're a seasoned cyclist or a beginner, learning how to fix your bike chain is a valuable skill that can save you time and money in the long run. So, let's get started and learn how to get your bike back in working order!
Explore related products


What You'll Learn
- Inspecting the Chain: Check for damage, wear, or misalignment before attempting any repairs
- Gathering Tools: Essential tools include a chain tool, lubricant, rag, and safety gloves
- Removing the Chain: Use the chain tool to carefully remove the damaged chain from the bike
- Cleaning and Lubricating: Thoroughly clean the chain and apply lubricant to ensure smooth operation
- Reinstalling the Chain: Align the new chain correctly and use the chain tool to secure it in place

Inspecting the Chain: Check for damage, wear, or misalignment before attempting any repairs
Before attempting any repairs on your bike chain, it's crucial to thoroughly inspect it for damage, wear, or misalignment. This step is often overlooked, but it's essential to ensure that you're addressing the root cause of the issue and not just treating symptoms. Start by visually examining the chain for any obvious signs of damage, such as broken or bent links. Then, use your fingers to feel for any rough or uneven spots, which could indicate wear or corrosion.
Next, check for misalignment by ensuring that the chain is properly seated on the sprockets and not rubbing against the frame or other components. If you notice any misalignment, it may be necessary to adjust the derailleur or check for bent sprockets. Additionally, pay attention to the chain's tension; if it's too loose or too tight, it can cause premature wear or even breakage.
To get a more detailed look at the chain's condition, you can use a chain wear indicator tool. These tools measure the stretch of the chain and can help you determine if it's time for a replacement. As a general rule of thumb, if the chain has stretched more than 1/16 of an inch, it's time to replace it.
During your inspection, be sure to clean the chain and remove any dirt or debris that may be contributing to wear. A clean chain not only functions better but also lasts longer. Finally, remember to always inspect the chain in a well-lit area and take your time to ensure that you don't miss any potential issues. By thoroughly inspecting your bike chain before attempting repairs, you can save time and money in the long run and ensure that your bike is safe and reliable.
Explore related products





Gathering Tools: Essential tools include a chain tool, lubricant, rag, and safety gloves
Before you begin the process of repairing your bike chain, it's crucial to gather the necessary tools. A chain tool is essential for removing and installing the chain, as it allows you to push out the pins that hold the chain links together. Without this tool, you'll be unable to break the chain and access the damaged links. Lubricant is another must-have item, as it helps to reduce friction between the chain and the gears, ensuring smooth operation and prolonging the life of your bike's drivetrain. A rag is also important for cleaning the chain and removing any dirt or debris that may have accumulated, which can cause further damage if left unchecked. Finally, safety gloves are a vital piece of personal protective equipment, as they protect your hands from sharp edges and potential injuries during the repair process.
When selecting your tools, it's important to choose high-quality items that are designed specifically for bicycle maintenance. A cheap chain tool may not be strong enough to handle the force required to remove the chain pins, and a low-quality lubricant may not provide adequate protection against wear and tear. Additionally, make sure to choose a rag that is soft and absorbent, as a rough or abrasive material could scratch the chain or gears. As for safety gloves, look for a pair that offers a good balance of protection and dexterity, as you'll need to be able to manipulate small parts and tools during the repair process.
Once you've gathered your tools, it's a good idea to lay them out on a clean, flat surface, such as a workbench or table. This will help you stay organized and ensure that you have everything you need before you begin the repair process. It's also a good idea to have a container or tray handy to hold small parts and tools, as this will prevent them from getting lost or misplaced during the repair. With your tools gathered and organized, you'll be ready to tackle the task of repairing your bike chain with confidence and efficiency.
Explore related products


Removing the Chain: Use the chain tool to carefully remove the damaged chain from the bike
Begin by positioning your bike on a stable surface, such as a repair stand or an upside-down position with the wheels in the air. This will provide better access to the chain and prevent the bike from moving during the repair process. Ensure that the area is well-lit and that you have all the necessary tools within reach, including the chain tool, a rag, and lubricant.
Next, locate the damaged section of the chain. This might be a broken link, a stretched-out section, or a part that has become excessively worn. Once you've identified the damaged area, use the chain tool to carefully remove the chain from the bike. The chain tool should be inserted into the pin of the link you wish to remove, and then turned to push the pin out. Be cautious not to push the pin all the way out, as you may need to reuse it later.
After removing the damaged chain, inspect it closely to determine the extent of the damage. If the chain is only slightly worn, you may be able to reuse it after cleaning and lubricating it. However, if the damage is severe, it's best to replace the entire chain to ensure safe and efficient operation of your bike.
When installing a new chain, it's important to ensure that it is properly sized and aligned with the bike's gears and sprockets. Use the chain tool to connect the new chain, making sure that the pins are securely in place. Once the chain is installed, apply a small amount of lubricant to each link to reduce friction and wear.
Finally, test the bike to ensure that the new chain is functioning properly. Shift through the gears and check for any signs of slipping or misalignment. If everything seems to be working smoothly, you're ready to hit the road again. Remember to regularly inspect and maintain your bike chain to prevent future damage and ensure a safe and enjoyable riding experience.
Explore related products




Cleaning and Lubricating: Thoroughly clean the chain and apply lubricant to ensure smooth operation
To ensure your bike chain operates smoothly and efficiently, regular cleaning and lubrication are essential. Begin by removing any dirt, grime, or old lubricant from the chain using a dedicated chain cleaning device or a soft brush with degreaser. Be thorough in this process, as any residue can hinder the chain's performance and lead to premature wear.
Once the chain is clean, allow it to dry completely before applying lubricant. Choose a high-quality lubricant designed specifically for bike chains, and apply it sparingly to each roller while slowly rotating the pedals backward. Ensure the lubricant penetrates the rollers and pins, as this is where the majority of wear occurs. After application, allow the lubricant to set for a few minutes before wiping off any excess with a clean rag.
It's important to note that over-lubrication can be just as detrimental as under-lubrication, as it can attract dirt and grime, leading to a buildup of debris that can cause the chain to skip or break. Aim for a smooth, even coating of lubricant on the chain, and remember to clean and lubricate the chain regularly to maintain optimal performance.
In addition to cleaning and lubricating, it's also crucial to inspect the chain for any signs of wear or damage. Look for stretched or worn links, as well as any bent or damaged rollers. If you notice any issues, it's best to replace the chain to avoid further damage to your bike's drivetrain. By following these steps and maintaining a regular cleaning and lubrication schedule, you can ensure your bike chain operates smoothly and efficiently for miles to come.
Explore related products


Reinstalling the Chain: Align the new chain correctly and use the chain tool to secure it in place
Begin by ensuring the new chain is properly aligned with the rear cassette and front chainrings. This is crucial for smooth gear shifting and to prevent the chain from derailing. Once aligned, use the chain tool to push out the pin that holds the chain together. Be careful not to push the pin all the way out, as you'll need to reinsert it to secure the chain.
Next, thread the new chain through the derailleur and around the rear cassette. Make sure the chain is taut and not sagging, as this can cause shifting issues. Then, pull the chain up and over the front chainrings, ensuring it's properly seated on the teeth.
Now, use the chain tool to reinsert the pin you pushed out earlier. Line up the pin with the hole in the chain link, and then push it back in until it's flush with the chain. You may need to use a bit of force, but be careful not to damage the chain or the pin.
After reinstalling the chain, it's important to check the tension. A properly tensioned chain should have a small amount of slack, but not be too loose. If the chain is too tight, it can cause excessive wear on the chainrings and cassette. If it's too loose, it can derail or skip gears.
Finally, take the bike for a test ride to ensure the chain is functioning properly. Pay attention to how the chain shifts between gears, and make any necessary adjustments to the derailleur or chain tension. With proper installation and maintenance, your new chain should provide smooth and reliable shifting for many miles to come.
Frequently asked questions
To repair a bike chain, you'll need a few essential tools: a chain tool or chain whip, a new chain (if necessary), a pair of pliers, and lubricant.
Look for signs of wear such as rust, excessive stretching, or bent links. If the chain skips gears or makes unusual noises while riding, it's likely time for repair.
Yes, you can fix a broken bike chain link using a chain tool to remove the damaged link and replace it with a new one. Make sure to properly align and secure the new link.
It's recommended to lubricate your bike chain every 100-200 miles, depending on riding conditions. Clean the chain thoroughly before applying lubricant to ensure smooth operation.
Regular maintenance is key to preventing bike chain damage. Keep the chain clean and lubricated, avoid riding in extreme conditions, and replace the chain when it shows signs of wear.