Eric Johnson

Shortening a bike motor chain is a crucial maintenance task that ensures optimal performance and safety. Over time, a chain can stretch or become damaged, leading to inefficient power transfer and potential hazards. To address this issue, it's essential to follow a systematic approach. First, assess the chain's condition by checking for signs of wear, such as rust, kinks, or excessive stretching. If the chain is deemed salvageable, use a chain tool to remove the necessary links, ensuring that the remaining chain is of the correct length for your specific bike model. After shortening, reattach the chain, lubricate it properly, and test its tension and alignment. Regular chain maintenance not only prolongs the life of your bike's drivetrain but also enhances your overall riding experience.
Explore related products





What You'll Learn
- Tools Needed: Essential tools for shortening a bike chain include a chain tool, measuring tape, and lubricant
- Measuring Chain Length: Accurately measure the chain length to determine the number of links to remove
- Removing Links: Use a chain tool to push out the pins and remove the necessary links
- Rejoining the Chain: After shortening, reinsert the pins and ensure the chain is properly lubricated
- Safety and Maintenance: Regularly inspect the chain for wear and proper tension to ensure safe riding

Tools Needed: Essential tools for shortening a bike chain include a chain tool, measuring tape, and lubricant
To shorten a bike motor chain effectively, you'll need a few essential tools. A chain tool is the primary device used to remove links from the chain. It works by pushing out the pins that hold the links together. You can find chain tools at most bike shops or online retailers. They come in various sizes, so make sure to get one that matches the size of your bike's chain.
Another crucial tool is a measuring tape. You'll use this to measure the length of the chain before and after shortening. This ensures that you've removed the correct number of links and that the chain is the desired length. A flexible measuring tape is ideal for this task, as it can easily wrap around the chain.
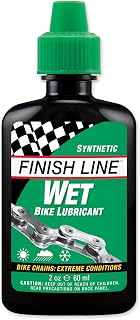
Lubricant is also necessary for maintaining the chain's performance and longevity. After shortening the chain, you'll want to apply a good quality lubricant to the rollers and pins. This reduces friction and wear, ensuring smooth operation. There are many types of chain lubricants available, including wax-based, oil-based, and spray lubricants. Choose one that's suitable for the conditions you'll be riding in.
When shortening your bike motor chain, it's important to have these tools on hand. The chain tool will allow you to remove links with ease, the measuring tape will help you achieve the perfect length, and the lubricant will keep the chain running smoothly. With these tools, you'll be able to shorten your bike motor chain like a pro.
Mastering Bike Maintenance: A Guide to Replacing Your Shimano Chain
You may want to see also
Explore related products




Measuring Chain Length: Accurately measure the chain length to determine the number of links to remove
To accurately measure the chain length and determine the number of links to remove, begin by ensuring the bike is on a level surface and the chain is properly lubricated. This will allow for smoother movement and a more precise measurement. Next, identify the chain's starting and ending points, typically where it connects to the front and rear sprockets.
Using a chain measuring tool or a ruler, carefully measure the length of the chain from the center of the front sprocket to the center of the rear sprocket. Make sure to follow the chain's path closely, accounting for any bends or curves. It's crucial to measure the chain under slight tension, as a slack chain can lead to inaccurate readings.
Once you have the measurement, consult the bike's manual or manufacturer's specifications to determine the recommended chain length for your specific model. This information will help you decide how many links need to be removed to achieve the proper length. Keep in mind that it's better to err on the side of caution and remove fewer links initially, as you can always remove more if necessary.
When removing links, use a chain tool to carefully extract the pins from the links you wish to remove. Be sure to keep track of the number of links you've removed and double-check your measurements before reinstalling the chain. After shortening the chain, it's essential to test its tension and alignment to ensure smooth operation and prevent potential damage to the bike's drivetrain.
Mastering the Art of Repinning Your Bike Chain: A Step-by-Step Guide
You may want to see also
Explore related products


Removing Links: Use a chain tool to push out the pins and remove the necessary links
To shorten a bike motor chain effectively, it's crucial to understand the process of removing links. This involves using a specialized tool known as a chain tool, which is designed to push out the pins that hold the chain links together. Before beginning, ensure you have the correct chain tool for your specific chain type, as using the wrong tool can lead to damage or improper shortening.
Start by positioning the chain on the bike so that the link you intend to remove is aligned with the chain tool. Secure the chain tool around the link, making sure it's firmly in place. Then, apply steady pressure to the tool's handle to push the pin out of the link. It's important to do this carefully to avoid pushing the pin too far out, which could make it difficult to reinsert later.
Once the pin is partially out, you can remove the link by sliding it off the chain. If you're removing multiple links, repeat this process for each link, ensuring that you keep track of the number of links removed to maintain the correct chain length. After removing the necessary links, you'll need to reinsert the pins into the remaining links to secure the chain. Use the chain tool to push the pins back in place, ensuring they're snug but not over-tightened.
When shortening a bike motor chain, it's essential to consider the potential impact on the bike's performance. Removing too many links can lead to a chain that's too short, which can cause shifting problems or even damage to the bike's drivetrain. On the other hand, leaving the chain too long can result in slippage or excessive wear. Therefore, it's important to measure the chain length carefully before and after shortening to ensure it's within the recommended range for your specific bike model.
In addition to the chain tool, you may need other tools such as a wrench or pliers to assist with the process. It's also a good idea to have some lubricant on hand to apply to the chain after shortening, as this can help reduce friction and prolong the life of the chain. Remember to always follow the manufacturer's instructions for your specific bike and chain type, as well as any safety guidelines provided.
By following these steps and considering the potential impact on your bike's performance, you can successfully shorten a bike motor chain using a chain tool. This process requires patience and attention to detail, but with the right tools and knowledge, it can be a straightforward and rewarding task.
Mastering the Art of Setting Your RadMini Bike Chain
You may want to see also
Explore related products





Rejoining the Chain: After shortening, reinsert the pins and ensure the chain is properly lubricated
After shortening the bike motor chain to the desired length, the next critical step is rejoining the chain. This involves carefully reinserting the pins that were removed during the shortening process. It's essential to ensure that the pins are aligned correctly and pushed in fully to maintain the chain's integrity and prevent any potential accidents.
Once the pins are reinserted, the chain should be properly lubricated. This is crucial for reducing friction and wear on the chain, as well as ensuring smooth operation of the bike's motor. A good quality chain lubricant should be applied evenly to the chain, making sure to cover all the links and rollers. It's important to avoid over-lubrication, as this can attract dirt and debris, leading to increased wear and tear.
When rejoining the chain, it's also important to check the tension. The chain should be taut but not overly tight, as this can put undue stress on the motor and other components. If the chain is too loose, it may slip or come off the sprockets, which can be dangerous while riding.
In addition to checking the tension, it's a good idea to inspect the chain for any signs of damage or wear. This includes looking for bent or broken links, as well as any areas where the chain appears to be stretched or worn out. If any damage is found, the chain should be replaced immediately to ensure safe operation of the bike.
Finally, after rejoining and lubricating the chain, it's important to test it out. This can be done by pedaling the bike and ensuring that the chain moves smoothly and quietly. If there are any issues, such as grinding or clicking noises, the chain may need to be adjusted or replaced.
By following these steps, you can ensure that your bike motor chain is properly shortened, rejoined, and lubricated, providing safe and efficient operation.
Mastering Your Bike's Gear System: A Chain Adjustment Guide
You may want to see also
Explore related products




Safety and Maintenance: Regularly inspect the chain for wear and proper tension to ensure safe riding
Regular inspection of your bike's motor chain is crucial for maintaining safety and optimal performance. A worn or improperly tensioned chain can lead to accidents, damage to the bike, and even injuries to the rider. To ensure safe riding, follow these steps to inspect your chain:
- Visual Inspection: Begin by visually examining the chain for any signs of wear, such as rust, discoloration, or stretched links. A healthy chain should have a consistent metallic sheen without any visible damage.
- Tension Check: Proper chain tension is essential for smooth and safe operation. To check the tension, apply slight pressure to the chain at the midpoint between the front and rear sprockets. The chain should have a small amount of slack but should not be excessively loose or tight.
- Wear Measurement: Use a chain wear indicator tool to measure the elongation of the chain. Most bike chains should not exceed 0.5% elongation for safe use. If the chain is beyond this limit, it's time to replace it.
- Lubrication: A well-lubricated chain reduces friction and wear, ensuring smoother and safer rides. Apply a suitable lubricant to the chain, focusing on the inner links where the pins connect. Avoid over-lubrication, as excess oil can attract dirt and debris, leading to increased wear.
- Regular Maintenance: Establish a routine maintenance schedule to inspect and lubricate the chain regularly. This practice not only ensures safety but also extends the life of the chain and other drivetrain components.
By following these steps, you can significantly reduce the risk of chain-related accidents and ensure a safe and enjoyable riding experience. Remember, a well-maintained chain is a critical component of a safe and reliable bike.
Mastering the Art of Routing Your Bike Chain Through the Rear Derailleur
You may want to see also